This post may contain affiliate links which help support Girls Can Grill.
The Cuisinart Clermont Pellet Grill is unlike any other pellet grill. Priced around $700, it’s like an outdoor oven with the benefit of smoke.
Disclosure Cuisinart compensated me for this review. Opinions are my own.
Save this BBQ Tip
Enter your email, and I’ll send this link directly to your inbox. Plus, you’ll get new BBQ recipes and tips weekly.
Table of Contents
- What makes the Cuisinart Clermont Pellet Grill & Smoker Different
- How is Grilling Different Than Barbecuing?
- To Get Started
- Cuisinart Clermont Pellet Grill & Smoker Features
- Prepping for Your First Cook
- Let’s Get Cooking
- My First Cook on the Cuisinart Clermont Pellet Grill
- What I Would Change about the Grill
- Cuisinart Clermont Pellet Grill Specifications
- BUY NOW
- Video Review
What makes the Cuisinart Clermont Pellet Grill & Smoker Different
Most pellet grills are designed similar to a traditional offset smoker. They include one maybe two racks of cooking space with a lid that lifts up.
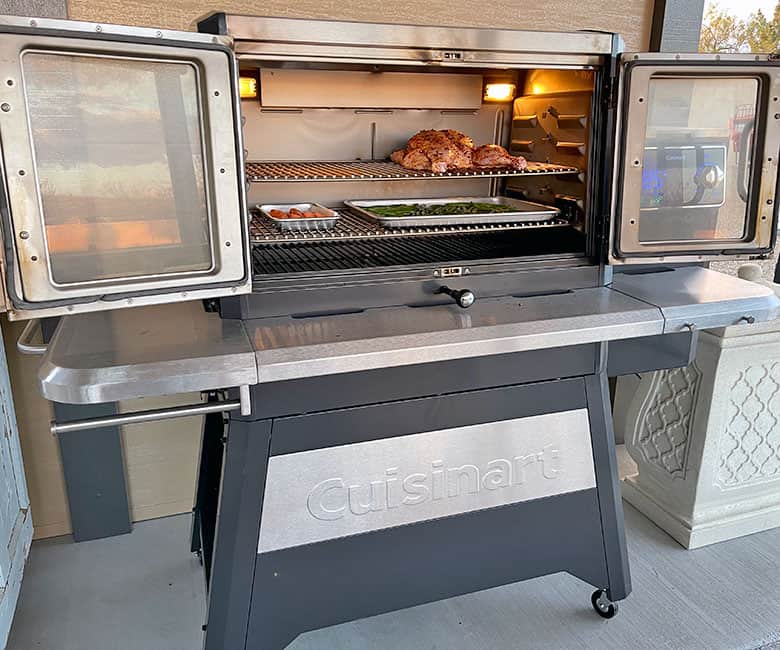
The Clermont on the other hand is designed more like a commercial oven. It has two large French-style glass doors with two cooking racks that can be adjusted to five different levels.
Just like an oven, you can use it to bake, roast and braise, but because it’s a pellet grill, you can also use it to smoke, barbecue and even grill.
How is Grilling Different Than Barbecuing?
Barbecuing is a slow and low process, which involves cooking with hardwood, charcoal or wood pellets over indirect heat. The ambient temperature of the smoker heats the meat and breaks down collagen to create succulent dishes.
Grilling involves cooking directly over a fire source hot and fast. Pellet grill manufacturers have slowly been adding this feature to their products to provide the versatility of both cooking methods.
The Cuisinart Sear Zone
Cuisinart introduced the grill capability into the Clermont by adding a sear zone.
The grill has a drip shield that extends the length and width of the interior of the grill. While it collects drips and guides the grease away from the fire, it also serves as a diffuser plate to create the indirect heat zone for barbecuing and smoking.
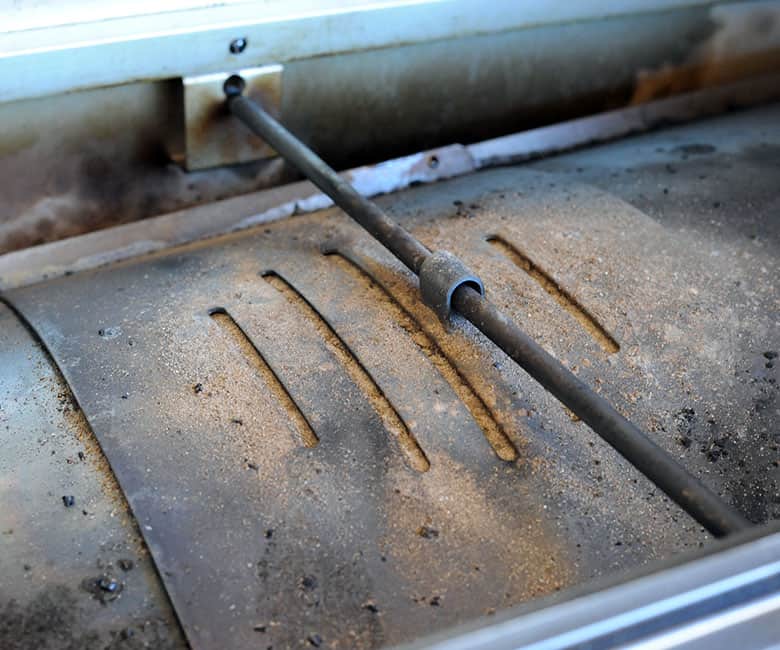
Within the drip shield, there are five slots. When you want to barbecue, these slots can be covered with the sear shutter.
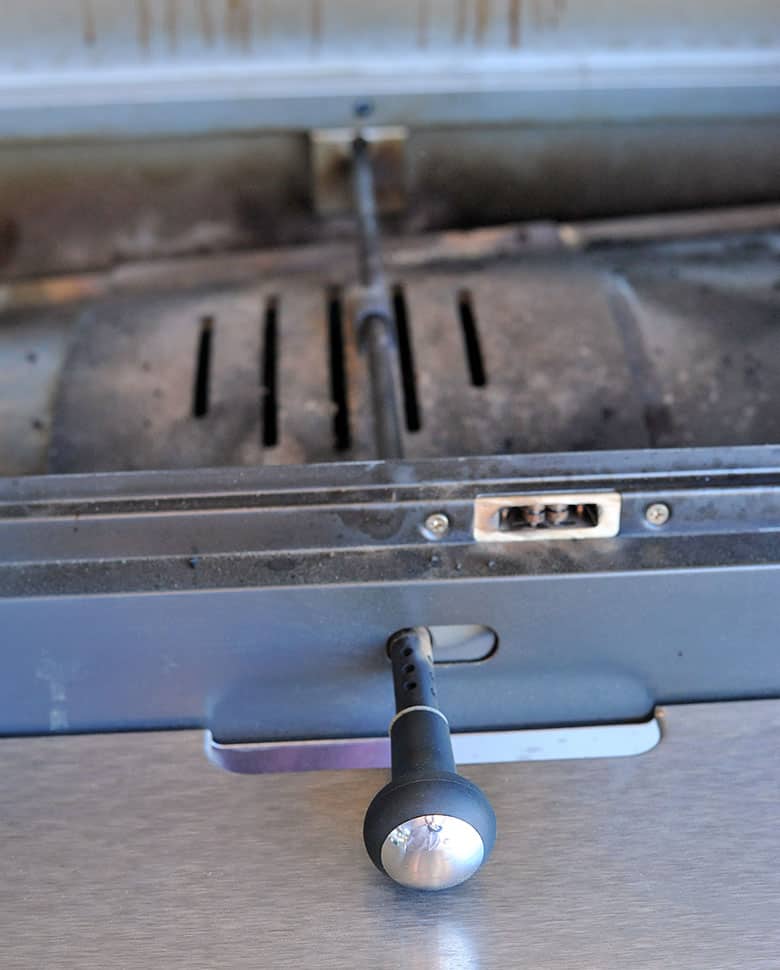
But when you’re ready to grill, you simply slide the handle in the front of the smoker to the left to expose the slots. Then, instead of cooking on one of the elevated racks, cook your meat directly over the flames on the cooking grate.
For all pellet grills, I like to cover the drip shield with foil to make cleanup easier. I checked with the Cuisinart engineers, and they said when you’re not using the sear shutter, it’s perfectly fine to cover the whole drip shield with foil. In fact, it makes the temperature a little more even. Depending on how you lay the foil, it can impact how the grease flows, so keep an eye on that.
To Get Started
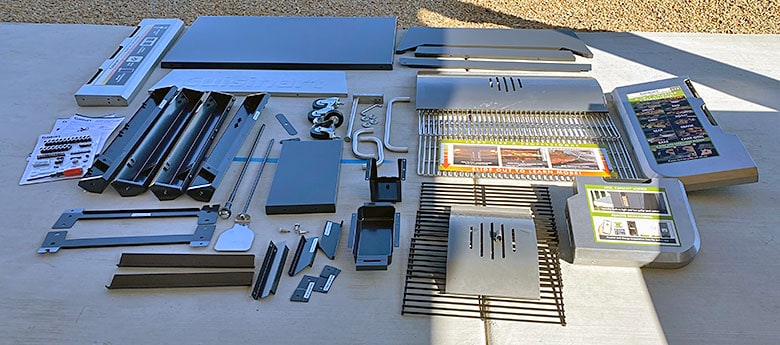
Like most pellet grills, the Clermont comes in a lot of parts and pieces and requires assembly. You don’t need any special tools though. You only need a screwdriver and wrench, which are included with the hardware. Total assembly time takes about 1 hour.
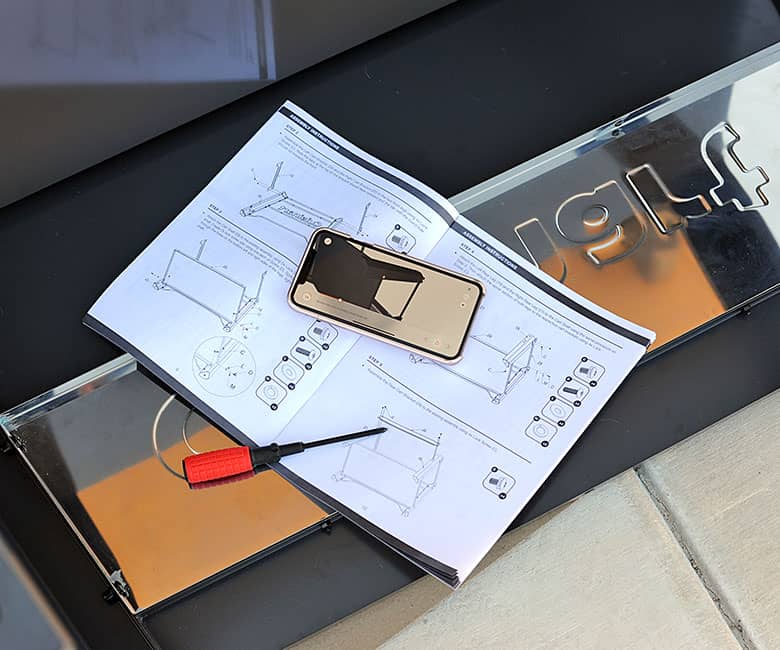
In addition to the standard manual, one really cool feature that Cuisinart now offers is a digital assembly video using the BILT App on your phone. I’ve put together my fair share of grills, and found this app made things so much easier to understand than the typical black and white drawings.
Cuisinart provides you with a QR code that you simply scan with your smart phone. It leads you right to the app. Just download it, pick the Clermont and press start.
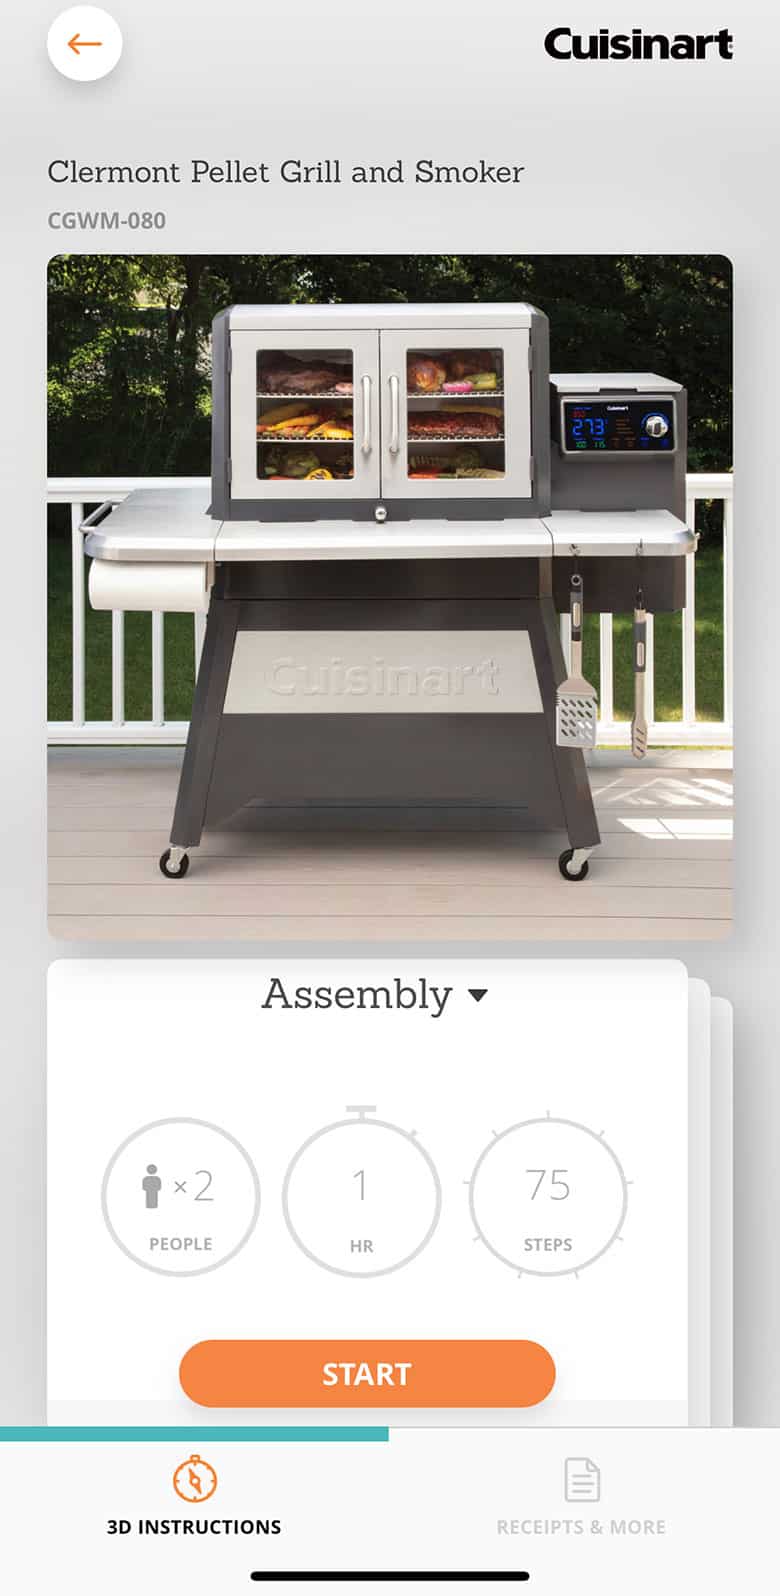
The app plays an animated video for each step with text explaining what you’re supposed to do. I used the manual as a secondary reference just to make sure I was doing everything right.
It’s also helpful that most of the parts are labeled with stickers that easily peel off.
I was able to build the base cart on my own, but I needed to call in reinforcements to lift the body of the grill onto the cart.
Cuisinart gets bonus points for not making me have to assemble the electronic components. I always get nervous when grills require me to be involved in those steps.
Once the body was connected to the cart, the last steps were adding the shelves and accessory features.
Cuisinart Clermont Pellet Grill & Smoker Features
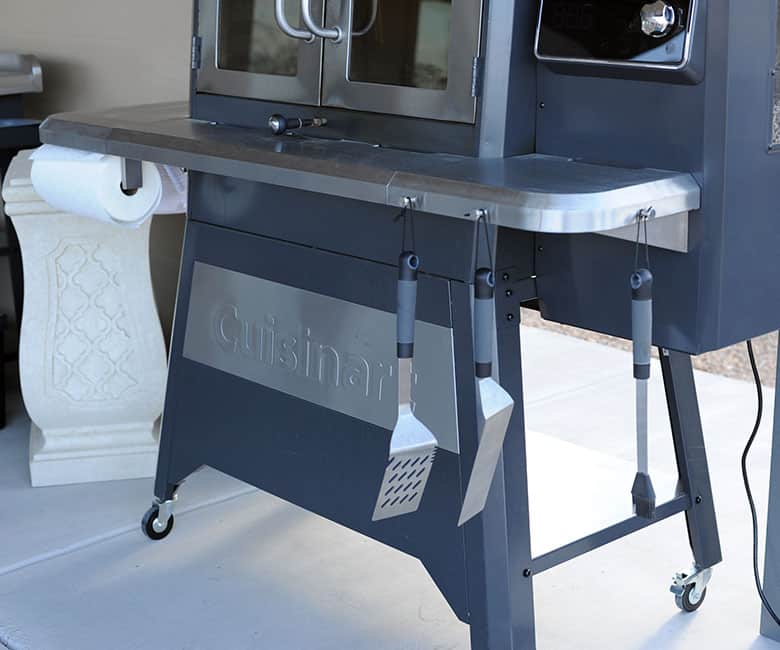
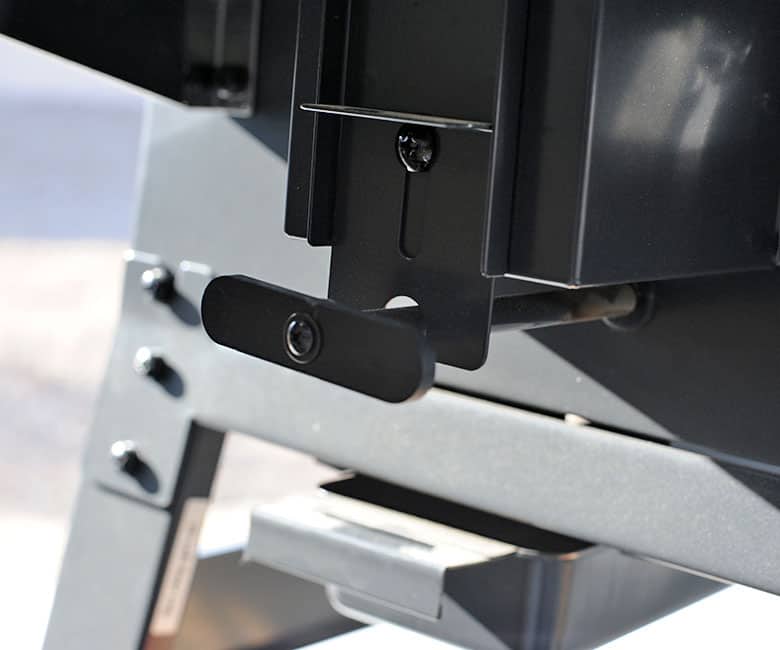
The exterior accessory features include a long counter, three tool hooks, a paper towel holder, a handle where you can hang a towel, two locking wheels and a large shelf that’s hidden by the sleek front base, which is a great place to store pellets.
The counter runs 58.5″ x 7″ in the front and 11″ x 25″ on the left.
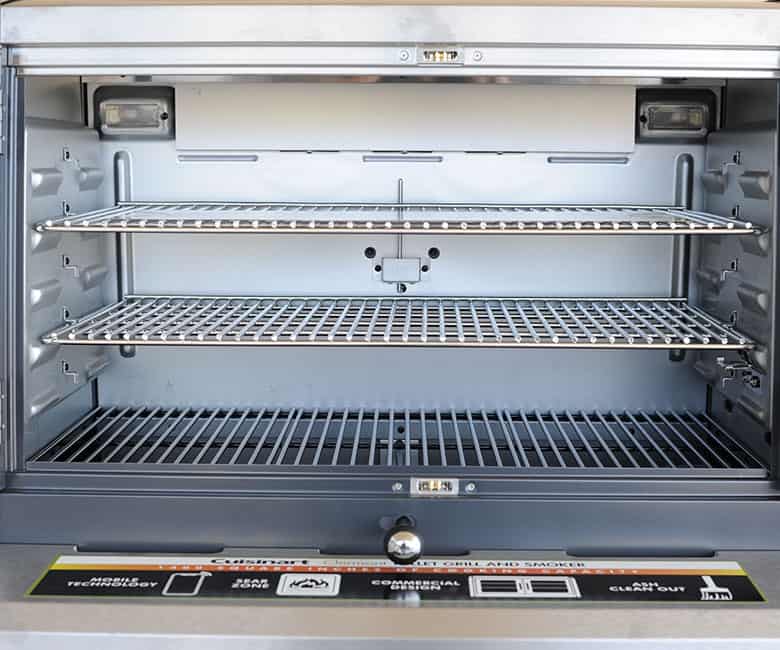
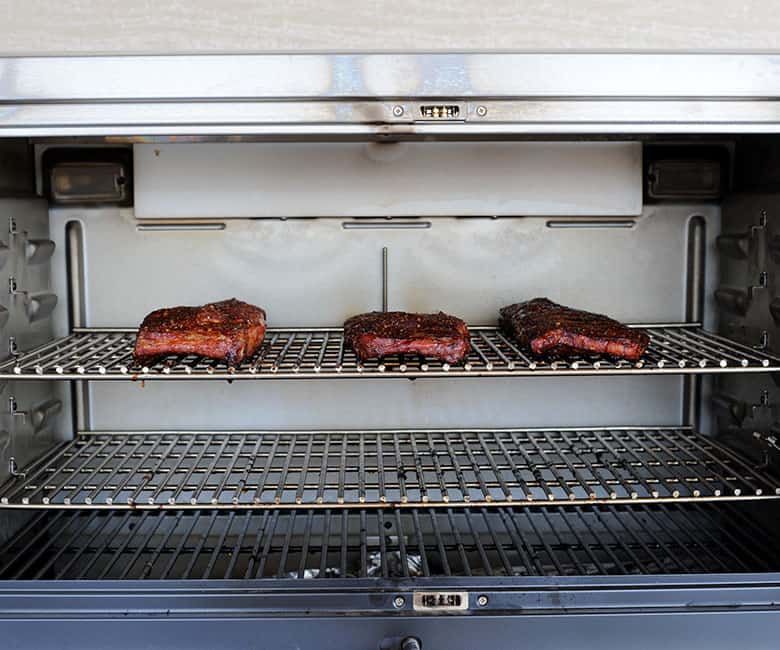
The inside of the grill includes a 16″ x 30″ cooking grate and two oven-style racks that can be adjusted to five different levels in 2.5″ increments . This is really nice when you need more room for cooking larger meats like briskets or turkeys. You can also buy more racks, if you really want to load the grill up.
Like all pellet grills, the grill is fueled by pellets that are fed into the fire pot with an auger. There is an igniter inside the fire pot that burns the pellets with the help of a fan.
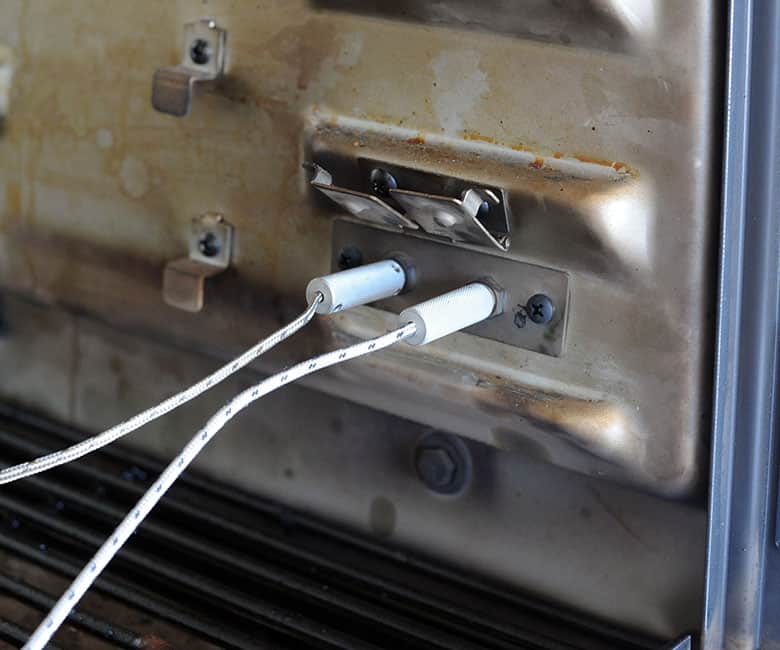
There are two thermometer probe jacks located inside the grill on the right. This is a smart placement, because you don’t have to run wires outside. It keeps the exterior of your grill looking sharp.
The Grease Tray
The drip shield I mentioned above plays an important role, because it routes the grease to the grease tray. This prevents flare ups and bitter the aroma that can occur when grease burns.
The grease tray can be accessed from the left side of the grill. After every few cooks, pull this pan out and discard the grease.
It’s 8.25″ x 4.25″, so you can line it with a 2-lb foil loaf pan. It can also be washed with soap and water.
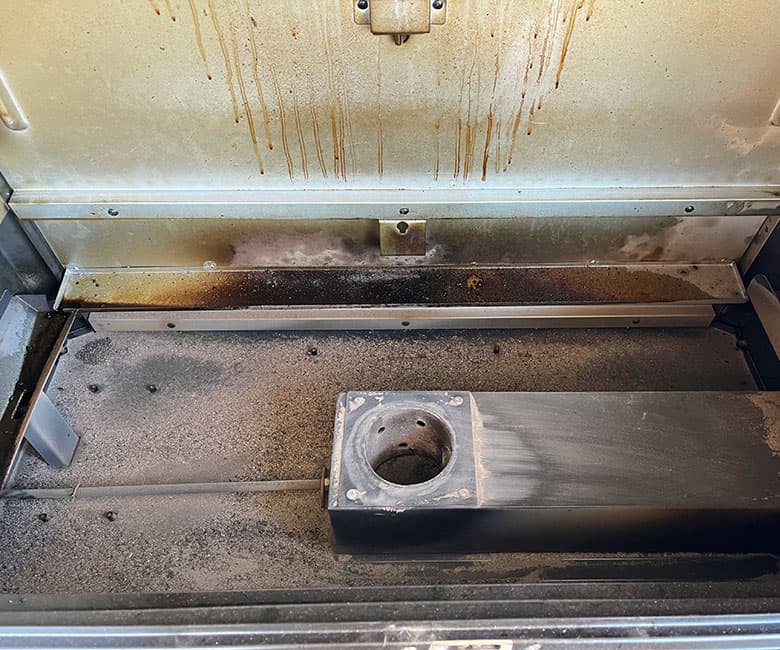
Cleaning Out Ashes
After each cook, it’s important to clean the ashes out of the fire pot. There is a release on the left side of the grill just above the grease tray. Just pull this open, and the ashes will fall into a collection drawer.
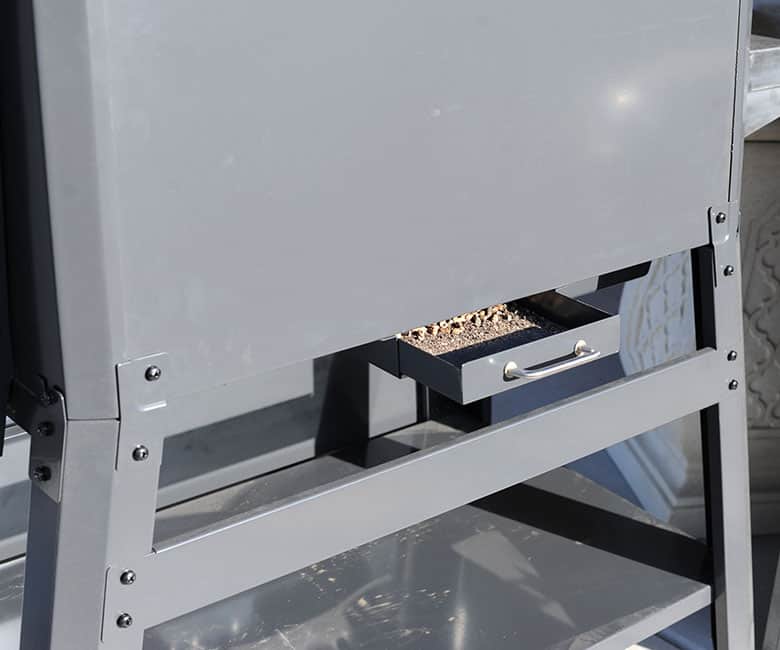
The ash drawer is a little more challenging to get to. It’s in the back of the grill, so if you have the grill against a wall, you may have to pull the grill out a bit to access it. Fortunately, the drawer is 40 square inches, so you don’t have to empty the pan after every cook.
But, the grill exhaust flows out the back, so you shouldn’t park the grill too close to a wall anyways.
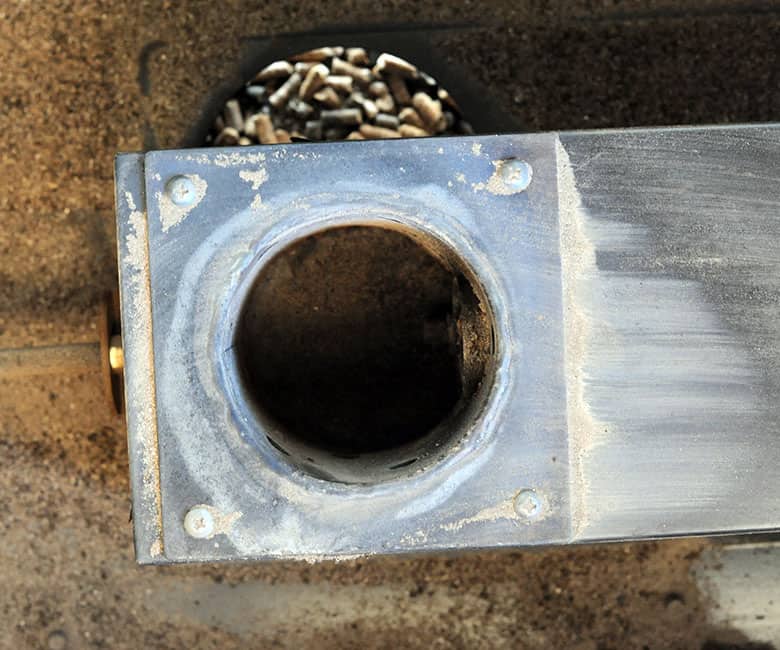
After a few cooks, there will also be some ash residue inside the bottom interior of the grill. This is because the internal fan blows the light stuff around. You can use a paper towel to push these ashes into the hole behind the fire pot, and they’ll fall right into the ash drawer.
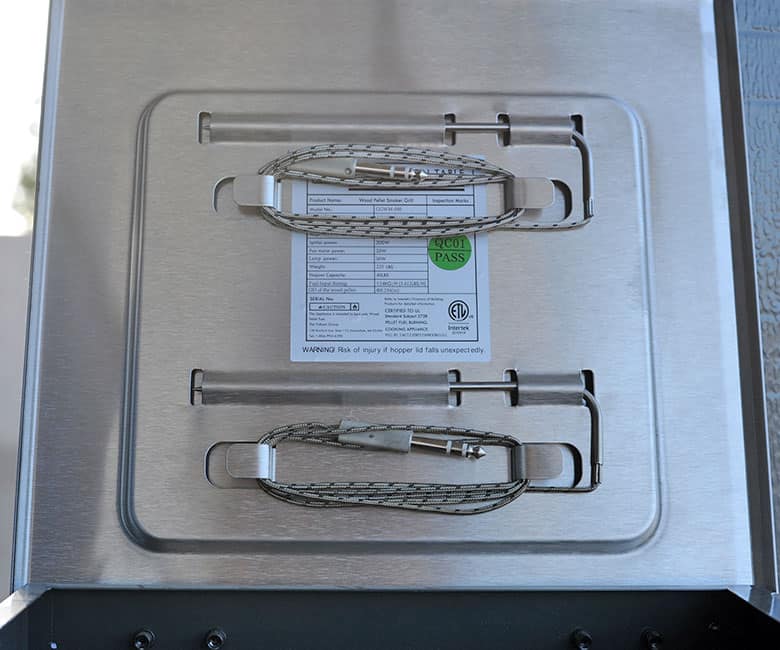
Pellet Hopper
The pellet hopper holds 40 pounds of pellets and includes an interior light. The thermometers store in the lid when you’re not using them.
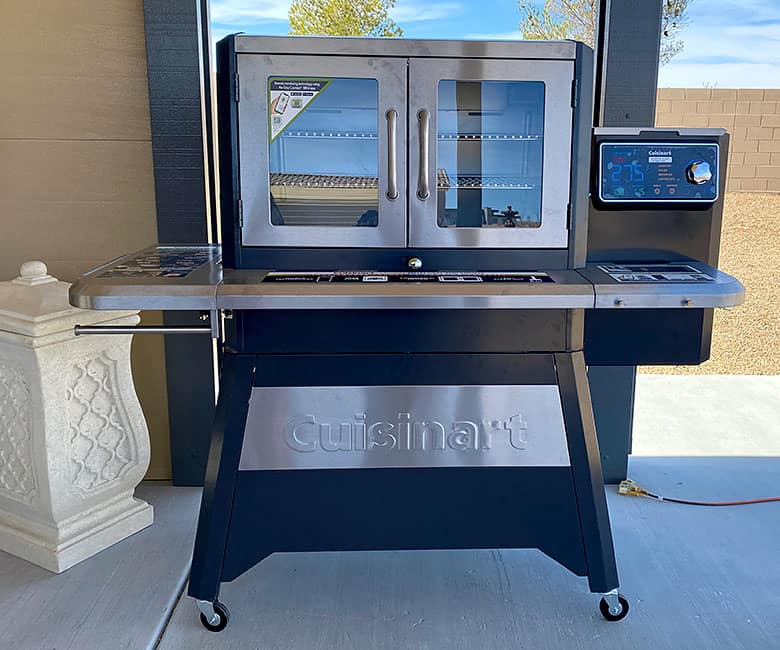
Double French-Style Doors
This pellet grill has by far the best viewing window of any pellet grill I’ve cooked on thanks to the double French-style doors.
Instead of a lid that opens up, the dual doors pull open like a cabinet. They are 17″ tall and 15.25″ wide with 13.5″ x 10″ windows and long sturdy handles.
When you turn on the two 10-watt halogen interior lights, you can even view your food at night without letting any heat escape.
The doors are a little snug to pull open, which helps keep the heat in. You do need to open the right one first. Just give it a good tug.
The Control Panel
I love that the 12″ control panel has bright, bold numbers. When I’m not using the app, I can view the readings from across the backyard, which gives me peace of mind.
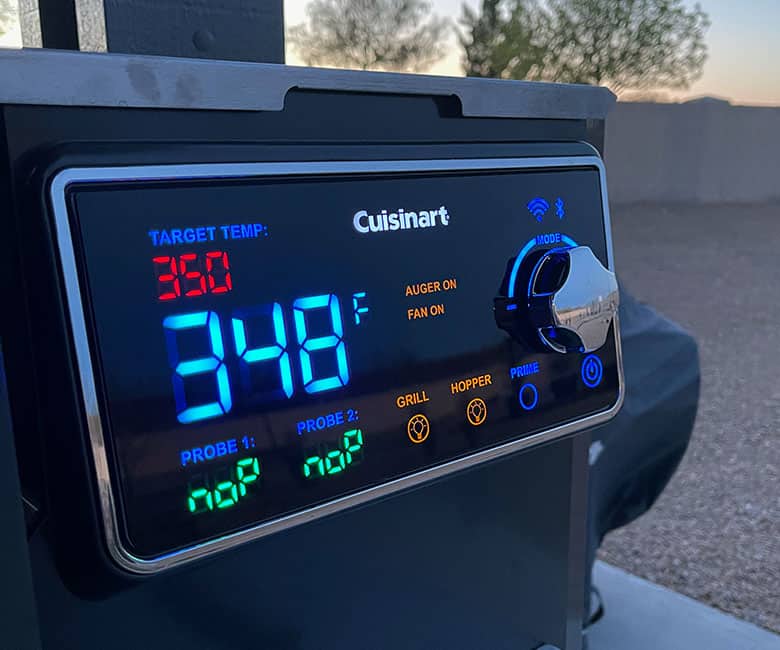
Unlike the Cuisinart Woodcreek Pellet Grill, which allows you to adjust the temperature in 25-50F-degree intervals, the Clermont dial goes as low as 160F and can be increased in 5F-degree intervals to 600F. That’s a feature I really like, because it allows me to smoke jerky and sear a steak.
In addition to the actual grill temp, the panel also includes readouts for the target grill temp, probe temps and visual alerts for when the auger, fan and igniter are on. If you’re low on pellets, the low pellet light will appear and an alert will sound.
I have found that the low-pellet alert is very sensitive and has gone off even when the pellets weren’t low. The engineers at Cuisinart are aware of that, and have already re-engineered a new alert system for the newer models.
There are four buttons on the panel to turn on the grill and hopper lights, to prime the auger (which loads pellets on demand) and to power the grill on and off.
The dial is used to set the target grill and probe temps. Press it once for the grill, twice for probe one and three times for probe 2.
Wireless Monitoring
If you like to monitor your grill or meat temps from your phone, just download the Cuisinart Easy Connect™ BBQ App on the App Store or Google Play.
It connects to your wireless internet at home. You can set alerts based on temperature or time. The app also features a history setting, so you can go back and look at previous cooks as you hone your skills and recipes.
Cover
Since this grill has electrical components and runs on wood pellets that dissolve when they get wet, I recommend keeping this on a covered patio with the extra protection of a grill cover.
Prepping for Your First Cook
As with any new grill, there are some steps you need to take before your first cook. These steps are important to make sure the grill is functioning properly and that any manufacturing residue is burned off.
First, without adding any pellets, remove all the grates, and turn the grill on to 200F degrees. Look to make sure the auger is rotating, and then place your hand above the fire pot just to make sure you feel the fan blowing and the heat.
Once that’s confirmed, shut the grill off. It’ll take about 10 minutes to go through the proper shutdown.
Next, add a scoop of pellets to the hopper. Start it again. When the grill is turned on, it automatically starts at 350F degrees. That setting is fine for this step. At this point, you’re checking to make sure the pellets reach the fire pot.
You can speed the process up by pressing the prime button on the control panel. These keeps the auger rotating, so pellets are pulled into the fire pot faster.
Once you see that the auger feeds the pellets properly, turn it off, and add the drip shield, sear shutter and grates back to the smoker.
Now, for the last pre-cook step, keep the doors open and turn the grill back on. Once you start to see smoke, close the doors. Then, set the grill to 500F and let it ride for a good 30 minutes. This will clean off any residue.
Now, you’re ready to cook.
Let’s Get Cooking
The fire pot in the Clermont is in the center of the grill. This is great placement, because it helps ensure that the temperature is going to be more even throughout the grill.
The bottom grate is the hottest point on the grill, because it’s the closest to the fire pot. I only recommend using this grate for grilling. If you plan to smoke, place your meat on one of the higher racks.
My First Cook on the Cuisinart Clermont Pellet Grill
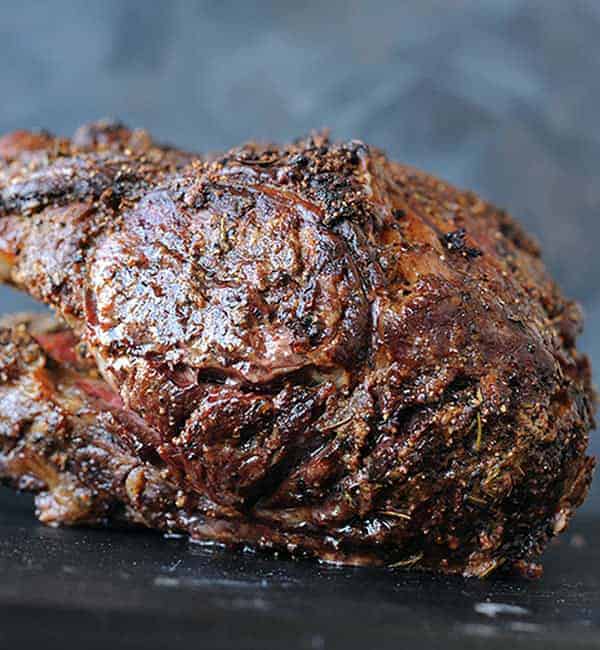
For my first cook on the Clermont, I smoked a spatchchock chicken with a pan of green beans and a pan of carrots. As you can see from the photo, I still had room to add more food, if I wanted to.
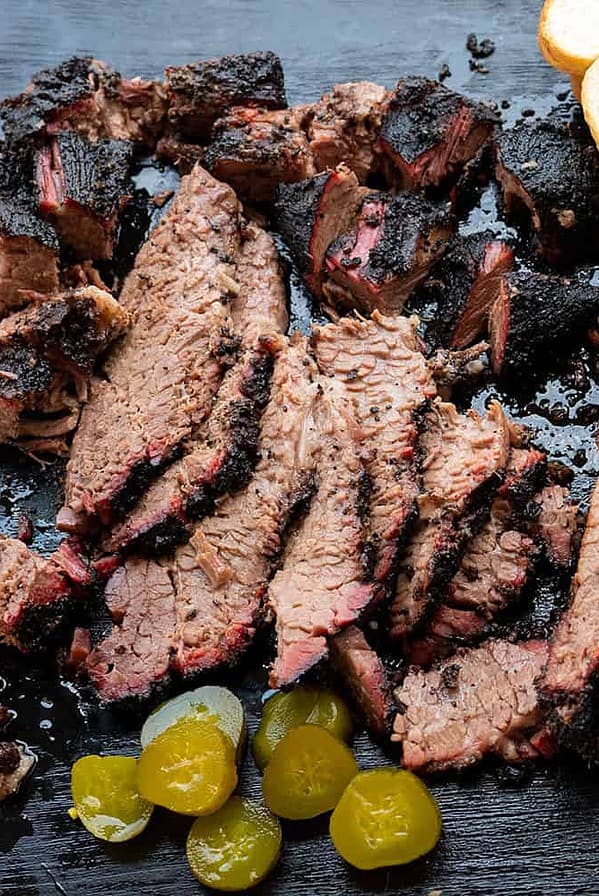
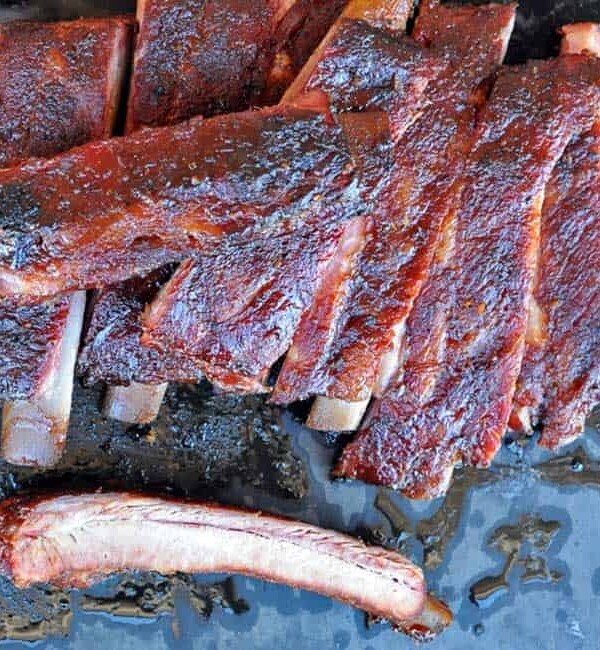
I followed that with three racks of ribs. I can’t get over how much room this grill has. You can easily fit five racks of ribs on each grill rack. Technically, you can add even more grill racks into the smoker, if you had the need to cook 25 racks of ribs.
The temp fluctuated 10-15F degrees during both cooks, which I find to be pretty standard on pellet grills. That fluctuation didn’t impact my cooks though, because the chamber is so large and because the cooking takes place on the elevated racks.
Also, the grill has a PID controller (proportional-integral-derivative controller), which means it takes feedback from each cook and corrects itself over time. Who knew a grill could be so smart?
Testing the Sear Zone
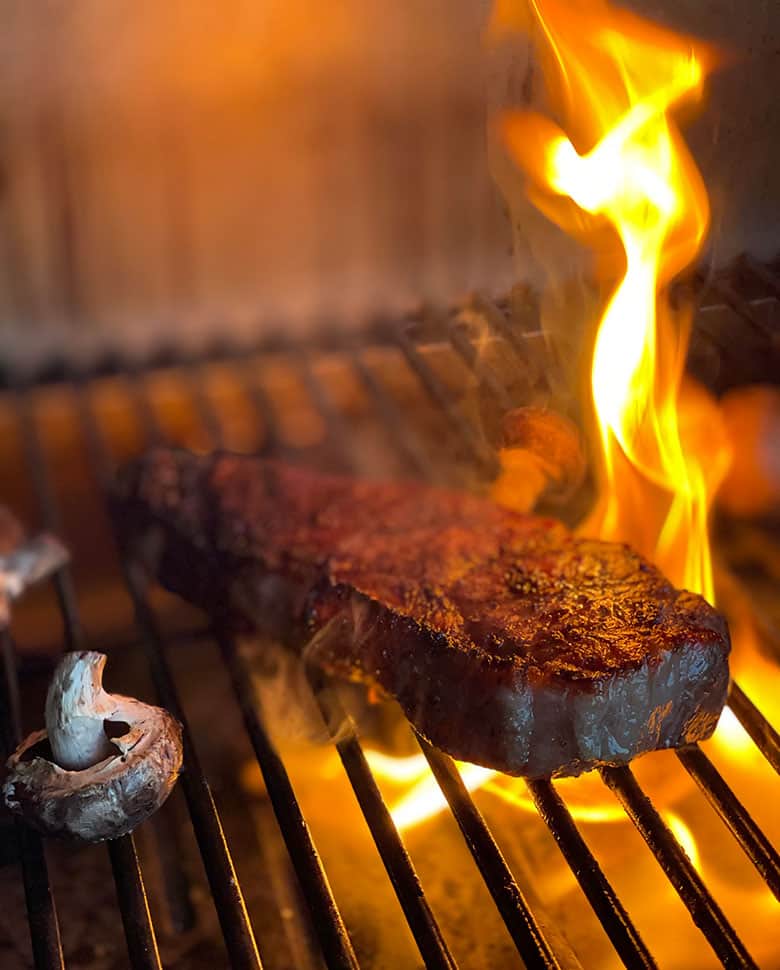
When I cooked over the sear zone, I set the grill temp to 500F and moved the searing knob to the right to expose the flames. I also elevated the adjustable racks to the two highest levels, so I had room to work the meat.
What I found is that the temp is hottest in the center above the flames. Thanks, Mr. Obvious. But you can still grill along the entire bottom grate.
Use the center area for your primary sear location, and then move your meat or veg to the left or right for indirect high heat.
I noticed that if I left the doors open too long, the auger and fan kept pumping hard, because I was letting in cooler air that was confusing the internal probe. The grill thought it needed to burn hotter to accommodate for that, which caused the flames to get a little too high.
To adjust, I simply closed the doors. You can also make adjustments by sliding the searing rod back to the left to close the vents.
As with any grill, practice and try new things. When you learn how the fire flows, you’ll become the master.
What I Would Change about the Grill
Overall, I’m really impressed with everything about this grill. There are only three features that I would adjust, if I ruled the world.
I wish there was an easier way to access the ash drawer. Because it’s behind the grill, you have to pull it out to get to them. And since I installed the locking wheels on the back of the cart, it’s hard to unlock them, so you can pull the grill out.
In hindsight, I should have installed the locking wheels on the front of the cart. Someday, I’ll probably make that adjustment.
I appreciate that there is a pellet dump. This is an important feature for every grill. I just wish there was a funnel or spout or something that allowed me to dump the pellets straight into a bucket on the ground.
Right now, if you open the pellet dump, you have to hold the bucket up or they disperse everywhere. After a bit, 20-40 pounds of pellets can get heavy fast.
Cuisinart Clermont Pellet Grill Specifications
Height: The Clermont is 58.8 inches tall with the lid closed. When the lid is open, the bottom cooking grate is about 40 inches from the ground.
Width: 64 inches
Weight: 233 pounds
Primary Cooking Area: 3 levels at 16 inches deep by 30 inches long (~1,400 square inches)
Fuel Source: Pellet
Hopper Capacity: 40 pounds
Price: $697
Overall, I love the innovation of the French-style doors on the Cuisinart Clermont Pellet Grill & Smoker. It not only looks sophisticated, it sets this pellet grill apart from others, because of the huge windows and massive cooking space. With superior counter space and hidden storage, I highly recommend the Clermont.
For more outdoor grilling with Cuisinart, check out my review of their 360 XL Griddle.


As always, a thorough review. I learned a lot about this piece. I planned to place against a wall and now will rethink it. I love all the room and functionality.
Thank you!!
Thanks.
I appreciate your thorough review. I have been trying to decide between a Campchef Woodwind and the Clermont. Honestly, if Campchef made a smoker with the French doors I would get it without question. After having the Clermont for awhile, has your experience changed your opinion? What do you like and dislike? Thank you!
I still love it. I had some issues with the pellet sensor going off when I still had pellets…but I have a beta model. They said that has been fixed with new models. If you still have problems, you can disable that feature. Also, the right door can be a little hard to close. I found if you lift it slightly, that’s the secret. Other than that, she cooks like a dream.
Question: I’m having a hard time keeping temperature…I noticed a lot of flames coming out of the bottom of the grill….is that common?
There are a few reasons you might see flames on the bottom: 1) If the temp is set high. 2) If the doors are open – this brings more air into the pellet grill, which cools the internal temperature probe. If the grill is set to 300, but the probe is only reading 250, it will keep dumping pellets and increasing the fire to try to get the grill up to 300. 3) You may need to clean the inside of the grill. Empty the ash release before every cook. And then every few cooks, take everything apart and make sure the inside is free of ash and grease.
As for having a hard time keeping temp, the grill naturally fluctuates during the cook. You’ll see it bounce up or down 10-15 degrees. Personally, I haven’t had any issues with that fluctuation. If you’re seeing spikes up or down greater than that, ensure your doors are closed all the way. Any flow of air can impact that probe reading.
I set this up and did some test cooks. I wanted to say thank you for your clear guide. Your directions for how to do the initial start up were so much clearer and accurate than in the manual. Suggestion for others new to pellet grilling — follow the directions here and watch the youtube video by Cuisinart on how to start up the Grill. Overall, we were happy with the outcome and hopeful we will get good milage and use.
A few early “hmm moments”. The pellet alarm would not turn off until we started up some real cooking (perhaps a start up glitch?). The power button would not turn off the grill. You could turn it off through the application (whew) but that caused tense moments. After the two cooks and playing around with it, I learned that if you put your thumb over the power LED button for 5 seconds or so it would turn off and go through its shut down cycle. This might be a “safety feature” to not interrupt the cook from inadvertent hitting of the LED power button and initiate the shut down which which takes a good 10 minutes. During the first cook set for 275 the grill went “crazy”, blew past the set temperature to 475 and it had to be shut down. It went through the shut down cycle and we started it up again. Then it worked fine, hit its temp zone and stayed there. My guess is that the system is “learning” how to calibrate itself at some level and it was taking a few times to align to the grill?
Also, the customer service line is not available on the weekend. Now, for a BBQ grill outfit to not have customer service on the weekend seems odd. Many are standing up our equipment for the test run on the weekend – peak “call day” would be the weekend. All other Cuisinart products have weekend customer service. What I learned was that Cuisinart does not make these grills. Another company is licensed to make the grill for Cuisinart. As a separate company, it does not need to conform to any of the Cuisinart expectations and it does not provide any customer support/resolution for the grills – you have to go through the licensing firm. Now, I bought this grill for a few reasons but an important factor was that I trusted Cusinart as a brand that makes solid, reliable, affordable products. What I learned is that I am not buying a Cusinart at all but Grill made by another company that slaps a Cuisinart name on it. My guess is that employees from another grill firm left, started their own firm 11 years ago, finally realized how hard it was to break into retail and cut a licensing deal with Cuisinart to get into Walmart.
Bought this grill last October(2021). This piece of junk has been nothing but a nightmare! First the grill was missing 2 of the wheels. Then the temperature knob broke off when the door tapped it. Then the pellet sensor went bad after about 10 minutes of trying to use it. Just finally received the sensor a couple weeks ago. Still waiting on the knob they are supposed to send! This thing is a poor quality piece of garbage. I wish I would have taken the piece of crap back before I assembled it.