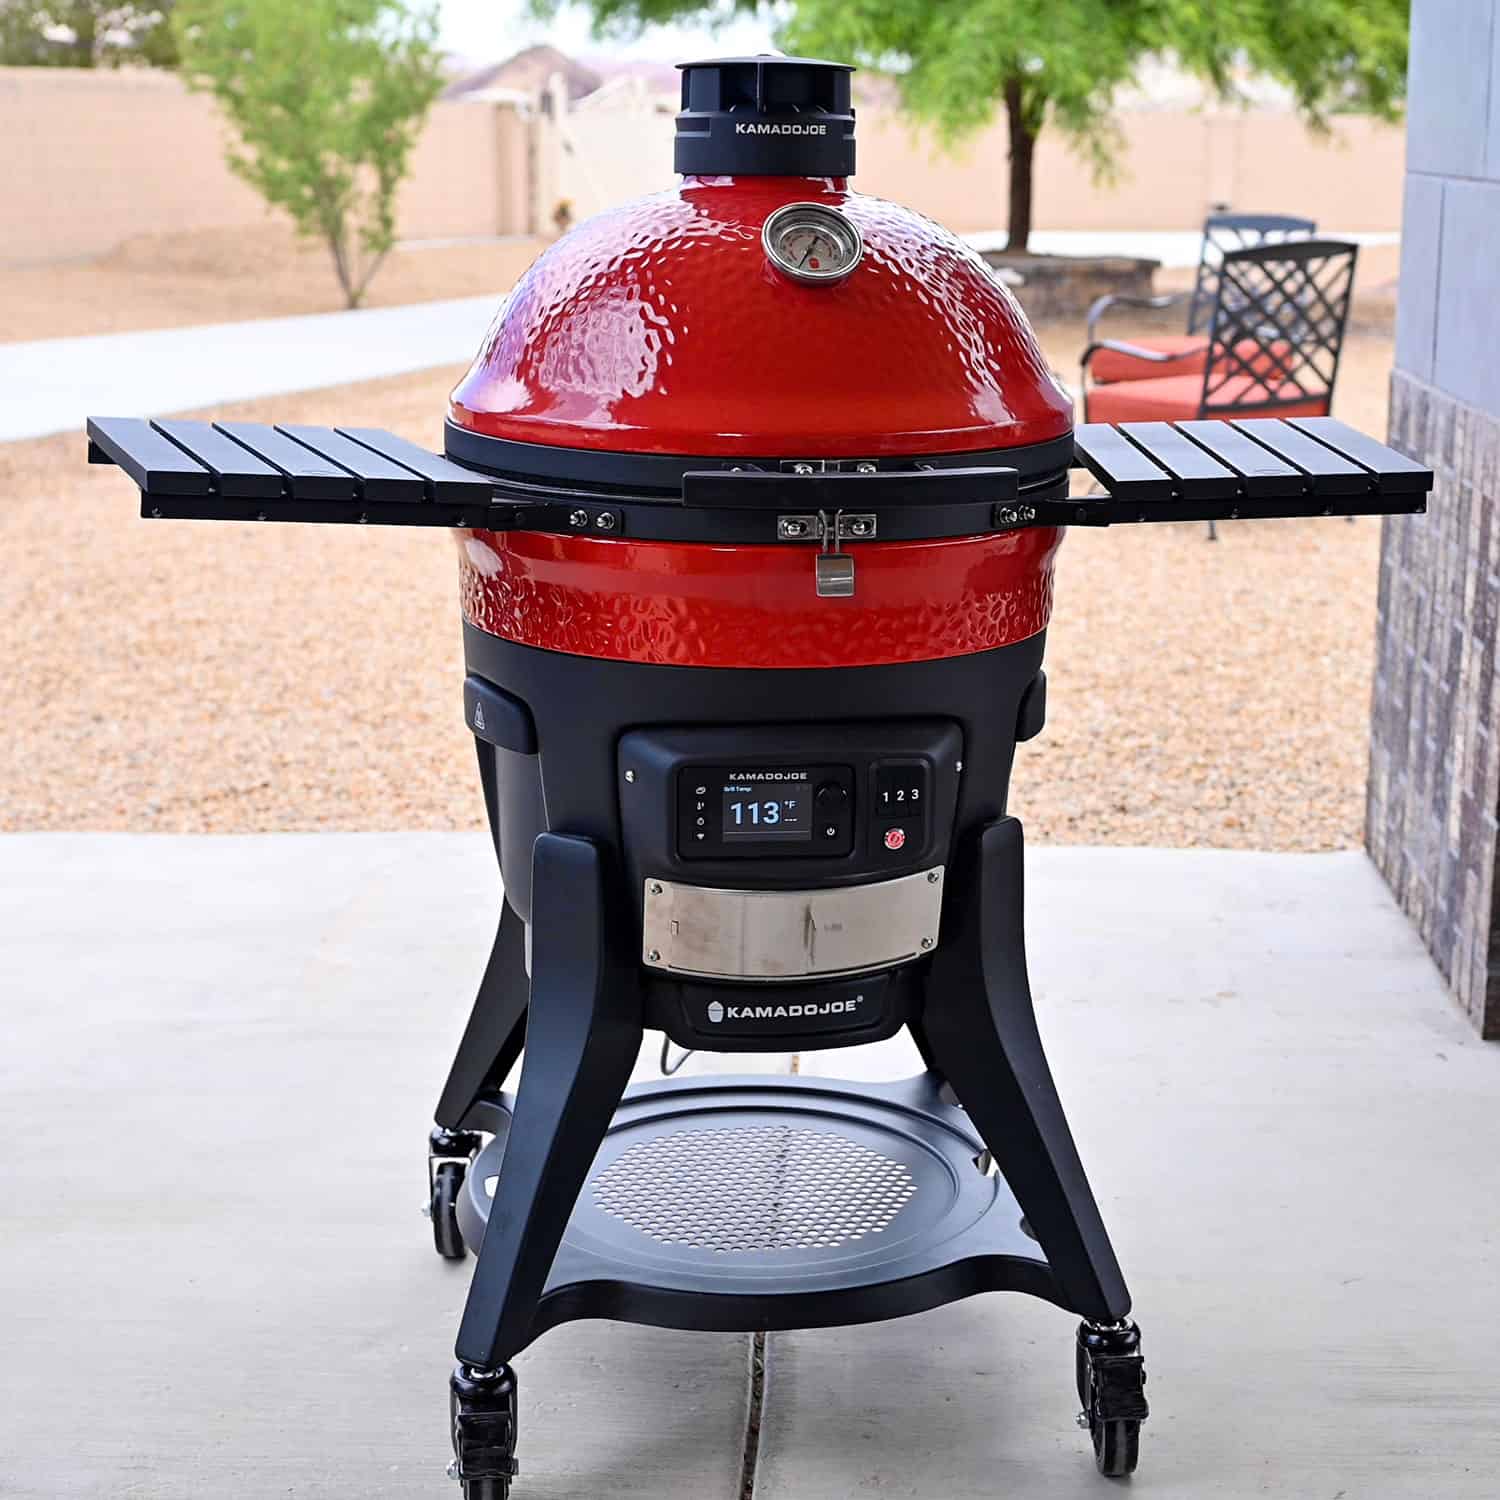
With the Konnected Joe, Kamado Joe has changed the charcoal grilling game by incorporating digital technology into a ceramic grill, making it even easier to manage heat while maintaining classic backyard barbecue flavor.
Save this BBQ Tip
Enter your email, and I’ll send this link directly to your inbox. Plus, you’ll get new BBQ recipes and tips weekly.
Table of Contents
What is a Kamado Joe Konnected Joe
The Kamado Joe is a ceramic charcoal grill and smoker. This style of grill was invented in Asia and has been around for thousands of years.
Kamado Joe started manufacturing its own version of the Kamado-style grill in 2009. Over the past decade, the company has released several different sizes of its charcoal grill, along with a variety of accessories that add versatility.
But this is the first time that Kamado Joe has added permanent technology to change the way the grill functions.
With the new Konnected Joe the tried-and-true effectiveness of ceramic cooking has evolved to include the digital conveniences modern-day barbecuers expect and enjoy.
What makes this different is that it’s fully automatic. Just like a pellet grill where you can set the temperature and monitor it from your phone, Kamado Joe has now made that functionality possible with a charcoal grill.
How the Konnected Joe works
As with all Kamado Joe grills, the body is made of ceramic. This retains heat better than any other material on the market.
Because of the grill’s automatic features, you don’t have to be a professional pitmaster to operate this charcoal grill.
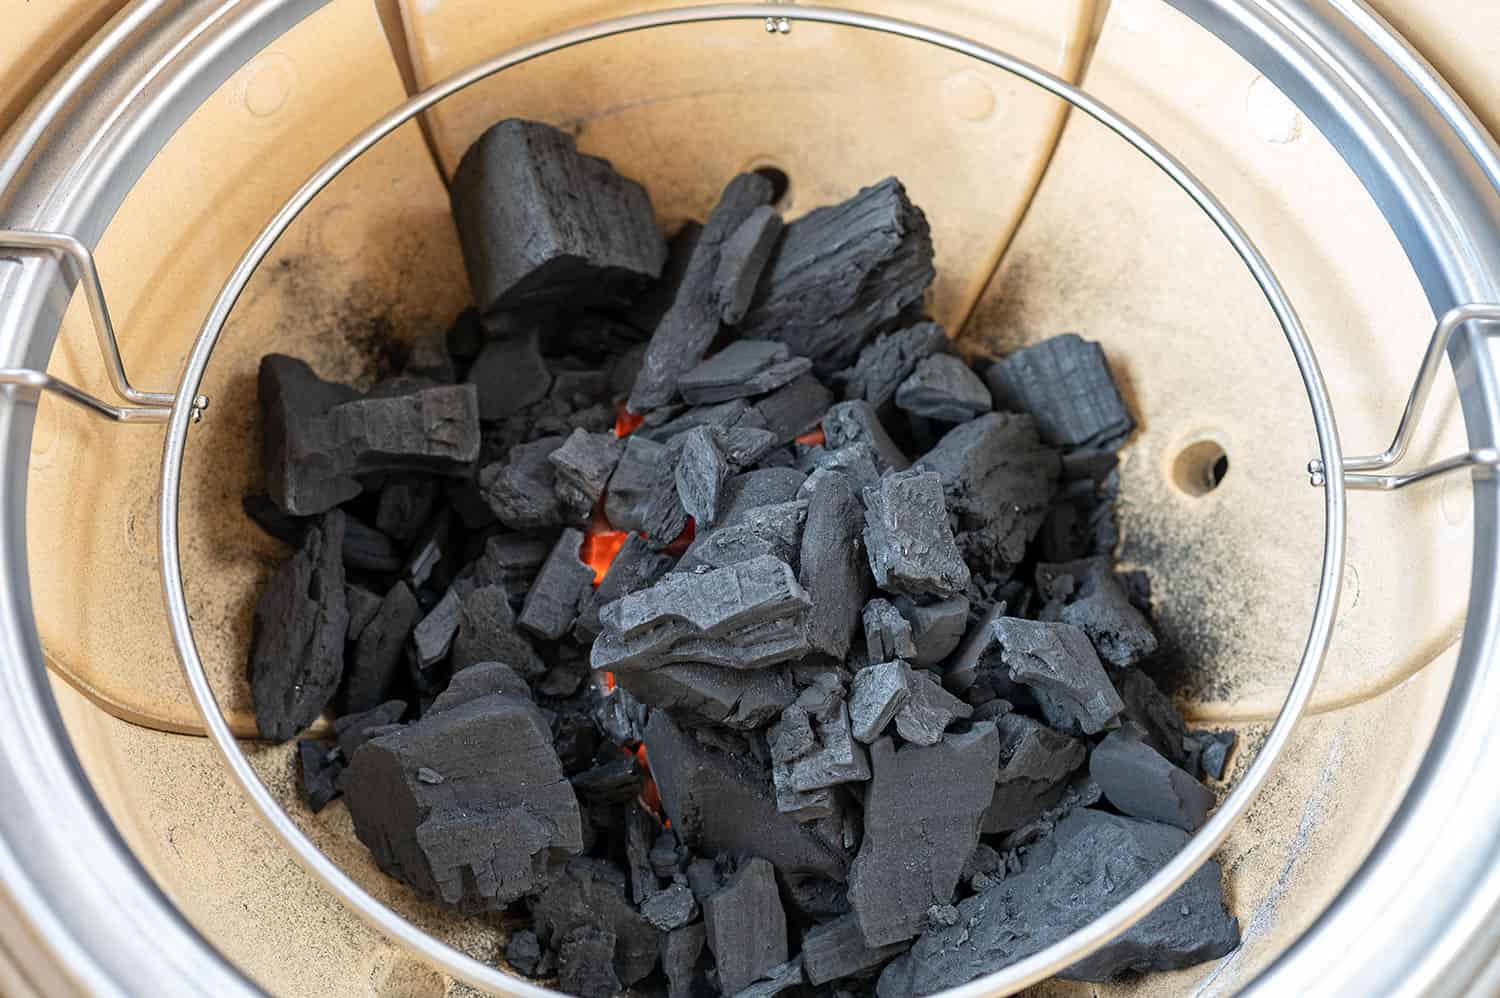
To use the automatic mode, add your coals into the clean grill. Turn the power on, close the bottom vent and push the AFS or automatic fire starter button.
Then, set your desired temperature by pushing the thermometer button, spinning the dial and pushing the thermometer button again.
The heating element on the bottom of the firebox will light your coals in about 15 minutes. Then, the grill will regulate itself to peak at your desired temperature. I found it takes about 30 minutes total to reach 250F degrees.
Throughout the cook, the grill will continue to make internal adjustments with the Kontrol Fan to keep your heat steady, so you never have to worry about opening and closing vents.
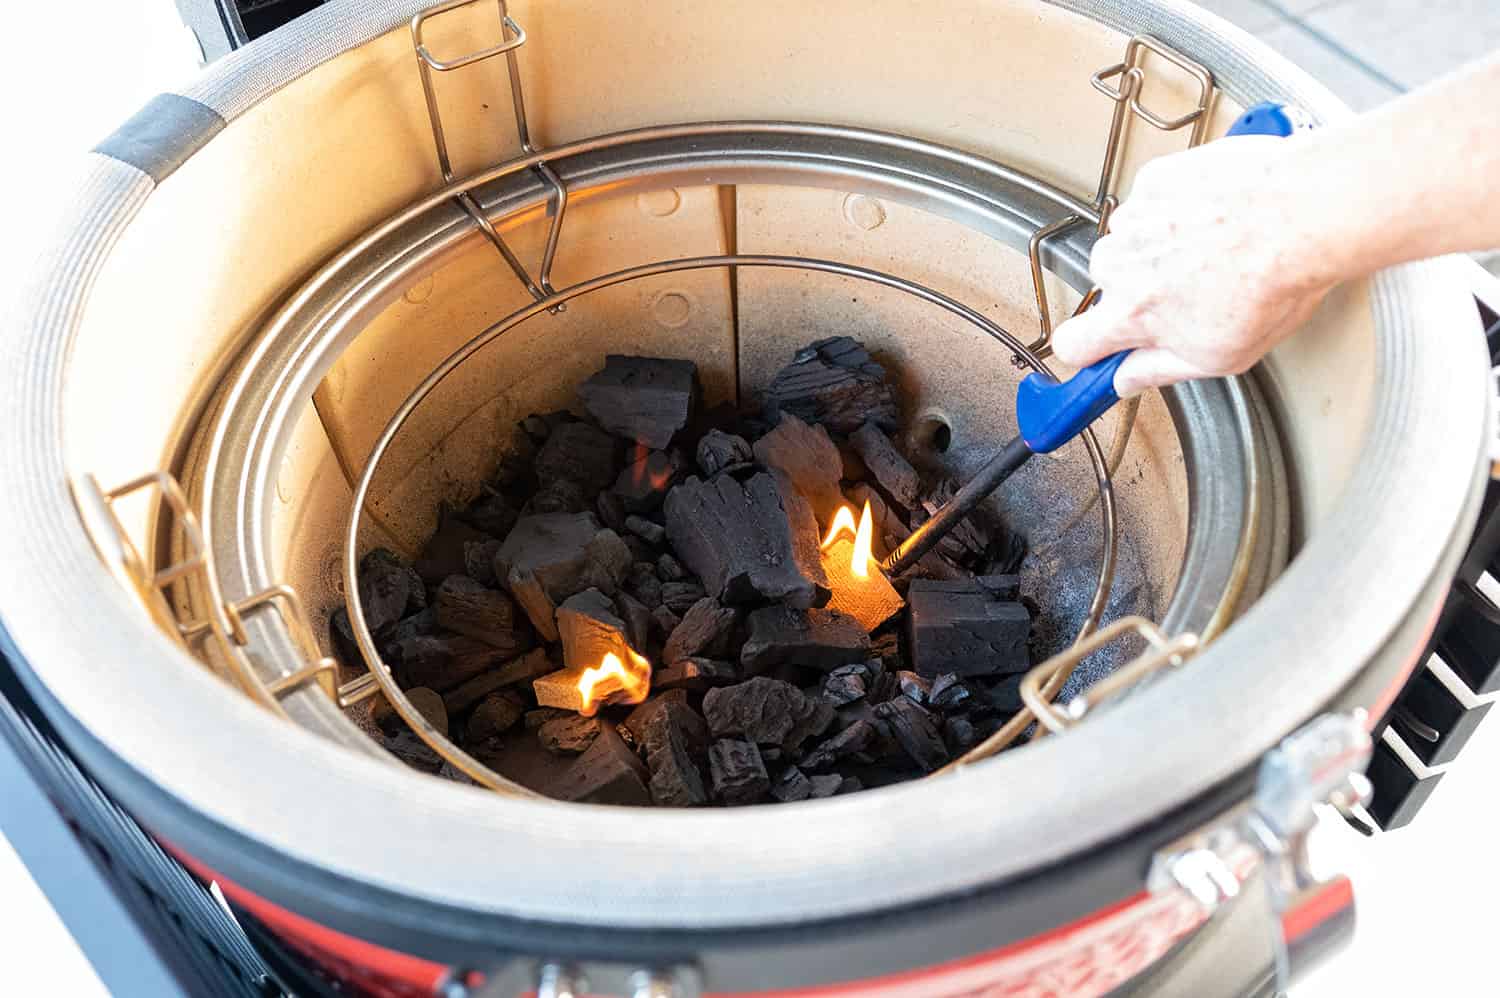
But don’t worry, you still have the full freedom to cook on the Konnected Joe without power. Just add your coals. Light them with fire starters and control your heat with the vents on the top and bottom just like you would with any other Kamado Joe.

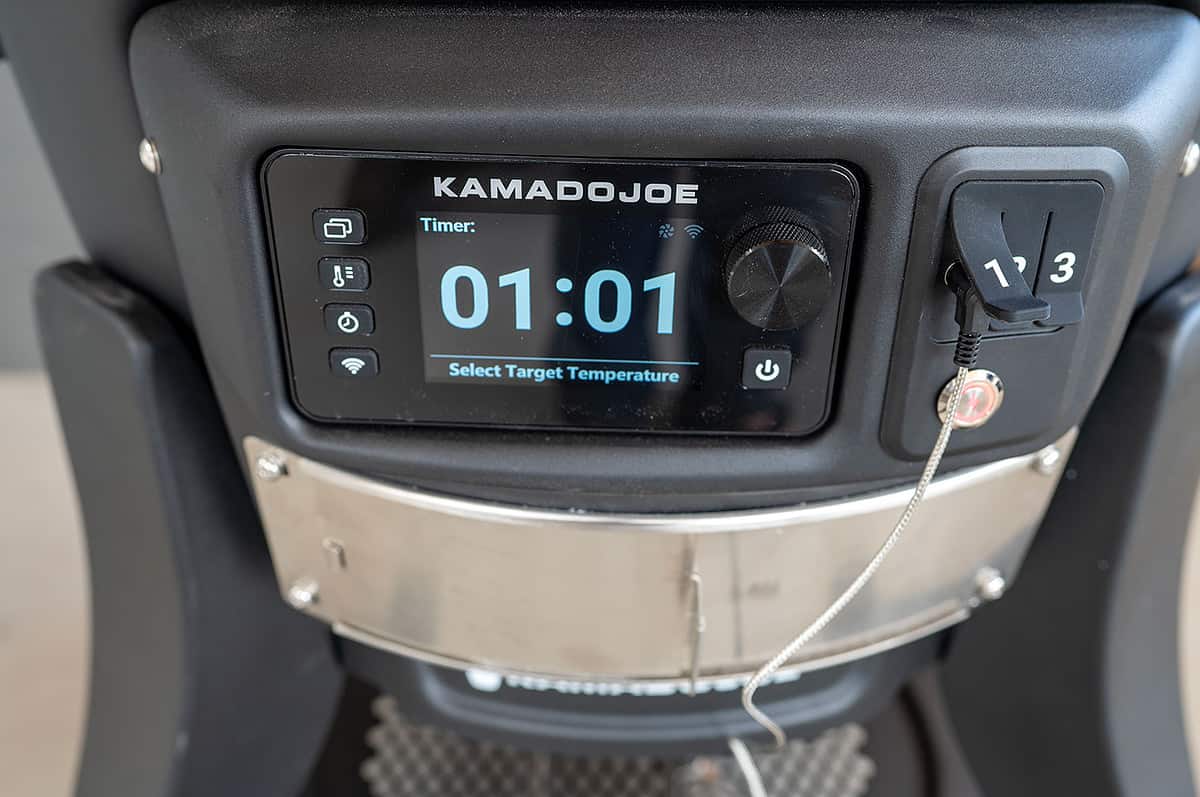
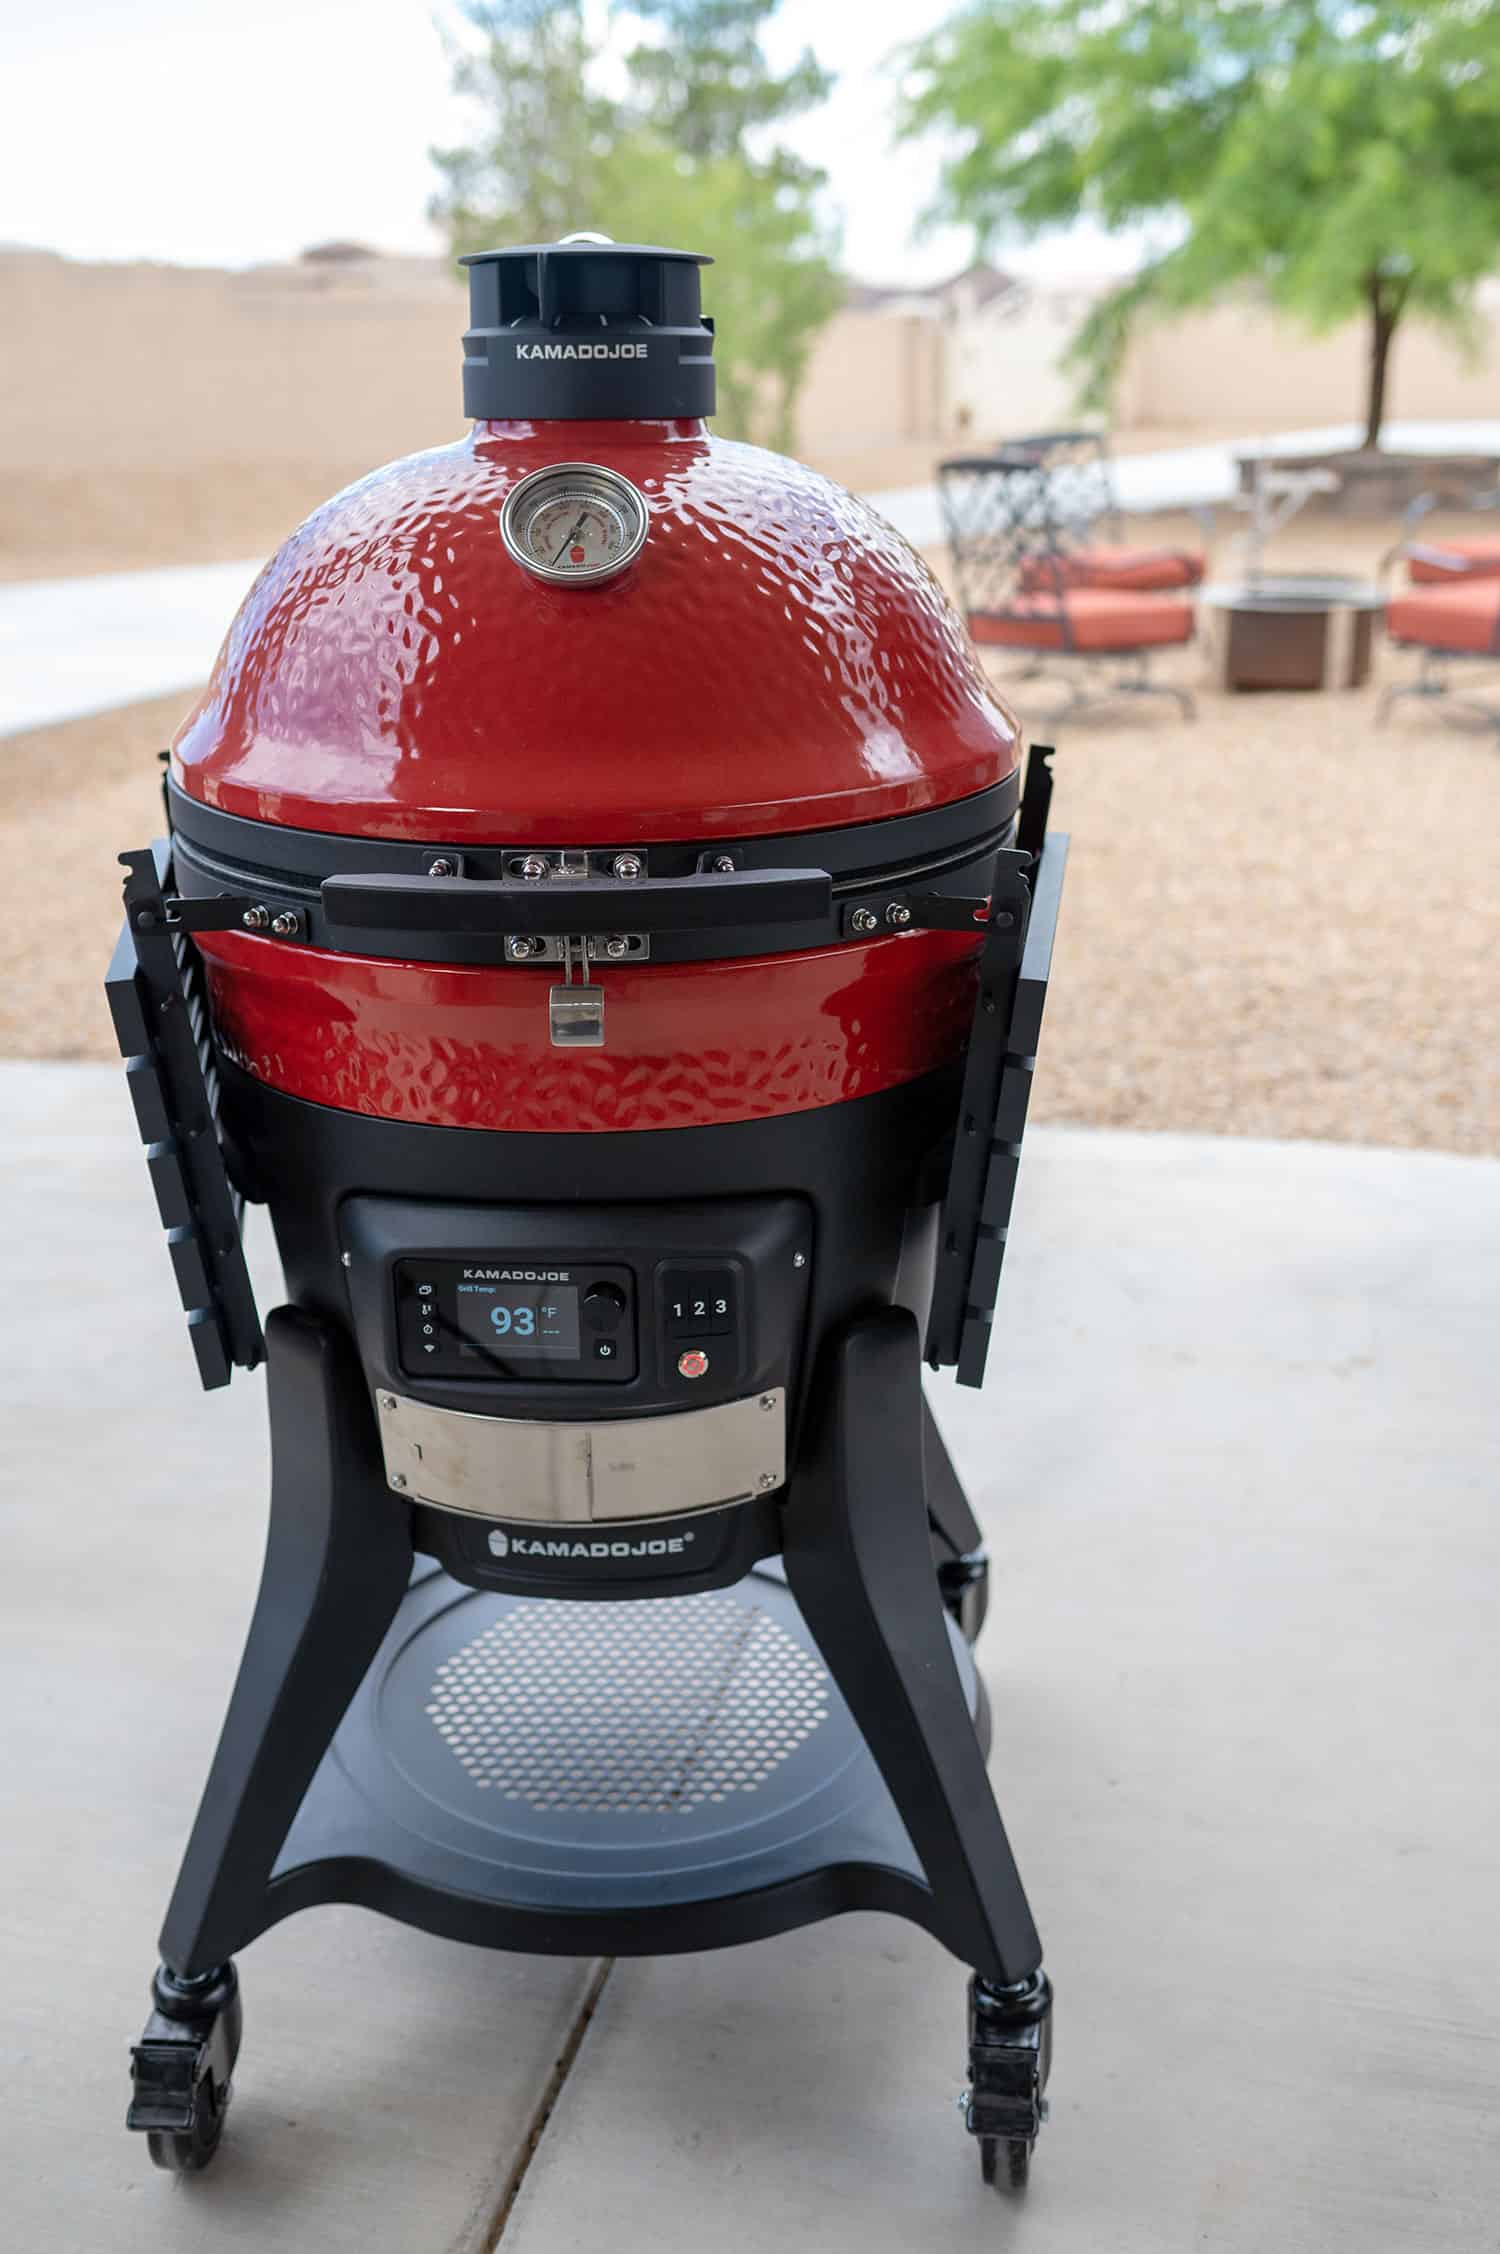
Digital Kontrol Board
The Konnected Joe’s digital Kontrol Board has a large digital screen, four primary buttons, a power button and a dial.
The top button allows you to cycle through the different screens. Personally, I haven’t found I need to push this button very often.
The second button is the most important. This is the temperature button. Once you press it, the temperature will blink on the display and you can turn the dial to adjust it up and down from 250 to 700 F degrees in five-degree increments.
In order to lock the temperature in, you need to press the thermometer button again.
While using the digital temperature control, you must keep the bottom vent fully closed for the Kontrol fan to work properly. A prompt on the monitor will remind you. The display will also advise you how wide to open the top vent.
The third button is a timer. It’s cool because it allows you to set a timer and count down, or you can set the timer to count up.
I like the count up feature, because I can throw a brisket on and see how much time it actually took to finish, so I can make notes and adjustments for my next cook. When the timer goes off, the tone is pleasing and not super annoying.
To set the countdown timer, press the button. The two zeros on the left should blink. Spin the dial to set the hours. Push the button again and the two zeros on the right will blink. Spin the dial to set the minutes.
To set the count up timer, press and hold the timer button. It will count in minutes and seconds first and then will transition to hours and minutes. To reset the timer, just hold the button down until you see all zeroes.
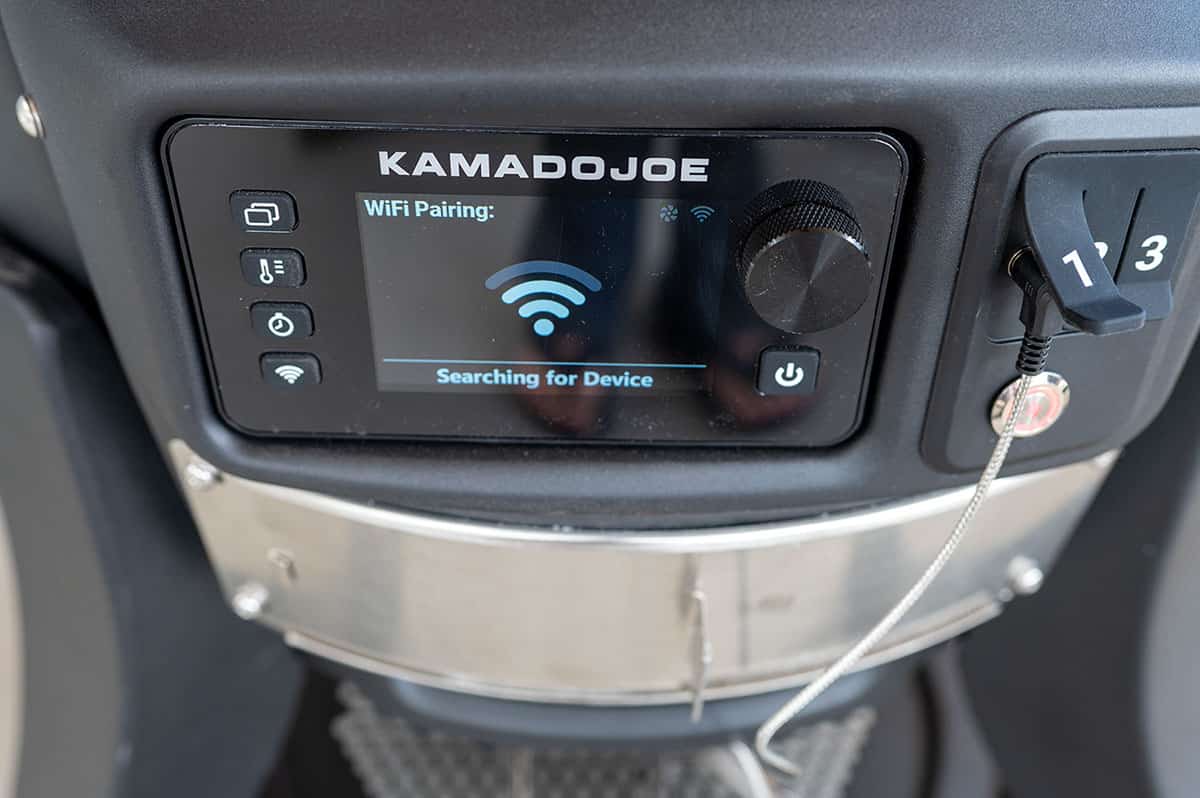
The fourth button is the wi-fi button. You’ll want to press this when you’re ready to connect your grill to the free Kamado Joe App. The app connects to the grill via your home wi-fi and Bluetooth and allows you to control and monitor your grill’s temperature.
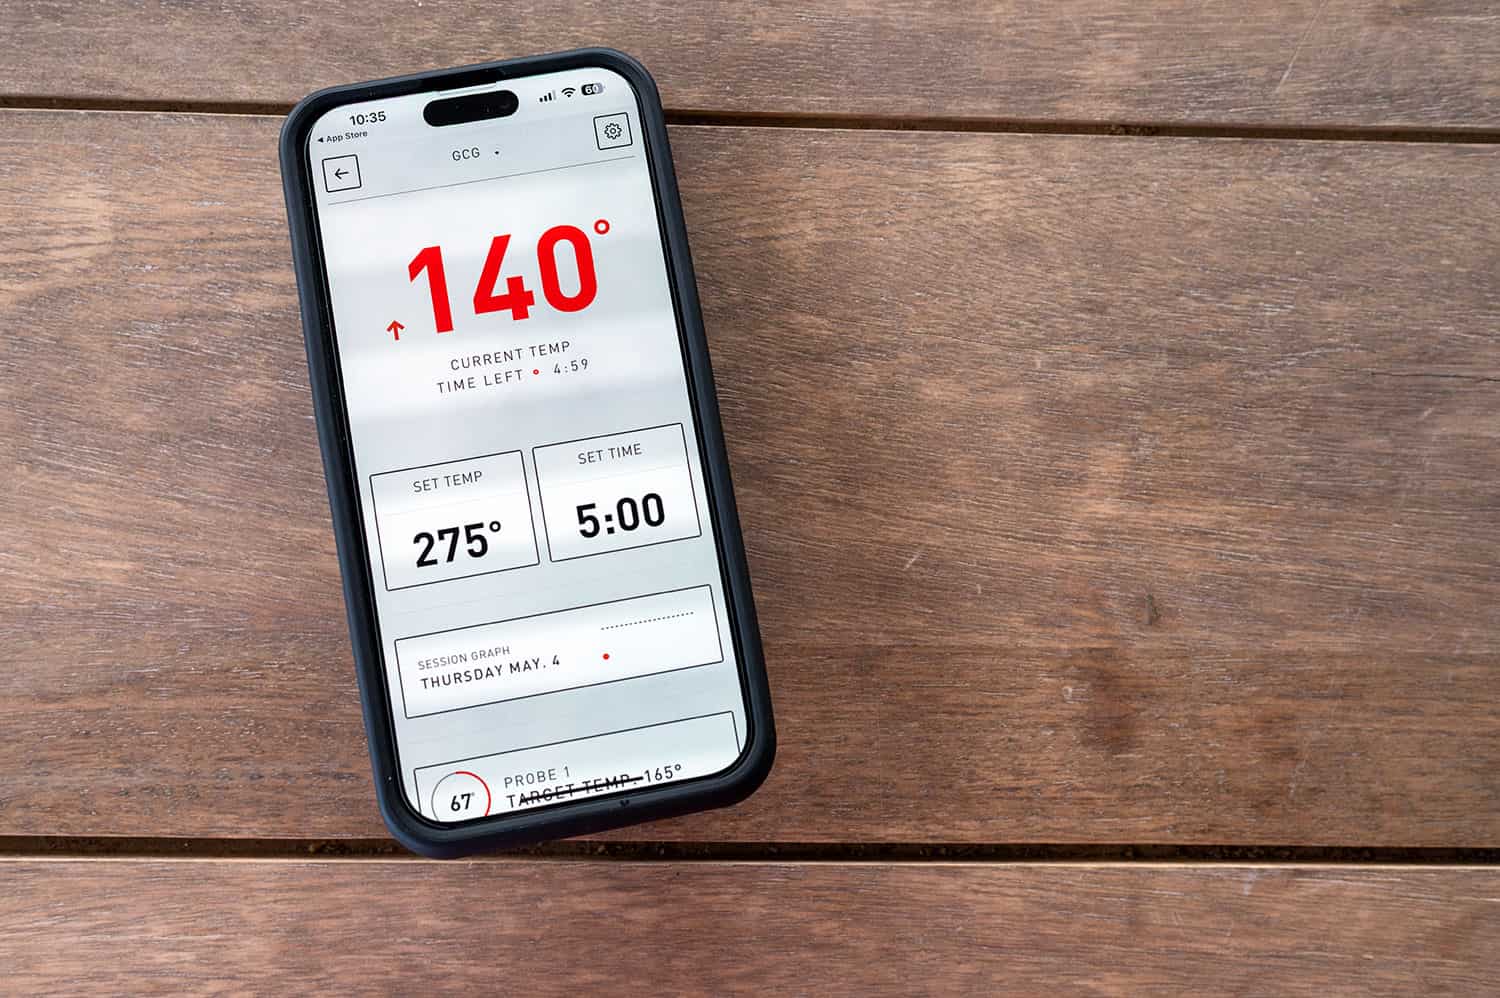
With the app, you can adjust the grill temperature, monitor internal meat temperatures, track the full cook and set the timer. The app even includes a collection of recipes.
I found the app’s range to be pretty decent, but if you travel too far from the grill, you will lose connectivity.
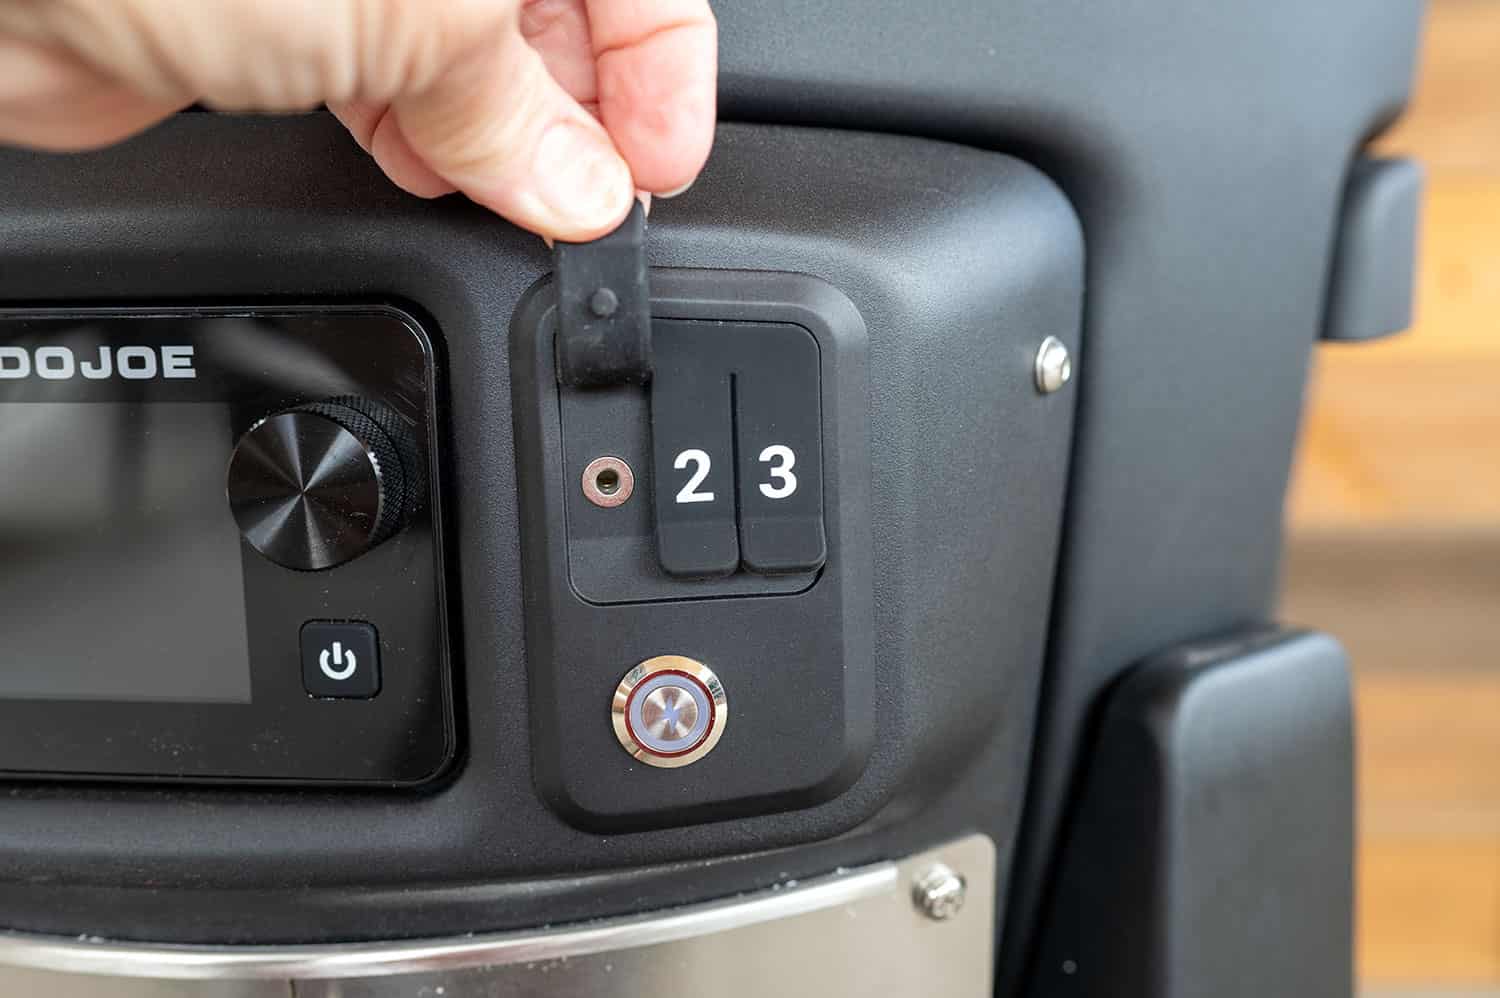
Next to the Kontrol Board, there are three ports for temperature probes. The grill comes with one meat probe, but you can purchase more.
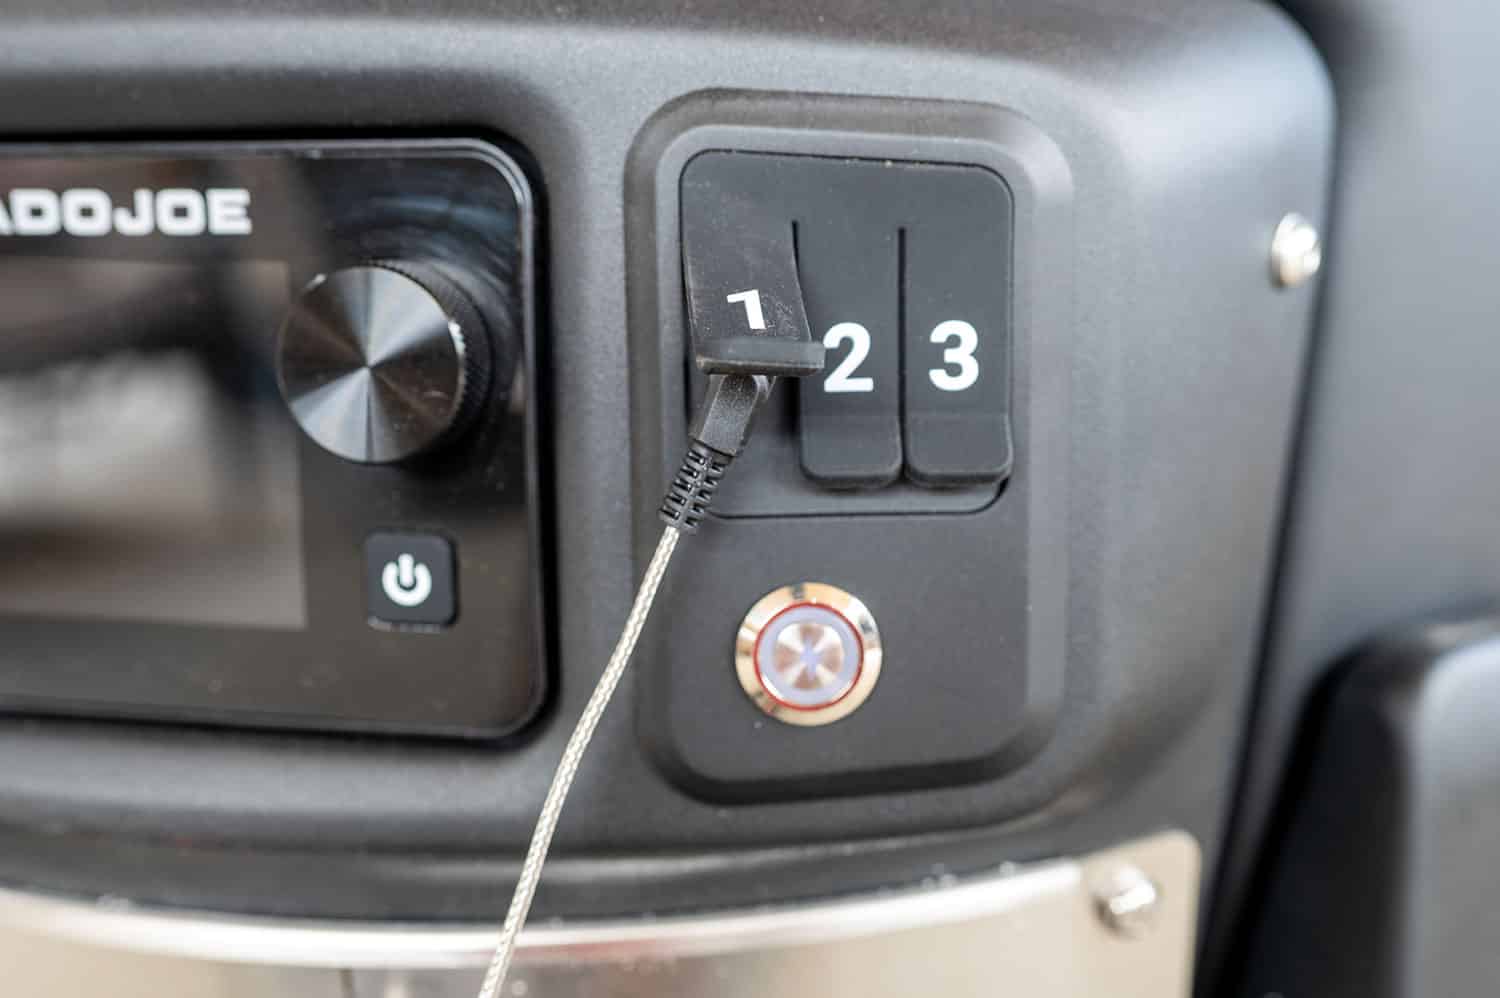
Simply insert the probe into the port, then run it up and under the grill lid and insert it into the meat. You’ll be able to see when your meat is ready without opening the grill.
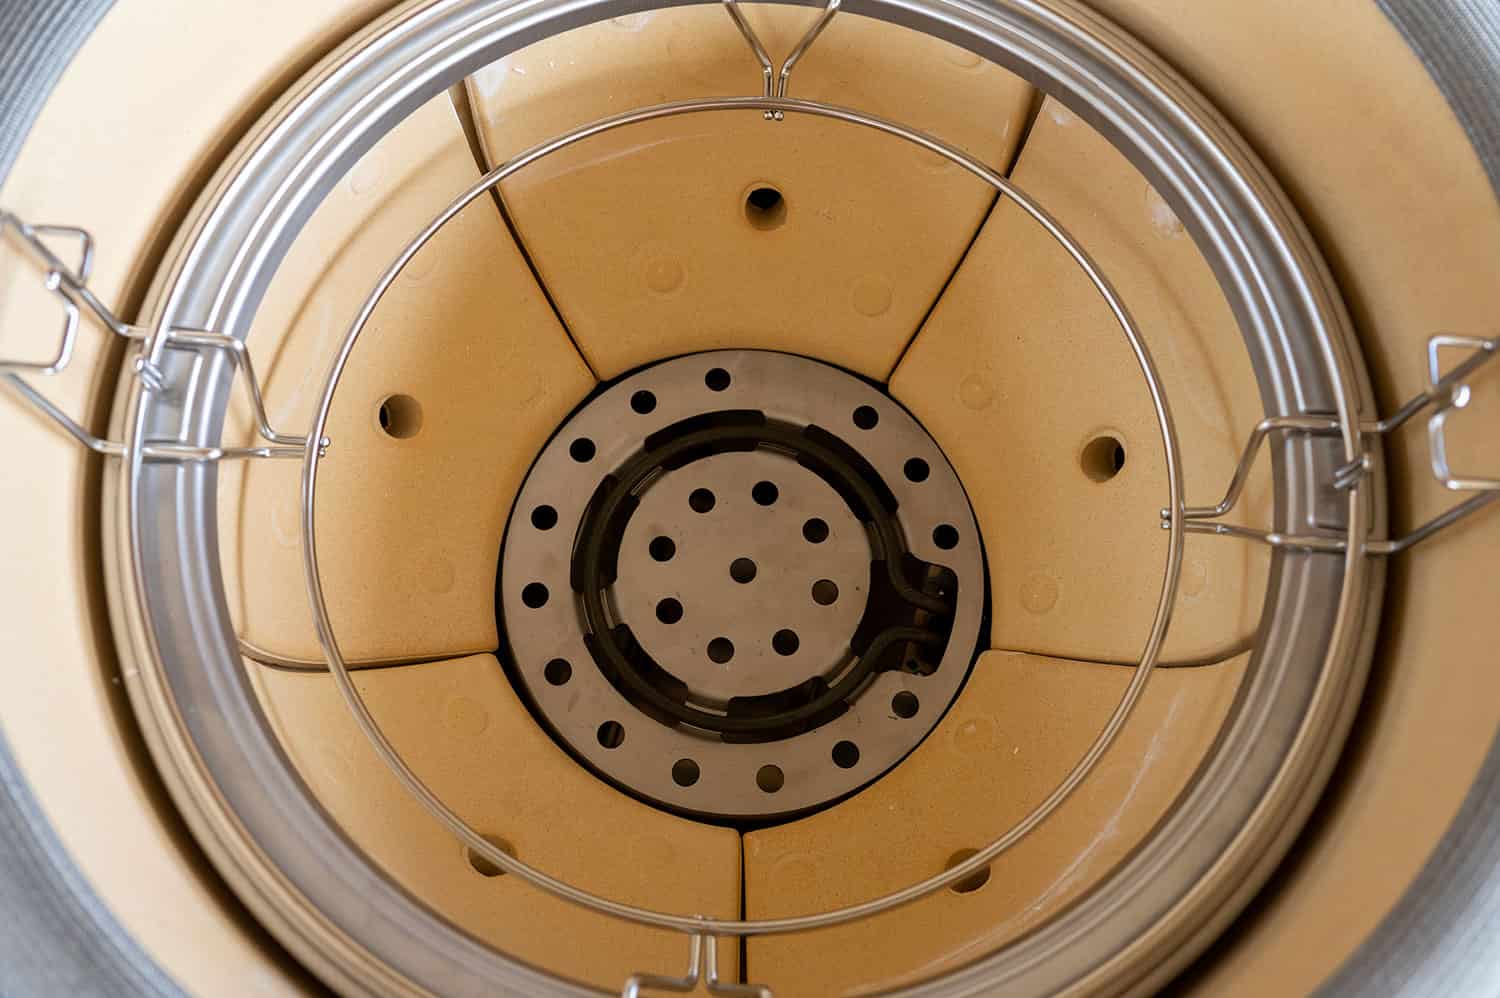
Right below the probe ports is the AFS button to auto light the grill. When it’s illuminated red, the interior burner is on.
PRO TIP: The Konnected Joe requires 5 amps of electricity, so it's important that the outlet and circuit you plug it into can manage that much power. I plugged it into the same circuit as my garage fridge and blew a 15-amp GFCI outlet, because I overloaded it. Safety first :)
The Kontrol Board has three other features. The screen saver mode cycles the display through the temperatures and timers. The accessory mode allows you to indicate which accessory you may be using. The full griddle mode is for when you’re covering the entire grill grate with the full griddle.
When using the full griddle, it is still important to close the lid to regulate temperatures if you’re cooking with digital assistance.
Features
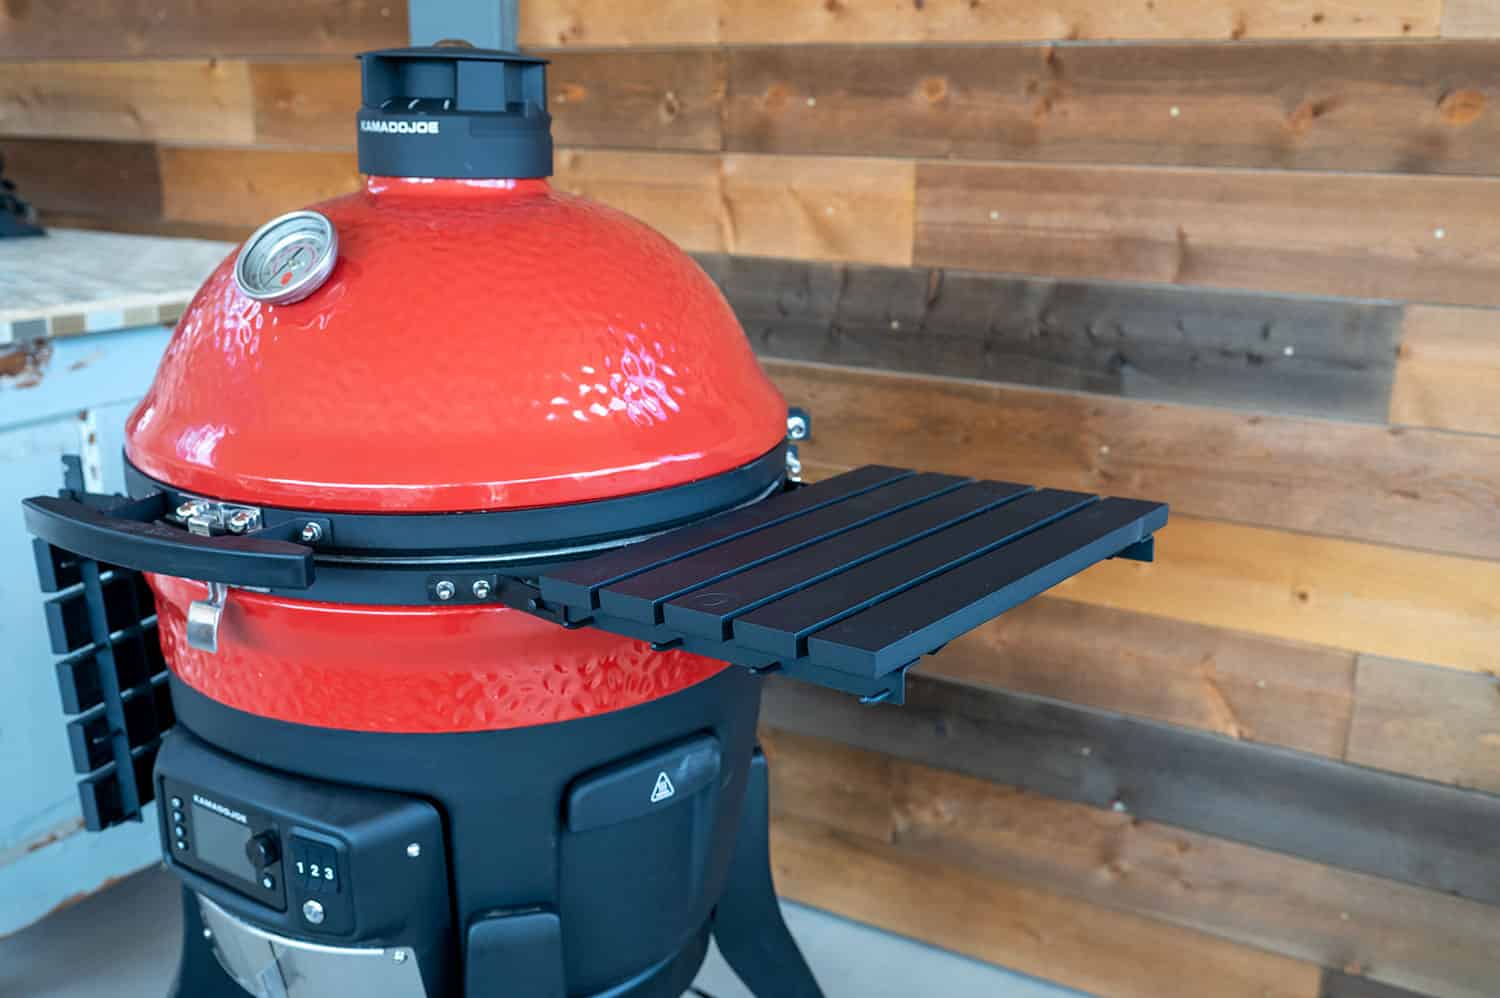
The outside of the Konnected Joe is painted the classic Kamado Joe red. It also has two foldable aluminum side shelves, which to me is a must with any grill.
Below the tables, which are easily removable, there are two lift handles. These help for placing the grill on the included cart or for when you want to take your Joe on the road.
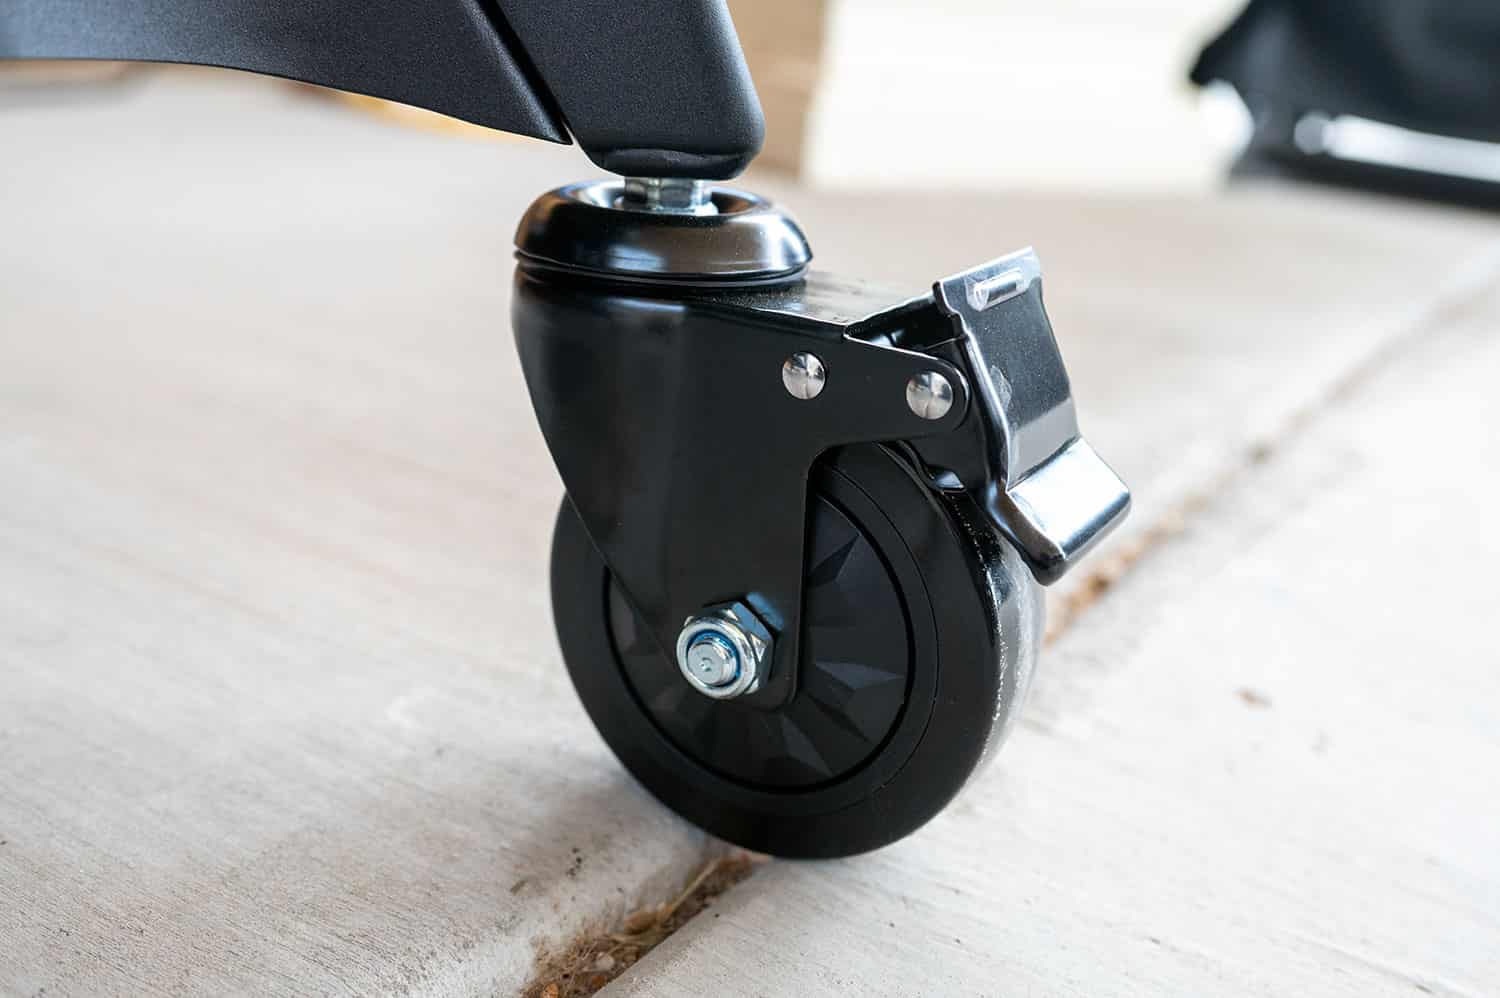
The cart has great heavy-duty wheels, including two that lock. There is also a shelf on the bottom to hold all of your accessories. There are several Kamado Joe accessories you can purchase at BBQguys.com.
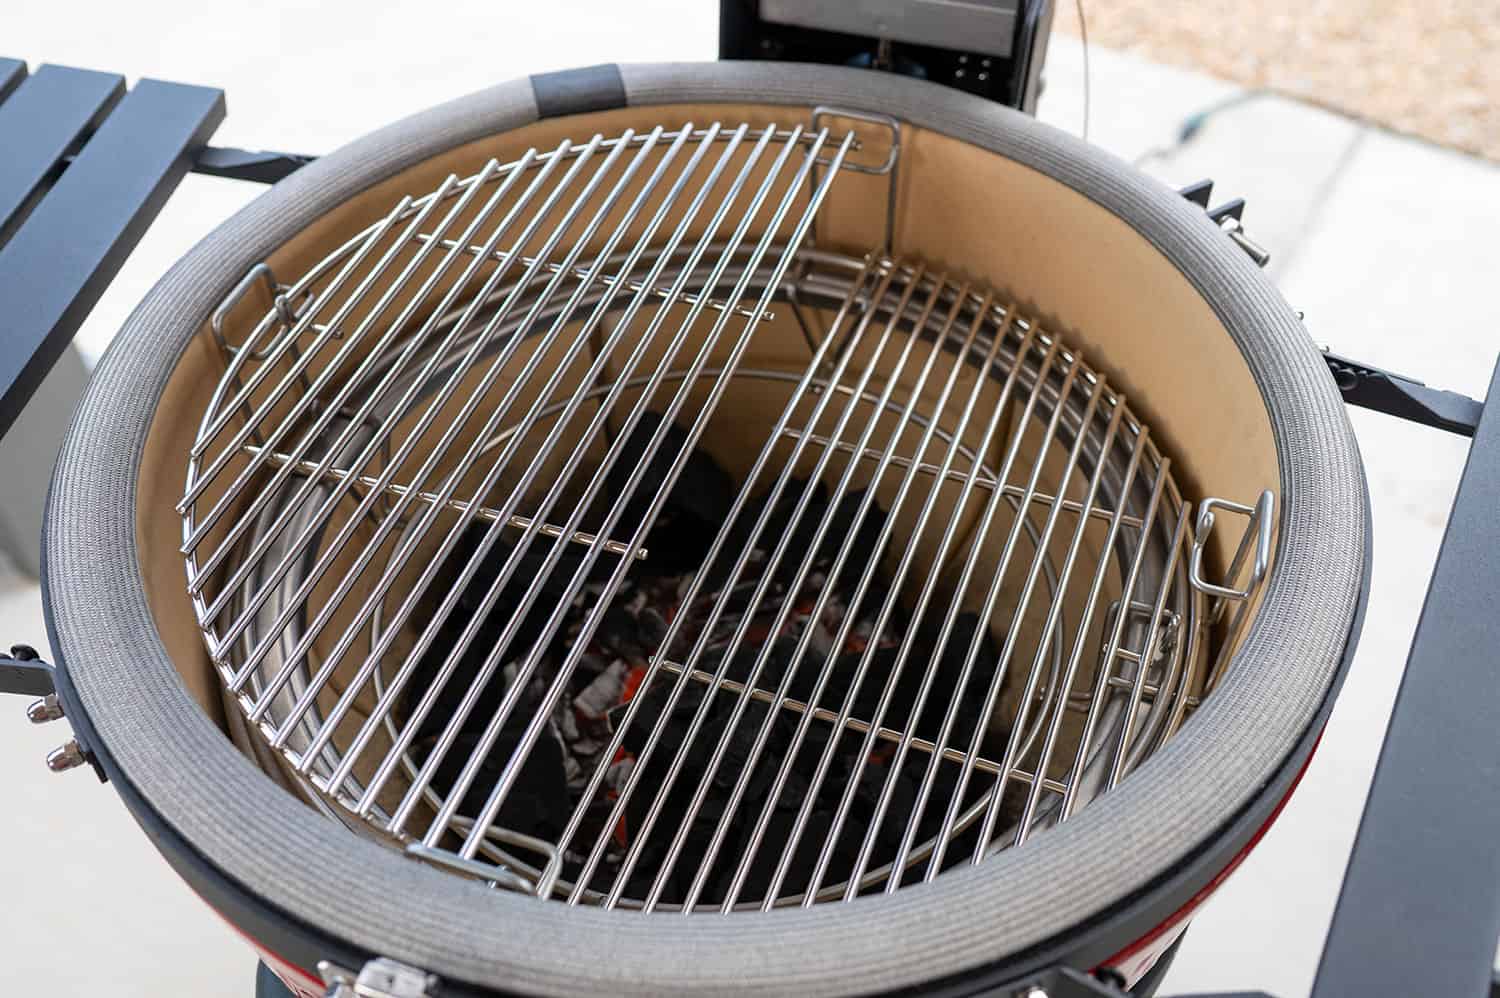
The Konnected Joe has 250 square inches of cooking space and a two-tier divide-and-conquer stainless steel cooking system. This system allows you to cook various foods at different levels.
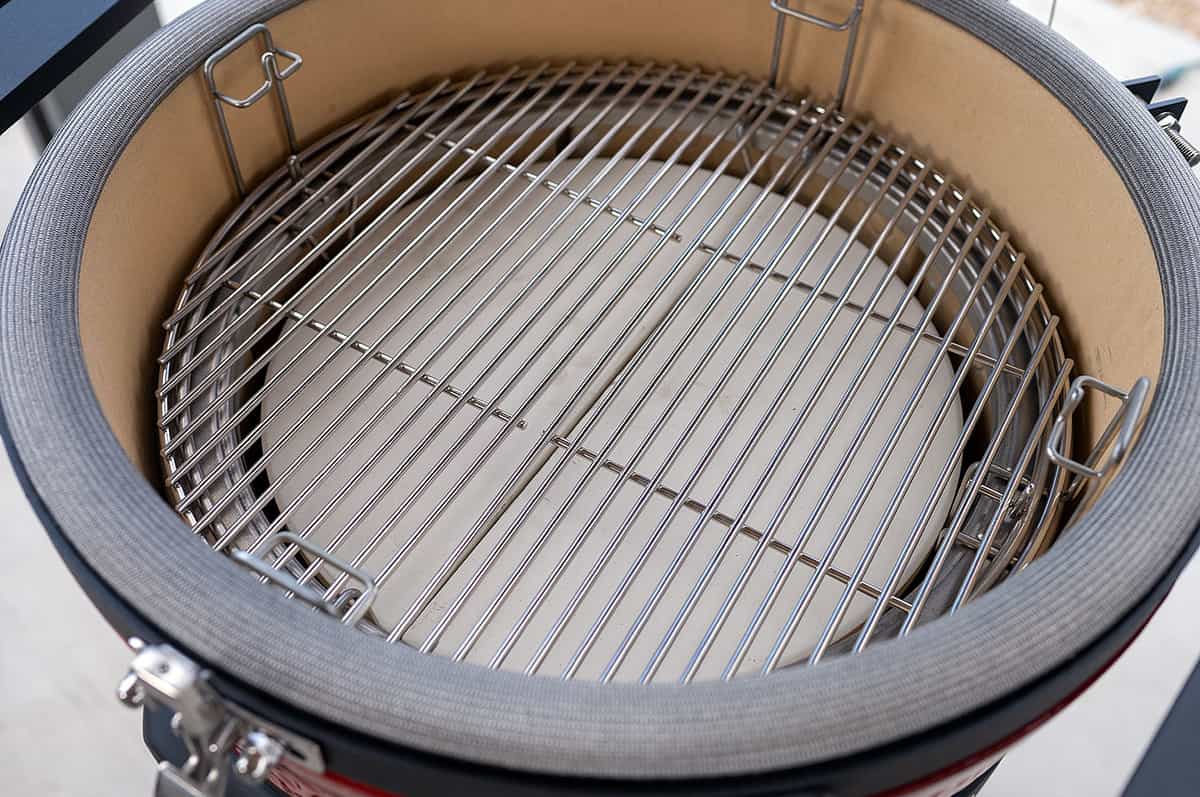
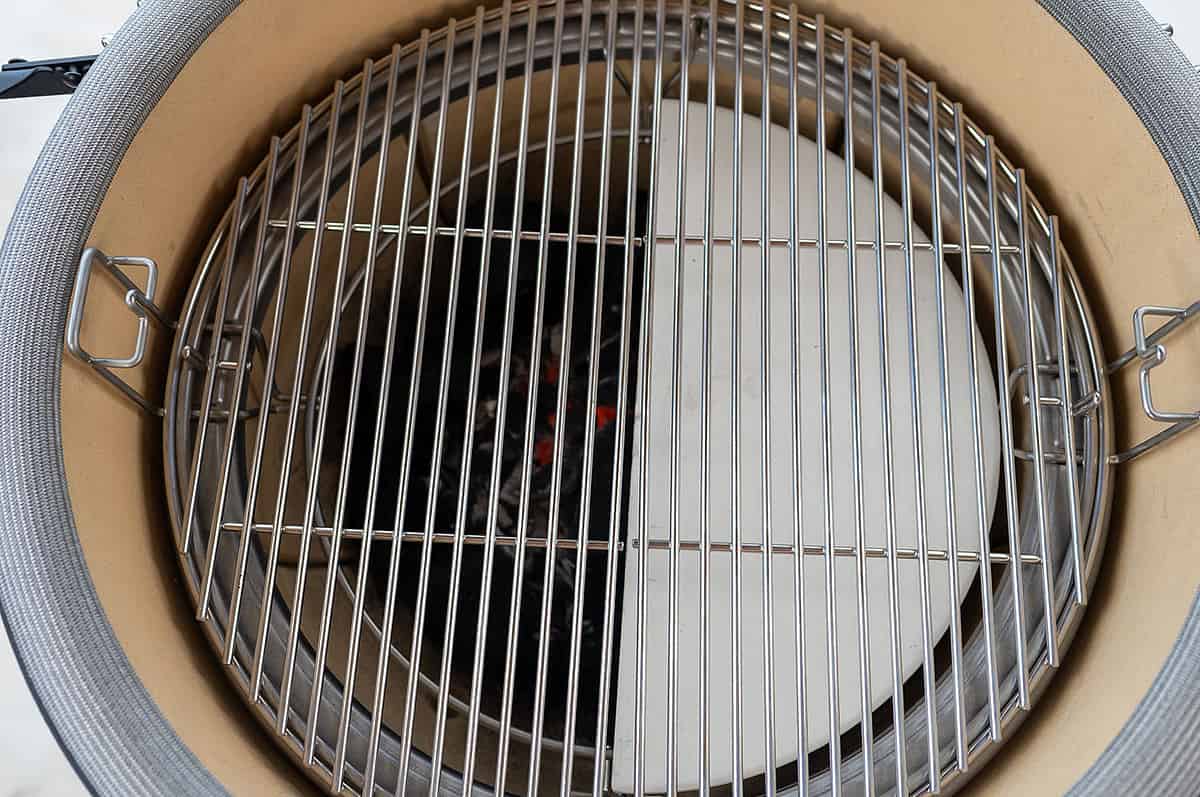
With the addition of the heat deflectors, you can also cook using direct and indirect heat across the full grill or half of the grill. The ceramic heat deflectors block off heat from the firebox, so the food above them on the grate doesn’t burn.
Pro Tip: The ceramic heat deflectors maintain a lot of heat. Allow them to cool completely before handling them or use the included grill gripper and heat gloves.
How to assemble the Konnected Joe
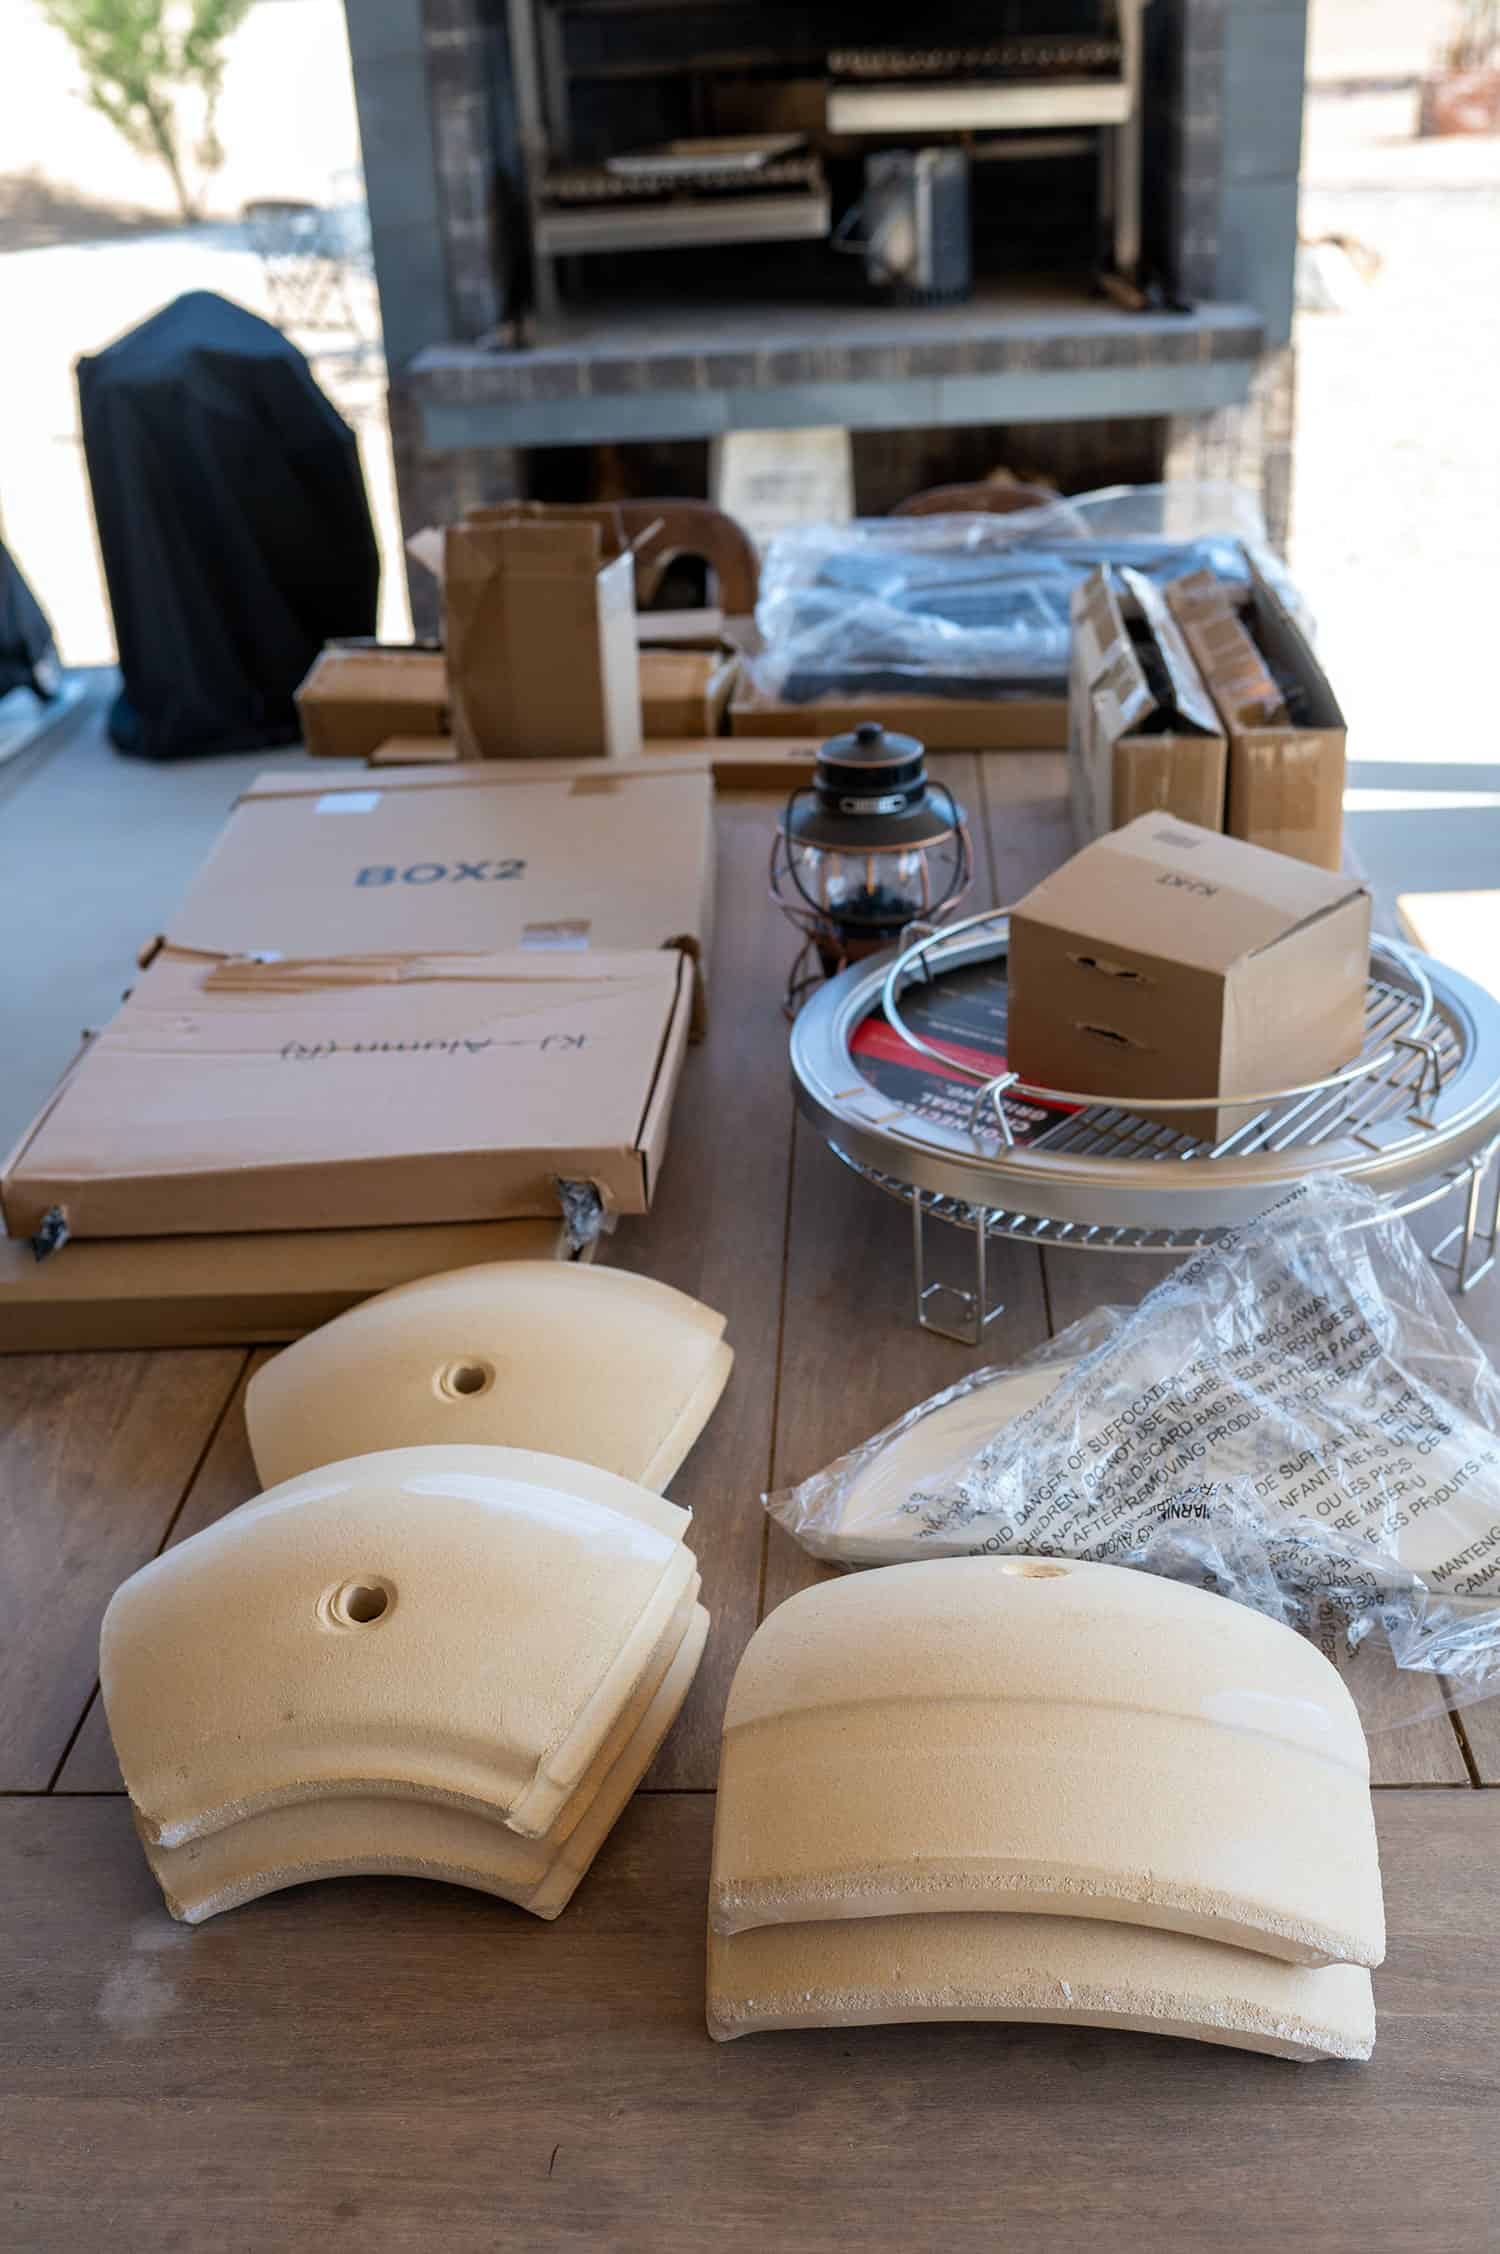
Konnected Joe assembly is easy-ish. It took me about 30 minutes to get all of the parts and pieces out of the box. On top of that, it should have only taken me 30 minutes to assemble the cart. But I got hung up on the legs because I was building it with a draft version of the manual.
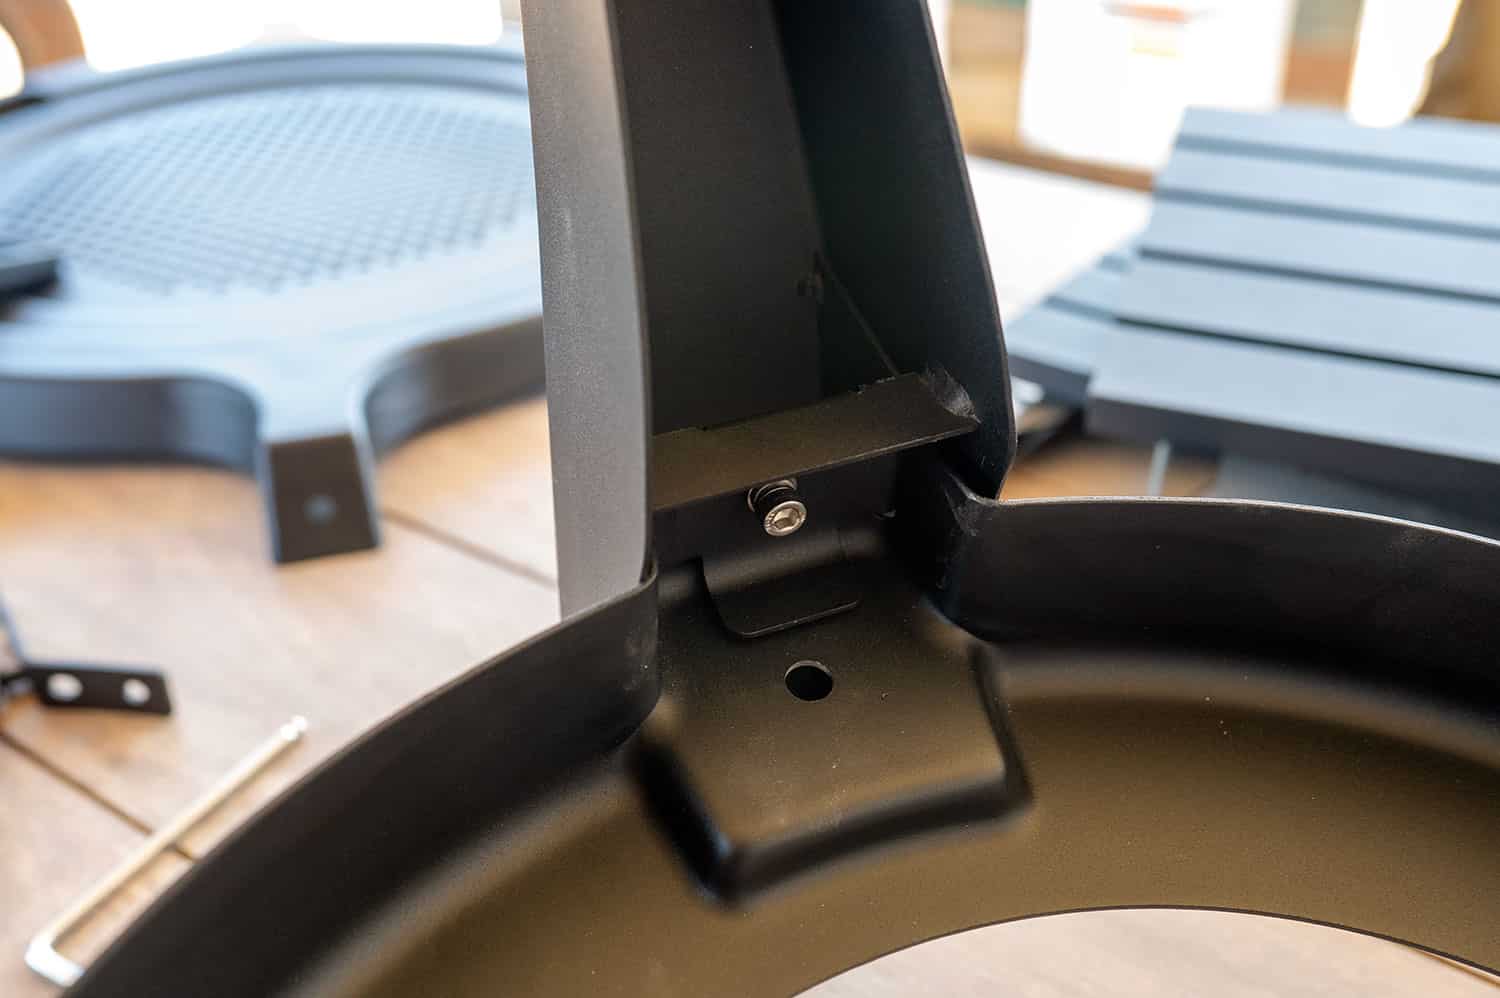
The key thing with the legs is that they attach to the ring in the middle. I was trying to screw them into the ring from the end, and they just wouldn’t stay in place. There is a metal slot that slides into the ring’s metal slot and then screws together and tightens with an included Allen wrench.
Once you attach the three legs, you add the bottom shelf with four more screws.
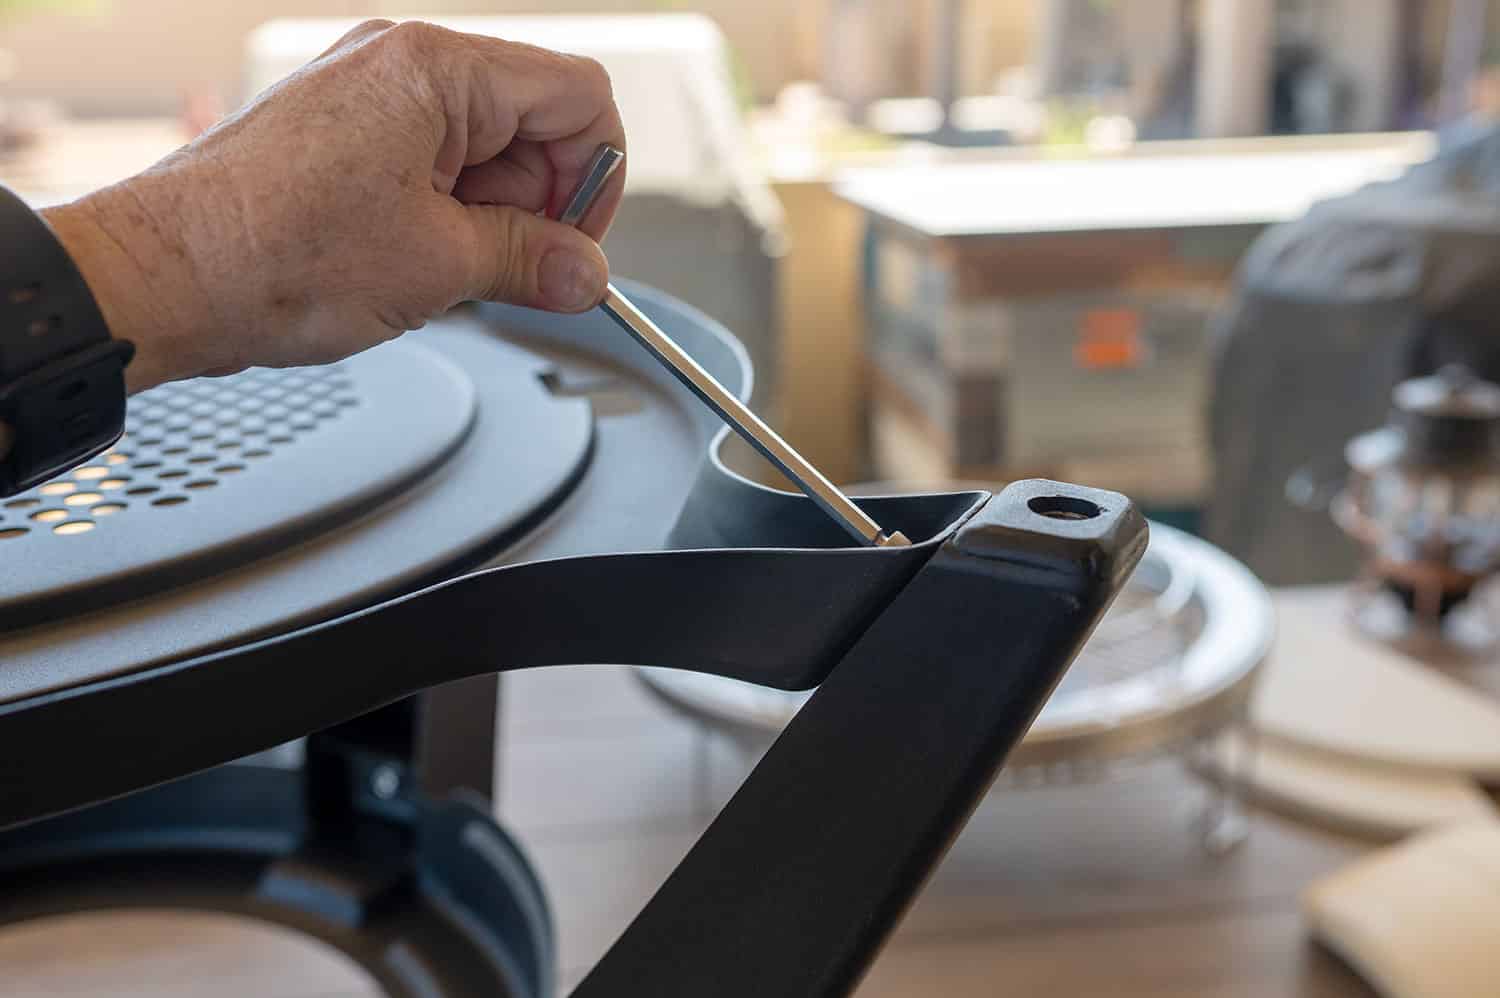
The manual I was using said to flip the cart over and add the wheels, but I found it easier to leave the stand upside down. Screw the wheels on with the included wrench and place the locking wheels on the side of the cart that says Kamado Joe.
I’m pretty picky about grill wheels and these pass the test. They are hard, rubberized wheels on casters that can stand up to any backyard.
Once the cart is fully assembled, flip it over, grab a friend and lift the grill onto the cart. It secures with four screws.
There are four side shelf brackets (two for each side). To install these, unscrew the nuts that are already on the grill. Slide the bracket over the screws and re-tighten the nuts.
The aluminum shelves slide right into these brackets. Make sure you install them so the hooks are facing forward. This way you can hang your grill tools on them.
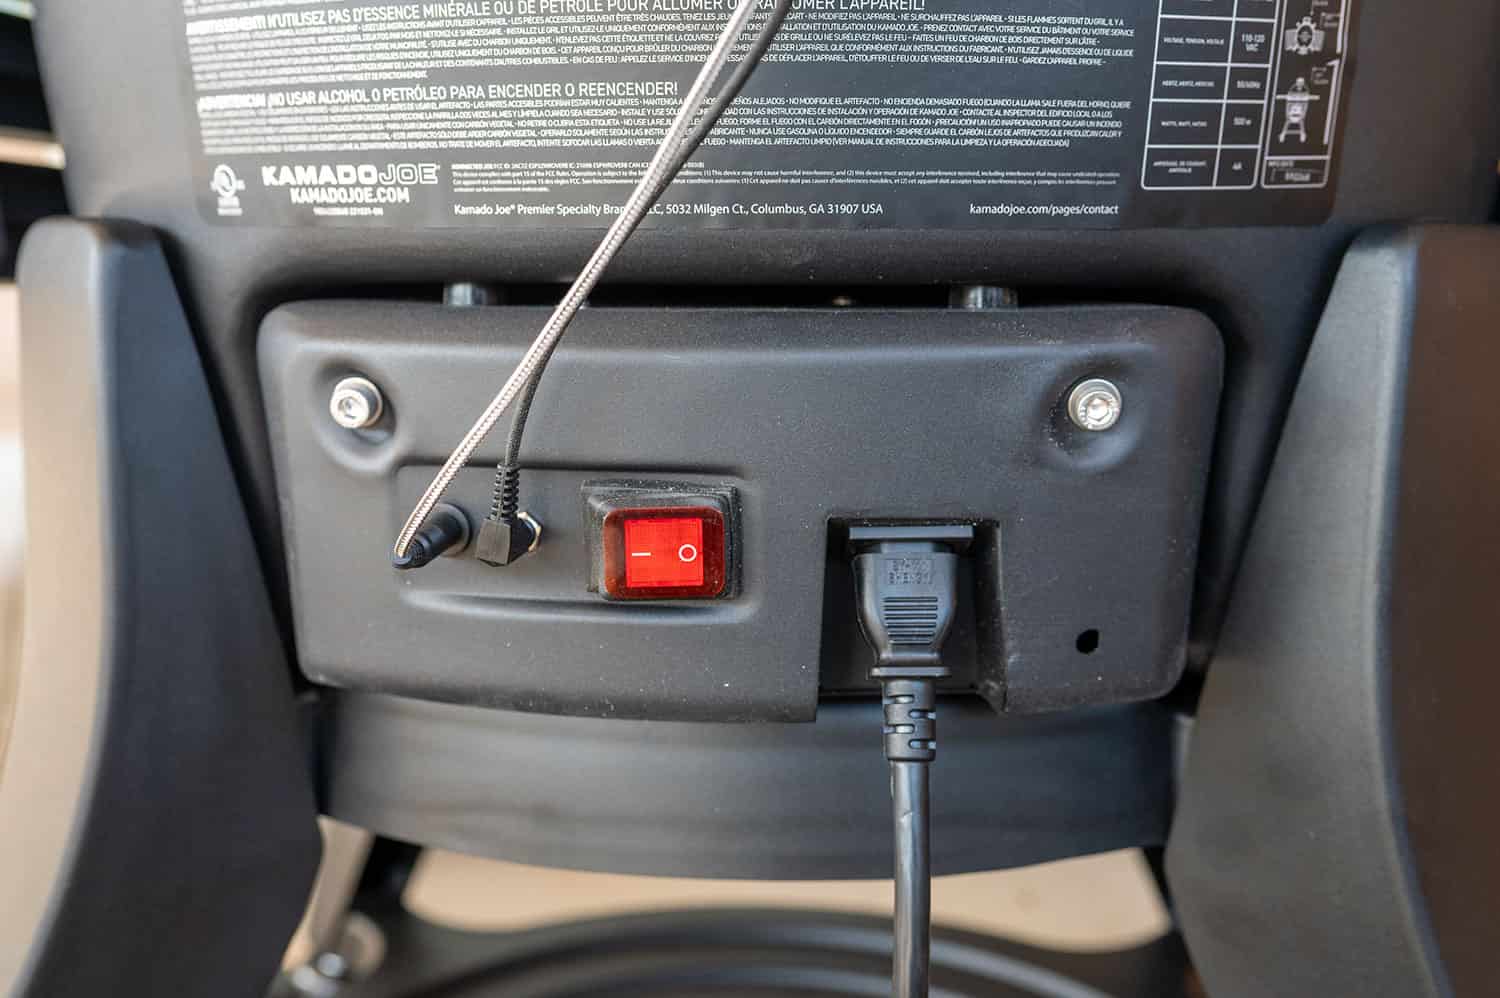
Last, add the vent to the top and the ash drawer to the bottom. Plug in the power cord and other wires on the back and you’re ready to turn the grill on and get cooking.
PRO TIP: The Konnected Joe has two power buttons. There is a primary button on the back and a secondary button on the front on the Kontrol board.
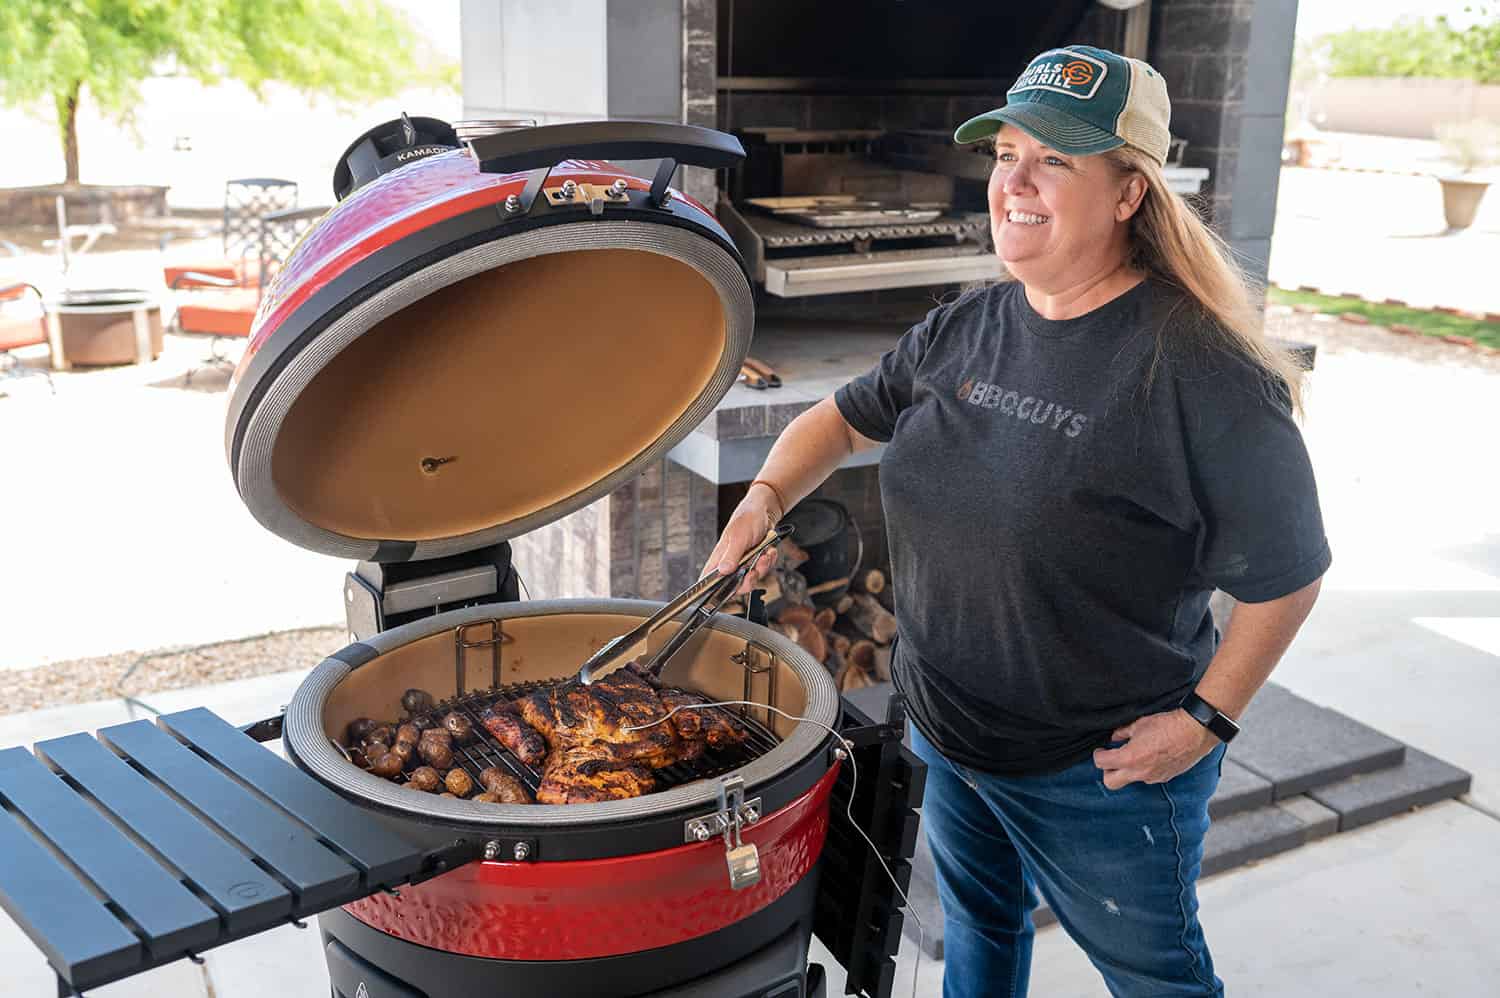
How to cook on the Konnected Joe
To cook on the Kamado Joe Konnected Joe either light lump charcoal or charcoal briquets using the automatic fire starter or manually with a long lighter and fire starters. Do not use lighter fluid! It will ruin the interior of your grill because it will soak into the ceramic.
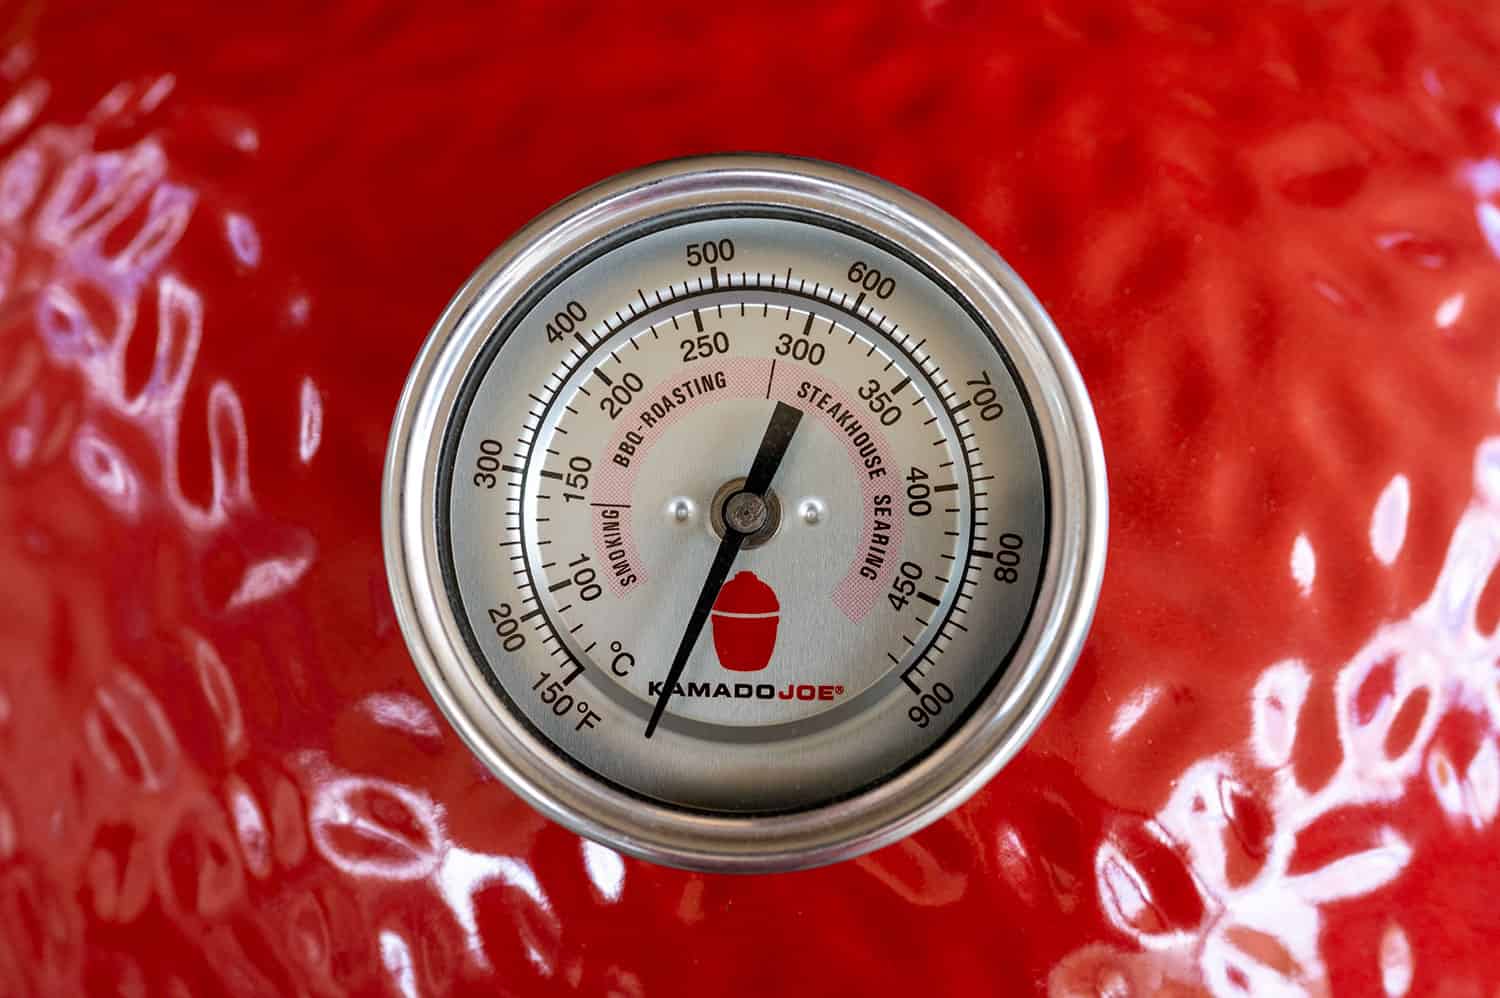
Set the temperature based on the grilling recipe that you’re following. You can do this manually just like any other ceramic smoker by adjusting the top and bottom vents and monitoring the in-dome analog temperature probe.
Or, you can close the bottom vent and set the temperature using the digital Kontrol board or the Kamdo Joe app.
PRO TIP: The temperature read outs on the analog and digital thermometers will not match exactly because they measure two different areas of the grill. They may fluctuate by 20 degrees or so. This shouldn't impact your grilling and smoking at all. Just shoot for the ideal range per the recipe.
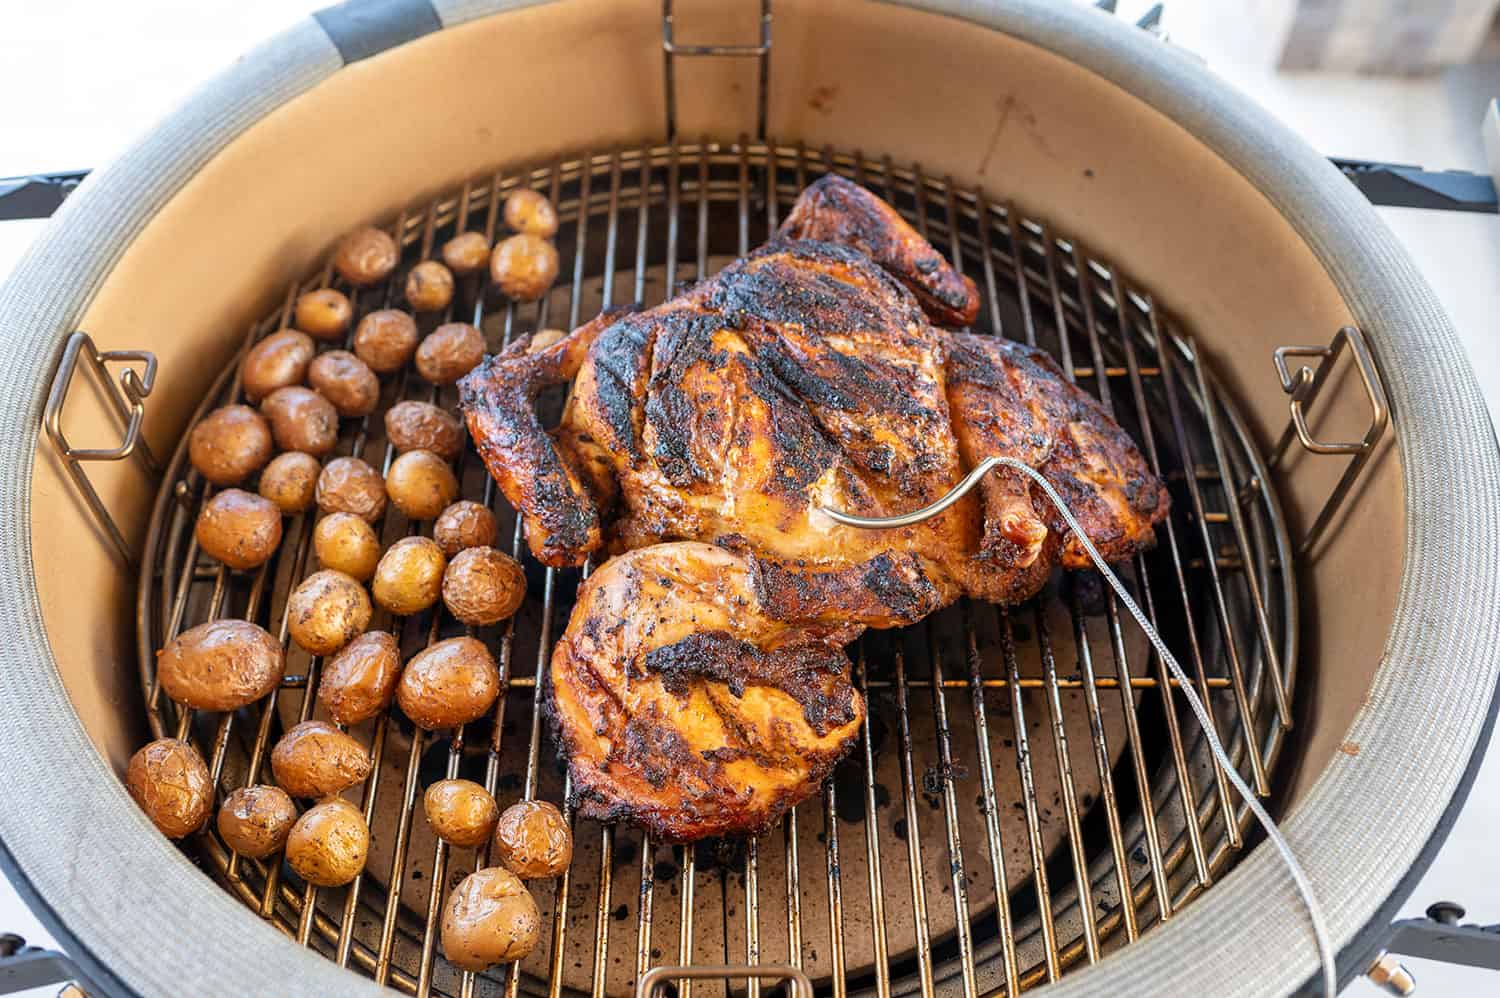
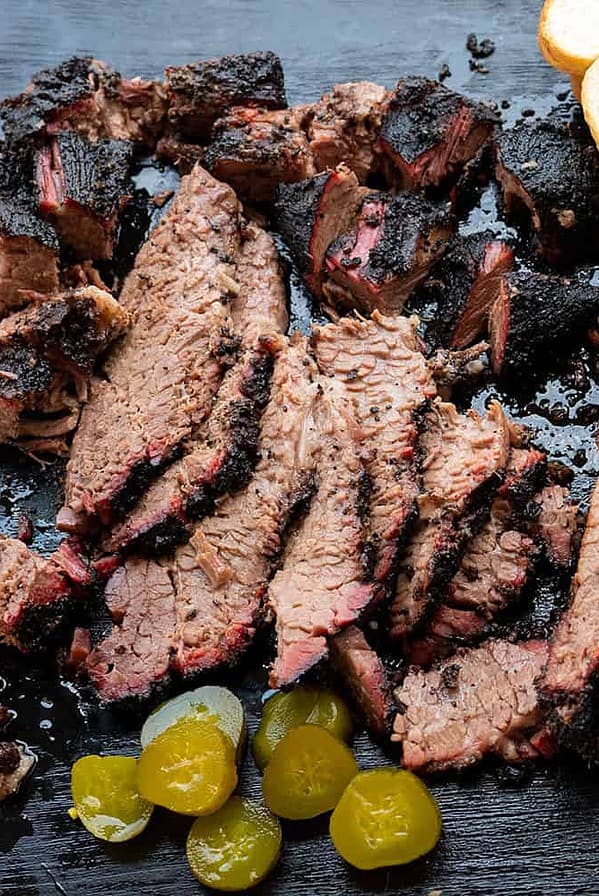
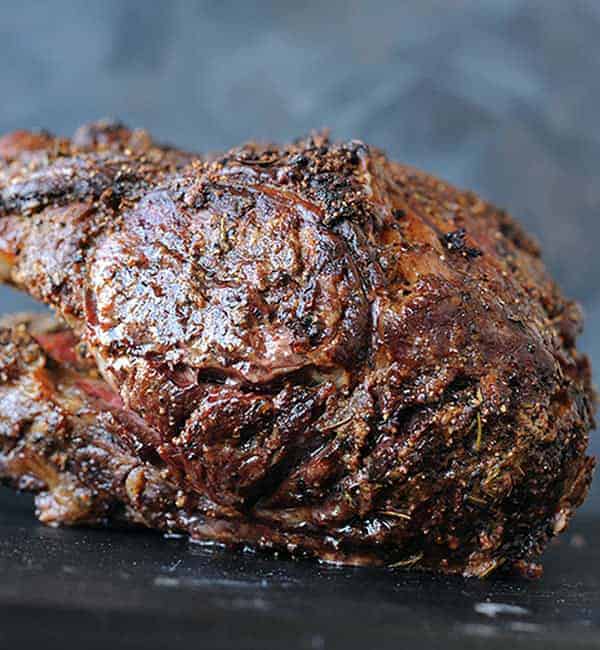
When cooking larger cuts of meat, the built in meat probes are great to use. Simply insert the connection into the bottom port and then insert the probe into the meat. You can set the desired temperature using the Kontrol Board or app.
If you’re not sure what temp you should cook the meat to, the app is super helpful. It allows you to select the protein and your desired doneness.
Cleaning
One of the biggest complaints I hear about charcoal grills is how dirty the clean up is. Well, it’s not with the Konnected Joe.
Once you’re done cooking, close the bottom vent and turn off the power (if you were using it). Once the temperature drops below 400 F degrees, close the top vent.

Then, once the ashes are completely extinguished and cool, open the lid, remove the grates and use the included ash tool to scrape small ashes down into the holes. Be gentle so you don’t beat up the heating element.
You can leave the big chunks in the grill and burn them again.
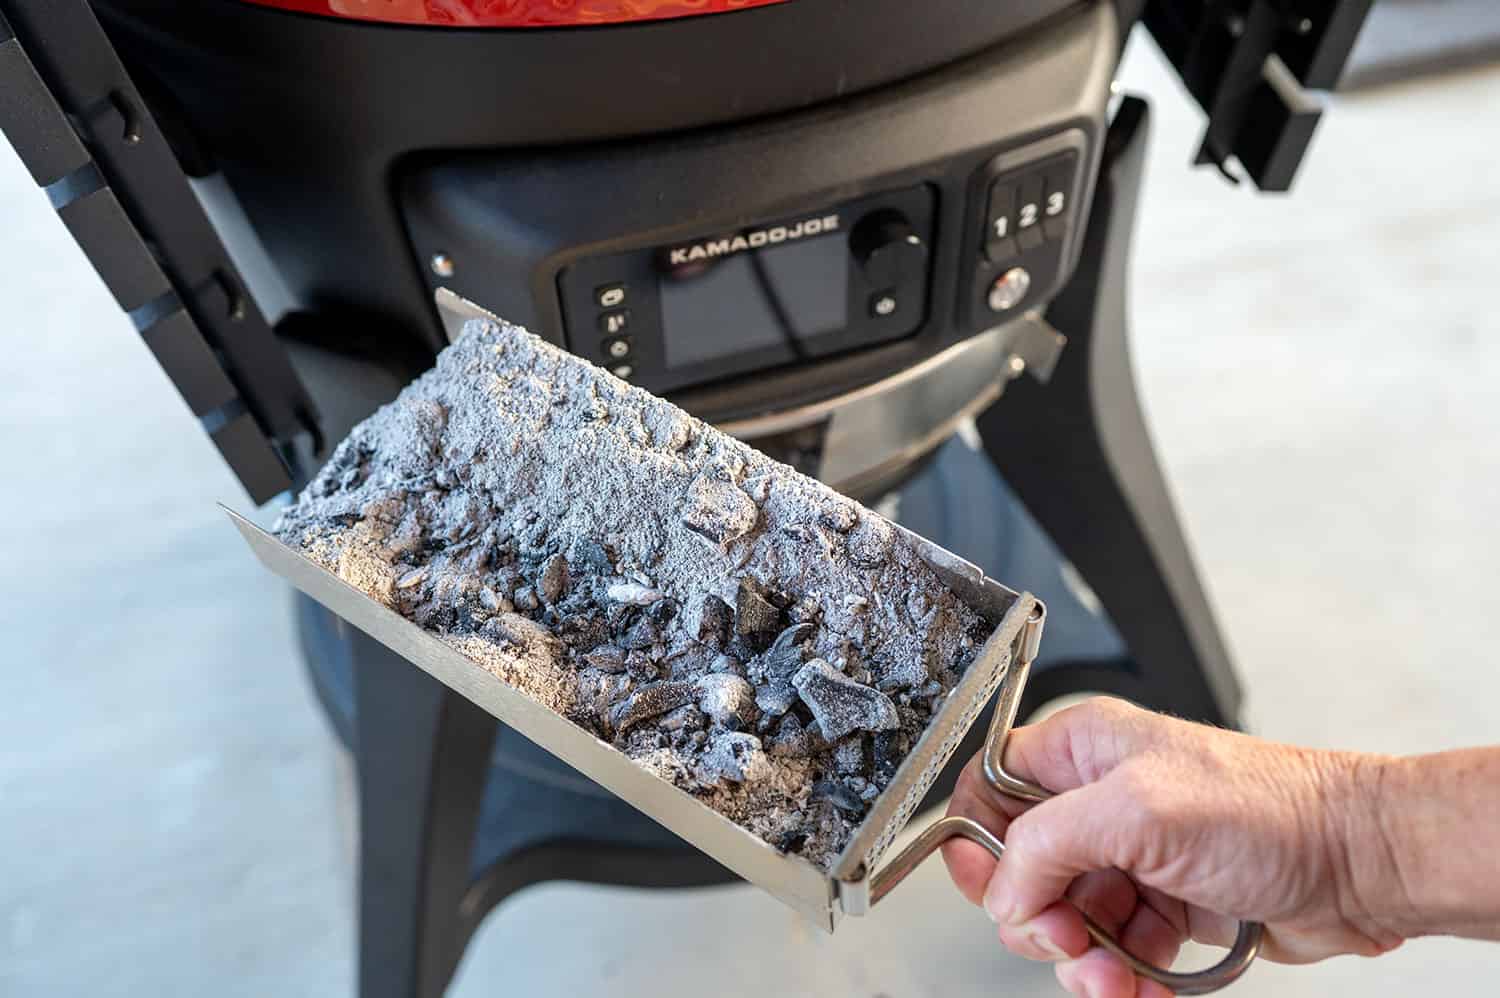
All of the ashes will collect in the bottom of the grill in the ash drawer. Simply open the bottom vent, pull out the drawer and toss the ashes. Honestly, this is easier than vacuuming a pellet grill.
Every few cooks, it’s good to look into the bottom vent to make sure there isn’t any build up that spilled over the drawer. If there is, just reach in with the ash tool and scrape it out.
Conclusion
I think by now you can tell from my Konnected Joe review that I’m really impressed with this grill. I’m happy with the construction. The heat regulation makes cooking on it super easy, and it’s charcoal, which is the barbecue flavor I prefer.
The only challenge that I faced when cooking on the grill was heat reduction, which is a challenge with every ceramic cooker.
If you get the grill to 400F degrees, it takes a while to reduce the heat down to 250F degrees, because the ceramic retains heat so well. If you need to cook at both temps, start with the foods that need to cook at 250F and then raise the heat for burgers and other quick-cooking foods.
Specifications
- Height: 48 inches
- Width: 47 inches with the shelves extended
- Depth: 30 inches
- Weight: 216 pounds
- Cooking Surface Diameter: 18 inches
- Fuel Source: Charcoal
- Temperature Range: 225-700F degrees
- Price: $1,699
- Warranty: Varies based on component
- Made in China
Frequently Asked Questions
The Kamado Joe Konnected Joe is priced just under $1,700, which is a large investment for a grill. If you like to grill or smoke regularly and you are looking for a smoker that will last several years, is easy to operate and provides the authentic flavor of charcoal, the Konnected Joe is a great choice.
No the Kamado Joe only comes in a bright candy red color.
I highly recommend covering all of your grills when they’re not in use. The Kamado Joe grill cover will prevent dust from collecting on the joints and will keep the exterior clean and shiny. The vinyl material also helps protect the grill from rain.