
Build an outdoor kitchen with these step-by-step installation instructions with video, photos and pro tips I learned from BBQGuys.com.
Disclosure BBQGuys.com compensated me for this review. Opinions are my own.

Save this BBQ Tip
Enter your email, and I’ll send this link directly to your inbox. Plus, you’ll get new BBQ recipes and tips weekly.
Table of Contents
If you haven’t purchased your outdoor kitchen frame kit and accessories yet, you should definitely hop over and read my post about how to design an outdoor kitchen. It breaks down what components you’ll need to buy, the types of finishes that work great outdoors and other info to help you plan the perfect outdoor space.
My outdoor kitchen includes a standalone Aspire by Hestan gas grill, two Grillnetics cabinets and the following Aspire by Hestan accessories: a cabinet, double drawers, paper towel holder and trash receptacle.
This post provides very in-depth details on how to build an outdoor kitchen once you have all of your components.
Let’s Assemble the BBQ Island
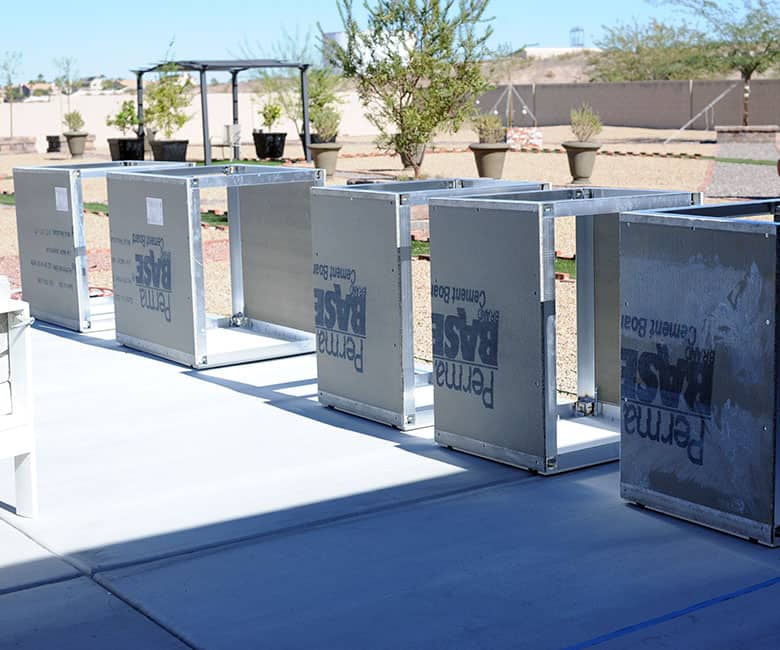
The foundation for my entire outdoor kitchen starts with my Grillnetics base cabinets from BBQGuys.com. I have three 24″ cabinets, two 36″ cabinets and two end cladding kits to finish off the sides.
UPDATE: The Grillnetics brand is no longer available, but BBQ Guys has similar products from other companies.
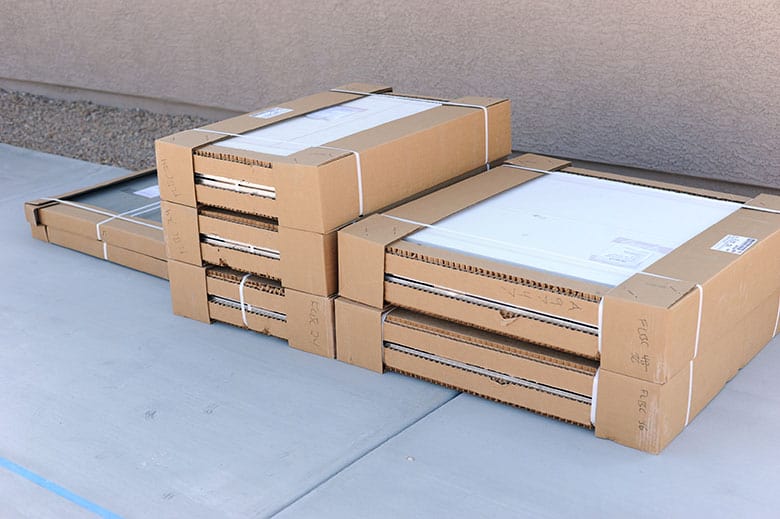
The kits were shipped directly to my home in flat boxes.
Within each box, there are two sides made of PermaBase cement board (which is moisture and mold resistant), a bottom magboard floor panel, four strong aluminum connecting struts, four full vertical adjustable rails (FVARs), two horizontal adjustable rails (HARs), screws, bolts, washers, leveling feet, adhesive and a T25 drill bit.
To complete assembly, you’ll need a 9/16″ wrench, a power drill or driver with 5/16″ and 1/4″ hex bits, an angle grinder, measuring tape, caulk gun, leveler and goggles and gloves for safety. It doesn’t hurt to have a helper, too.
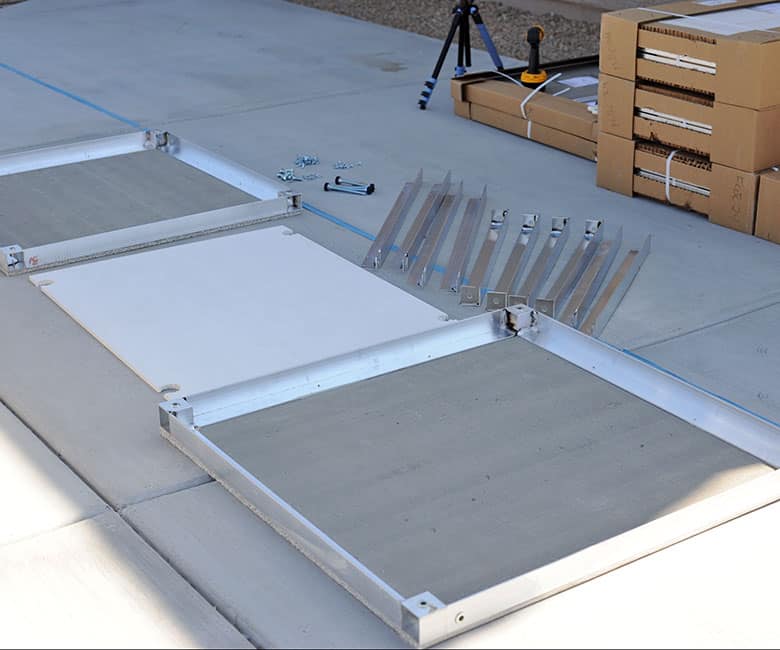
Connect the Sides
To build your outdoor kitchen, start by installing the four metal struts that connect the two cement board sides to each other.
Be sure to pay attention to each side panel. One end has two holes where the adjustable feet will screw in. You want these ends to match up, so the feet are all on the same side.
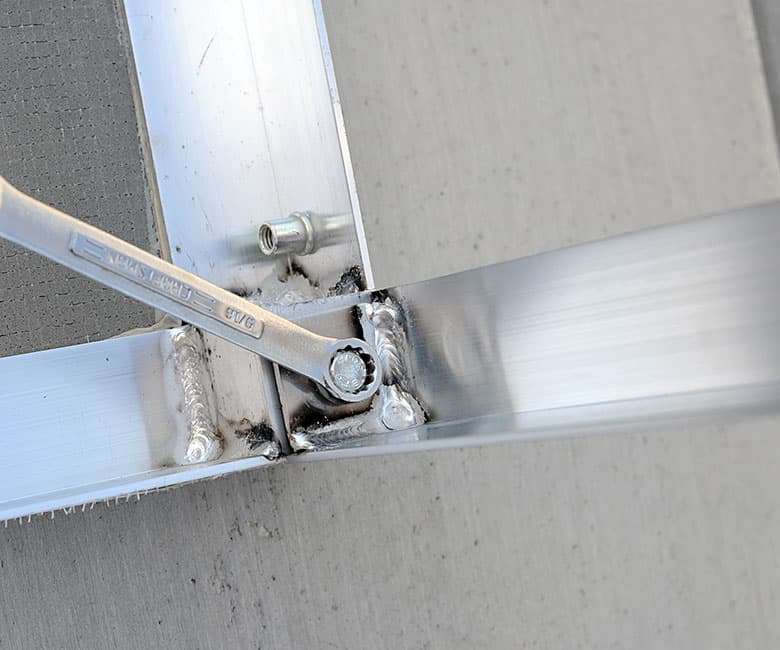
Hold one of the struts onto to a corner, and screw in a provided bolt using a 9/16″ wrench.
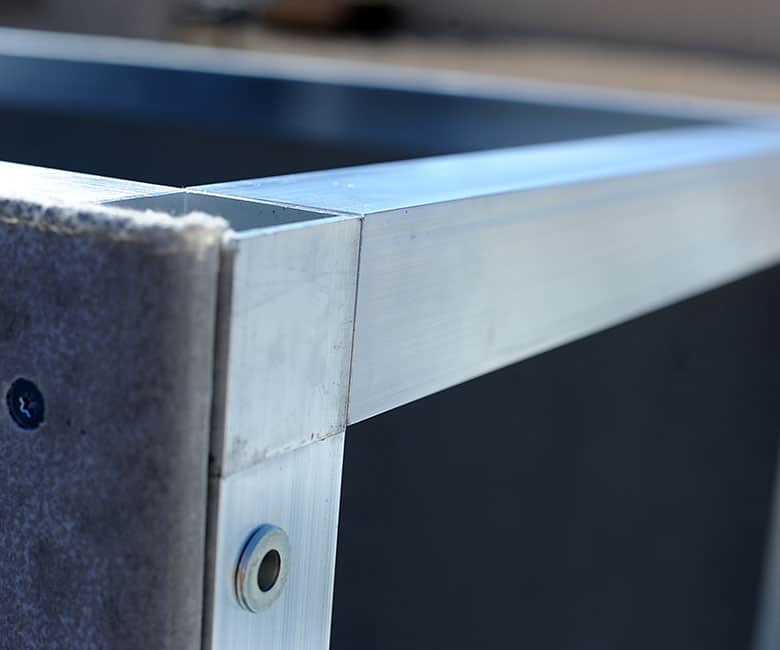
As you tighten the bolts, make sure that the metal edges are flush. This will be important when it comes time to connect different bases together.
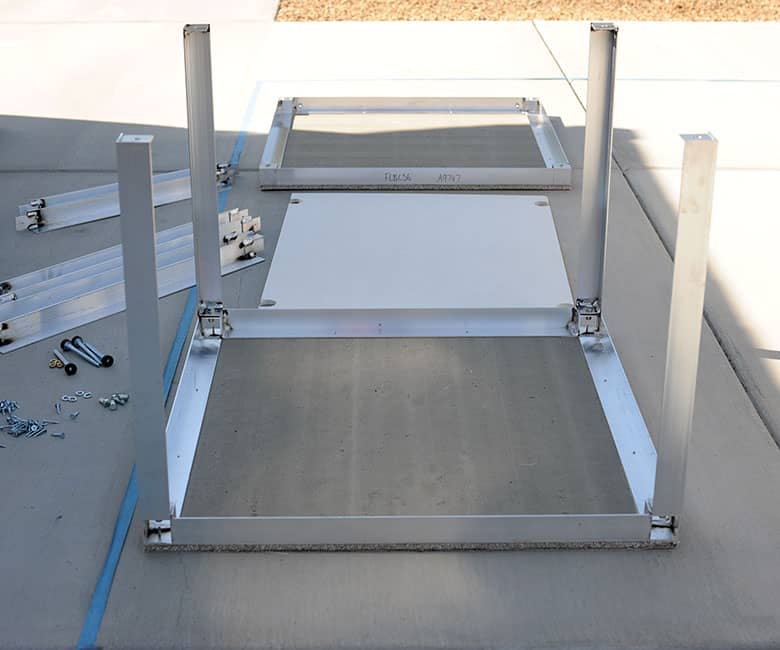
Once you get all four struts attached to one side, you can attach the other side, following the same technique.
Add the Floor Panel
Once the two sides are solid, flip the cabinet so the bottom is facing up, and screw in the adjustable feet.
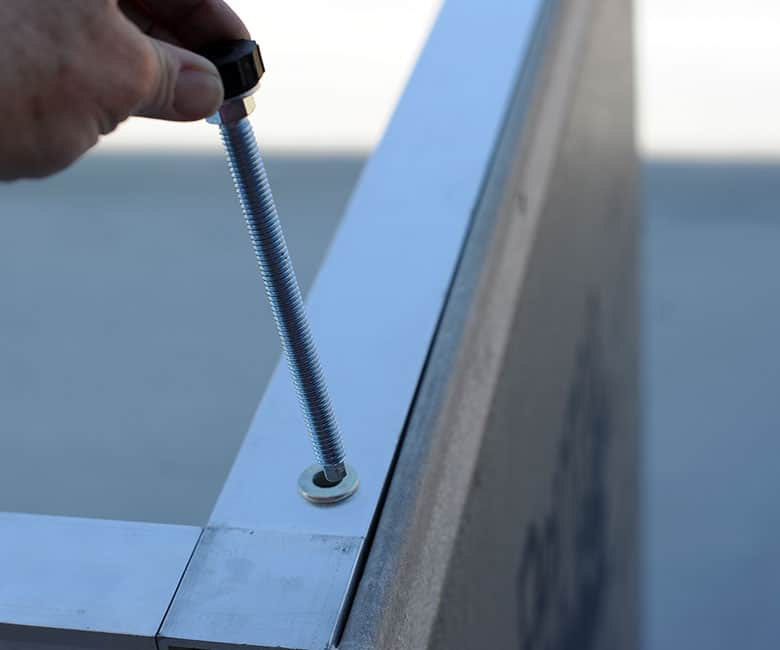
You’ll see they are really long. You can screw them in by hand, but you can also get inside underneath the feet and use a drill with a hex bit. That method goes a lot faster.
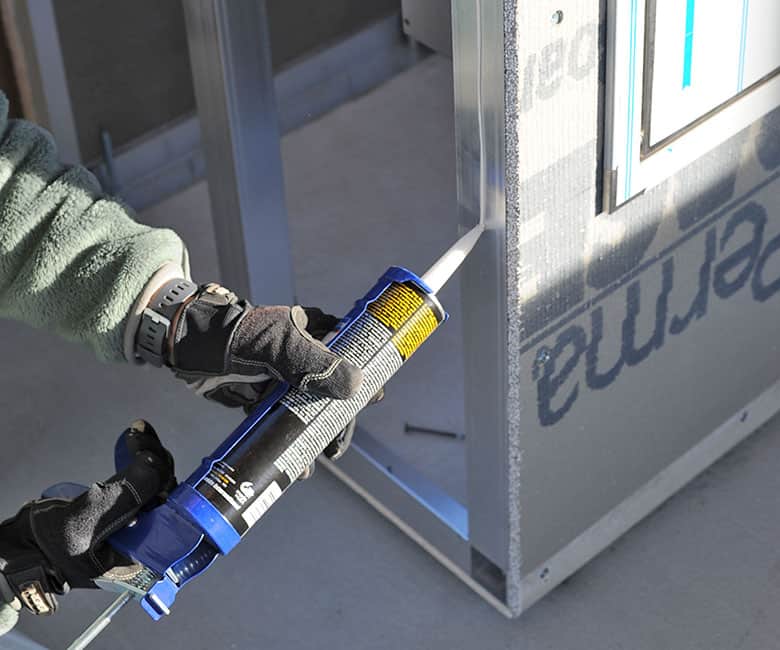
Place the construction adhesive into a caulk gun. Snip off the end of the tip with some scissors.
When using a caulk gun, I find it’s handy to keep a nail nearby to plug into the tip of the adhesive in between uses. This keeps the adhesive from oozing out.
Pipe the adhesive along the inner edge of the bottom rail on all four sides. Be careful not to get any onto the feet.
Place the floor panel board onto the frame with the smooth side out and press down slightly where you applied adhesive. You’ll notice the floor panel has cutouts for the feet, so it’s pretty evident how it goes.
Then, secure the floor panel, using the provided screws. Add one screw to each corner and two to three to each side.
Now you can flip the cabinet over. Be mindful that although the floor panel is strong, it’s not meant to hold a lot of weight, so don’t stand inside of it.
Repeat these two steps with all of your base cabinets. Adjust the feet, so they’re kind of level, but they don’t need to be spot on yet.
At this point, move things around your patio to make sure what you designed on paper makes sense in-person.
We were going to build an outdoor kitchen with two 36″ cabinets on the left and three 24″ cabinets on the right. But once we thought more about the accessories and how I wanted my outdoor kitchen to flow, we adjusted the layout.
Add the Outdoor Kitchen Accessories
Now that you know how your bases will be arranged, it’s time to add the outdoor kitchen accessories. The 19″ wide accessories will go into the 24″ bases and the 30″ wide accessories will go into the 36″ base. The folks at BBQGuys.com helped me figure all of that out when they helped me design my outdoor kitchen.
To add the accessories, you’ll need to cut a rectangle in the cement board. Ultimately, each accessory will slide inside that hole and will be secured with the aluminum vertical and horizontal bars that we’ll install later.
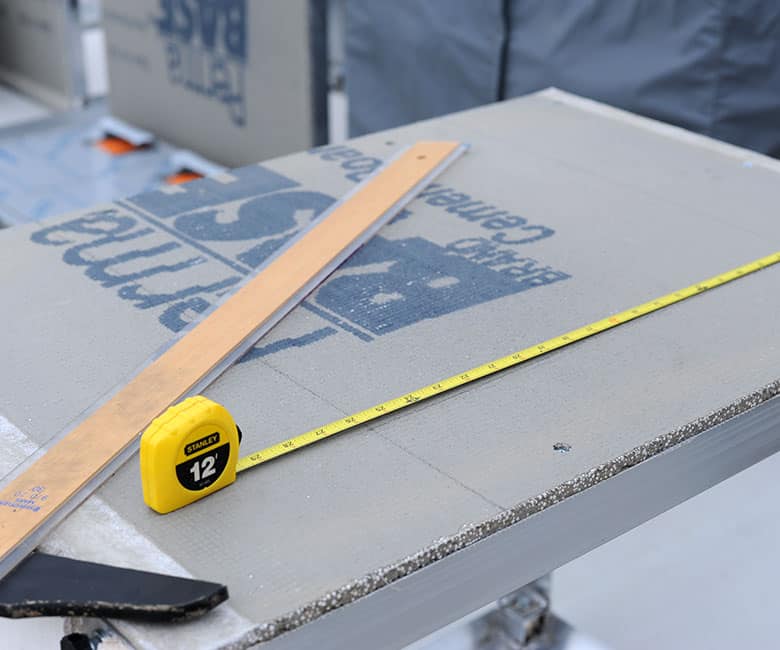
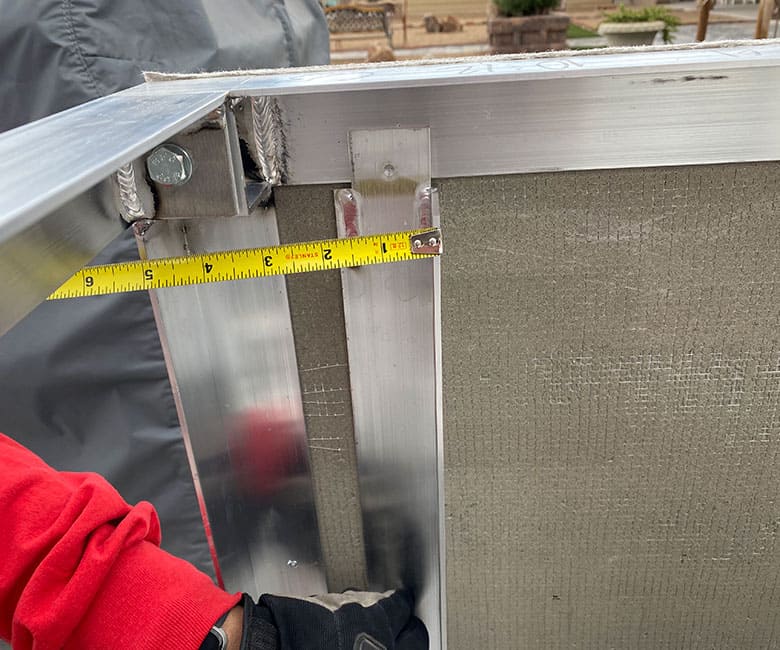
Your accessories will likely come with installation instructions that identify what the hole dimensions will need to be. Do yourself a favor, look at those instructions, but also double, triple check your measurements before cutting a hole.
You could simply center the accessory from side to side and top to bottom, but I recommend choosing your side finishing first. If you’re using tile or stacked stone, place the tile on the side and see where the edge lines up.
Then consider cutting your opening near that point. Otherwise, you’ll have the troublesome task of having to slice a tile in half horizontally.
If you’re finishing with stucco, you won’t have that concern, but you should visualize where you’d like the handles to be. Also, you may want all of your accessories to align at the top.
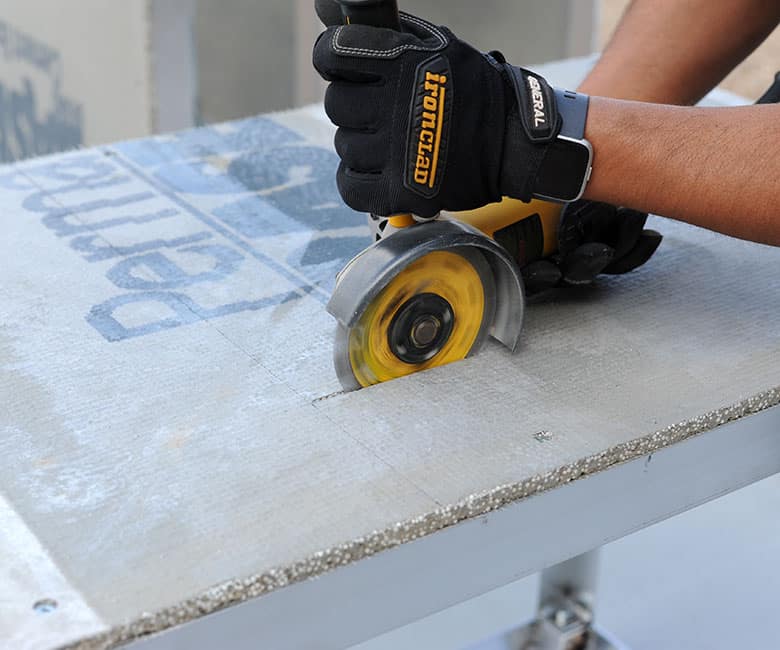
Once you’re certain your measurement is right, fire up the angle grinder and cut the opening. It helps to have someone else to assist to catch the board as it falls through.
Slide your accessory into the opening, just to make sure it fits. Then, take it out and stand the base upright.
Secure the Outdoor Kitchen Accessories
What’s cool about these BBQGuys.com and Grillnetics frame kits is that they’re completely adaptable to any type of outdoor kitchen accessory. This next step is what makes that possible.
It’s now time to install four full vertical rails – two on the inside front and two on the inside back. The two in the front will line up with the opening. Tap a screw into the top and bottom.
For the back rails, you don’t have a hole to go by, so measure where you installed the front rails and mirror that distance on the back side. Again, tap in a screw on the top and bottom.
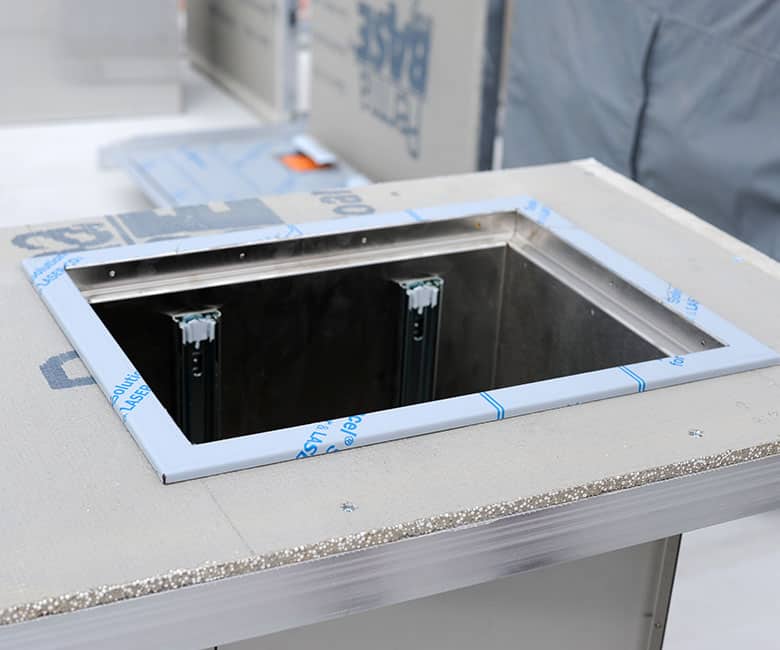
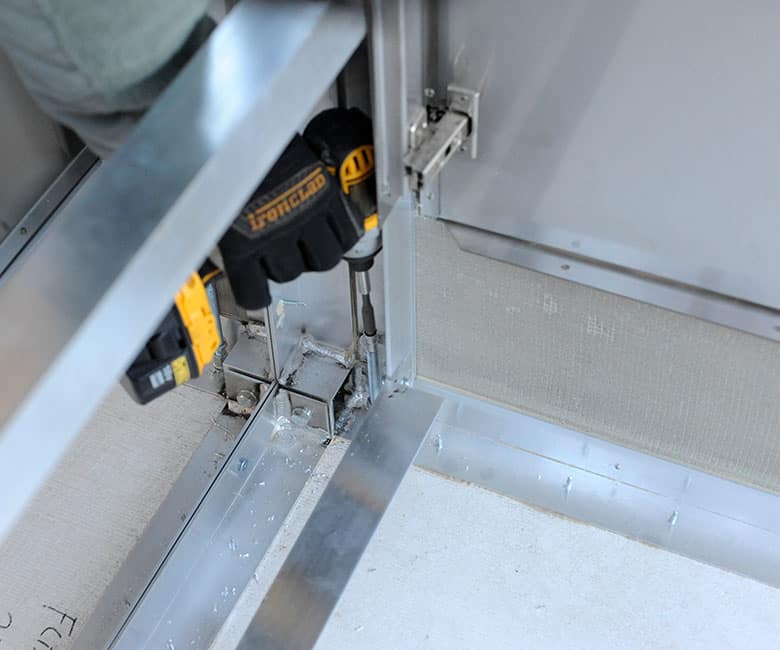
These four rails now provide a framework for installing the horizontal rails. These are the rails that the accessory will rest on and attach to.
Align one rail so the frame runs flush with the bottom of the cutout. Make sure it’s level. Then, tap in one screw to the front vertical rail and one to the rear vertical rail. Repeat with the other side.
Not all accessories will need horizontal and rear vertical rails. They’re only needed for larger, heavier pieces like drawers. Cabinet doors are flat and attach to the front of the base, so you’ll only need to install the front vertical rails for those.
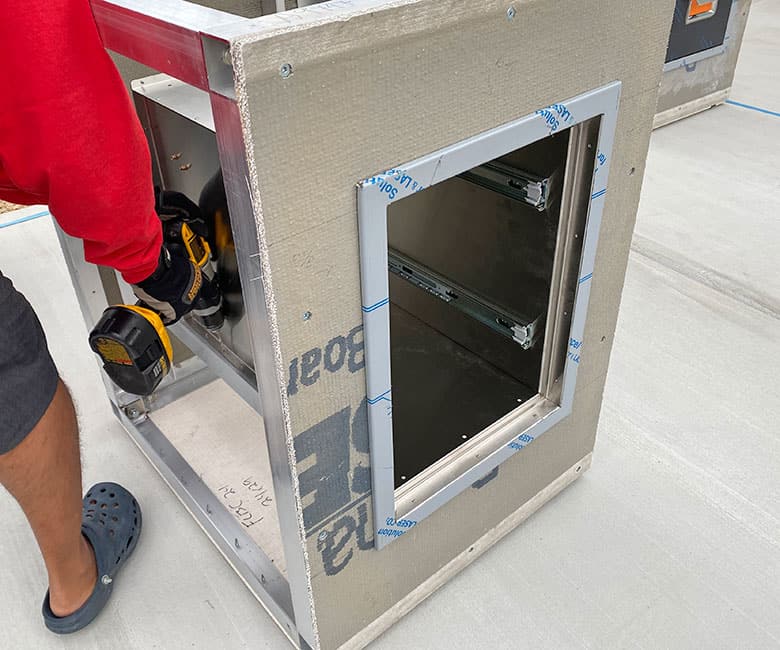
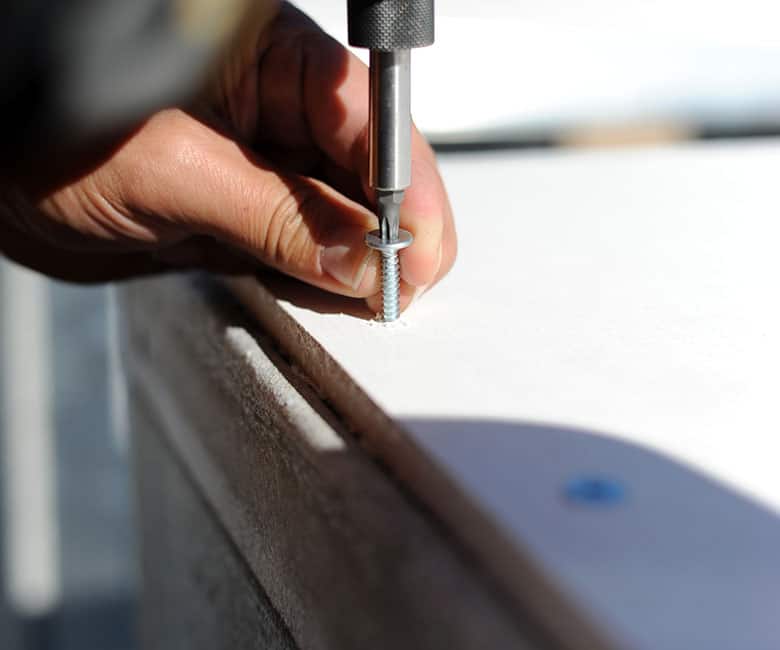
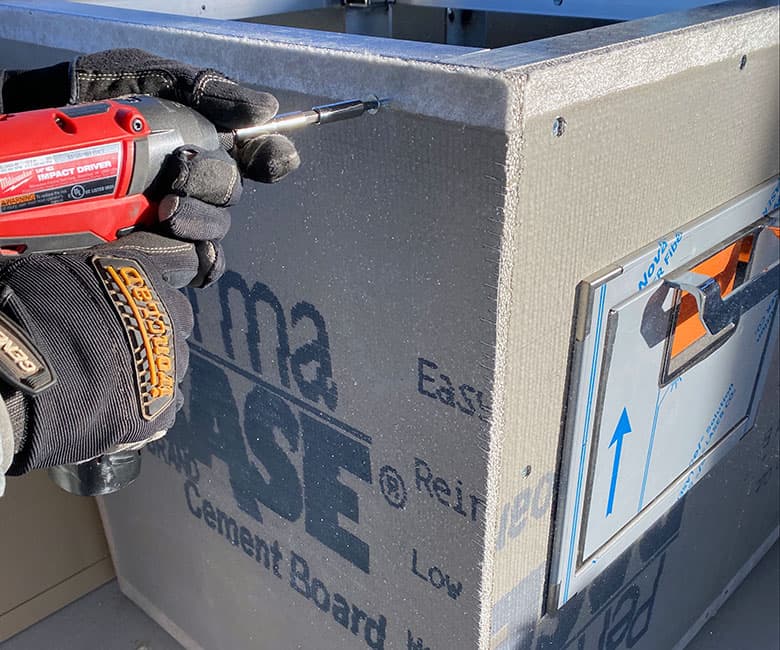
Next, slide your accessory back in and secure it to the horizontal rail with more screws. I recommend keeping the protective film on the accessories until the final step, so you don’t accidentally scratch the stainless steel.
Although the cabinets come with self-tapping screws, you may want to drill a small pilot hole for this step, because you’re piercing through the cabinet metal and the metal frame.
Continue adding in all of your accessories to each base cabinet, following the steps above.
Connect the Bases
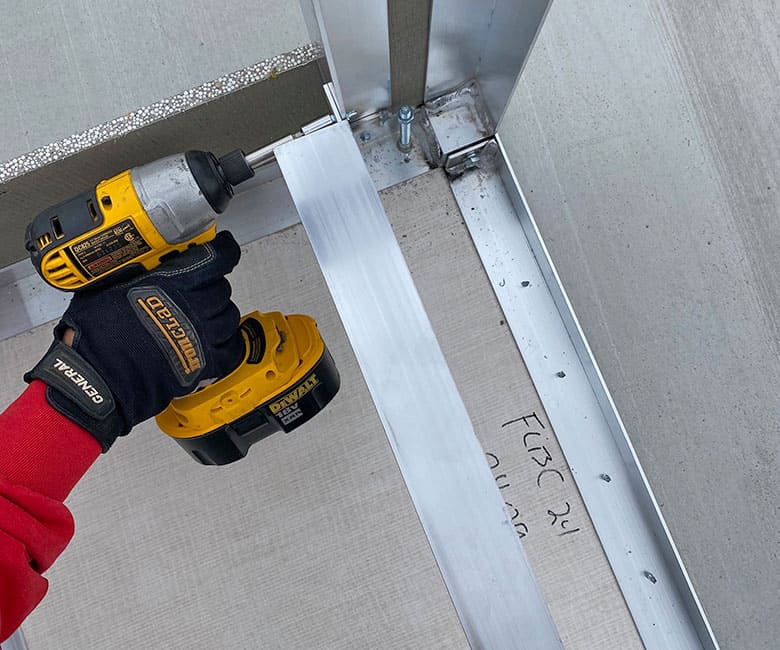
Once all of your accessories are installed, it’s time to bring the outdoor kitchen together. Place the bases next to each other where they will be installed on your patio.
Make sure the front and back are flush and level the feet. You may want to use a bit extension with your drill, so you can reach down inside better.
Work your body inside the cabinets (being careful not to put your weight on the base board), and screw the cabinets together along the top and bottom rails.
Install the Sides
The Grillnetics End Cladding Kit comes with two vertical rails and two more cement boards.

Place the vertical rail on the inside center edge of the cabinet, and secure it with a screw on the top and the bottom.
Mark a spot on the top of the frame or on the patio, so you know exactly where you installed this rail. That will make the next step easier.
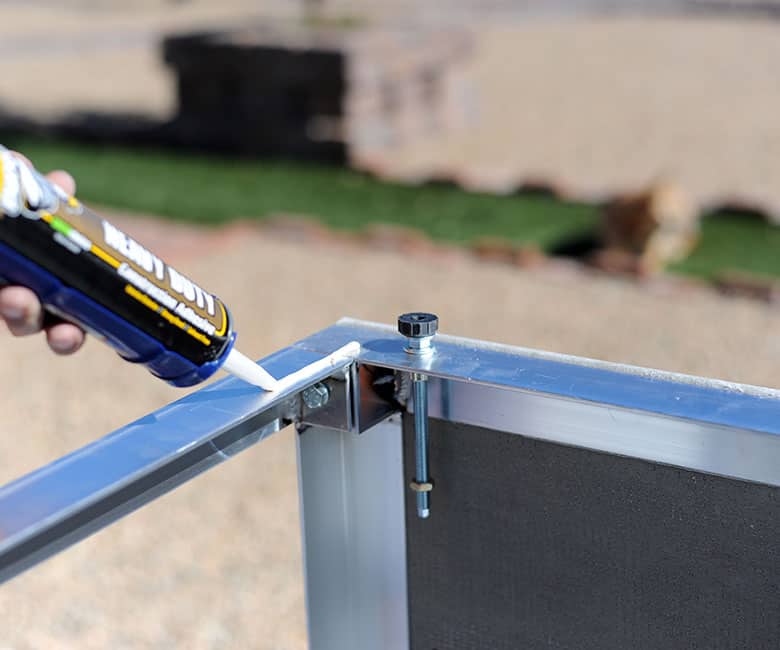
Use the same adhesive you used for the base and pipe a strip along the four edges and vertical rail.
Press the side against the frame and make sure the front and top edge are flush.
Tap in screws all around the frame and along the vertical rail to secure it. Since you marked where that rail was installed earlier, it’ll be easier to hit your target.
Install the Counter
My post on designing your outdoor kitchen goes over which counters are best for outdoor use. I chose Dekton, which is super durable and fade and scratch resistant.
Before adding the counter, give everything one final look over. Once the counter is installed, you will only be able to access the bases with cabinet doors. The inside of the bases with drawers will be inaccessible.
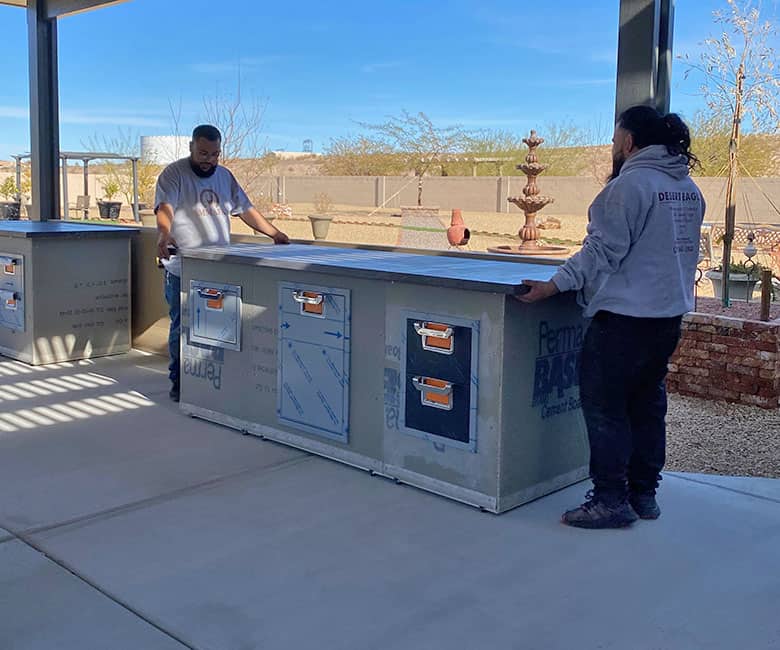
You’ll need a slab that is cut to the proper dimensions, allowing for overhang. I had a professional installer come out to install mine.
They measured everything after the cabinets were put together. Then, they cut the Dekton to the exact dimensions and fabricated the edging I selected.
When you build an outdoor kitchen, you’ll need to keep this phase in mind when planning your timeframe. From the time the installer measures your countertop needs to the time of installation may take a couple of weeks.
At first, the installers told me I was going to need to add a layer of cement board on top of the aluminum frame. They said the Dekton couldn’t be installed directly on the metal. So I called Grillnetics directly. They advised me that Dekton CAN be installed straight to the frame using Sika Tack®. Once I shared that info with the installer, we were good to go. No extra cement board was needed.
On installation day, the installers just piped a bit of that adhesive around the edges and placed the counter right on top.
Add Your Side Finishes
Now you can buy your tile, stacked stone or other side finishes. I recommend checking out the BBQGuys.com post that discusses pros and cons about different materials.
Since our grill is a standalone grill and there are no heat elements in my island, I went with wood.
To see how much material you’ll need, measure the square footage of the sides of the base and subtract the square footage of the accessories.
Then, look at the actual style of finishing that you’re using. You’ll likely want to purchase 10% more than the final square footage number to account for cuts and corners.
If the backside will be against a wall, there is no need to add finishing to that side. Instead, Grillnetics recommended just adding a coat of exterior paint for added protection.
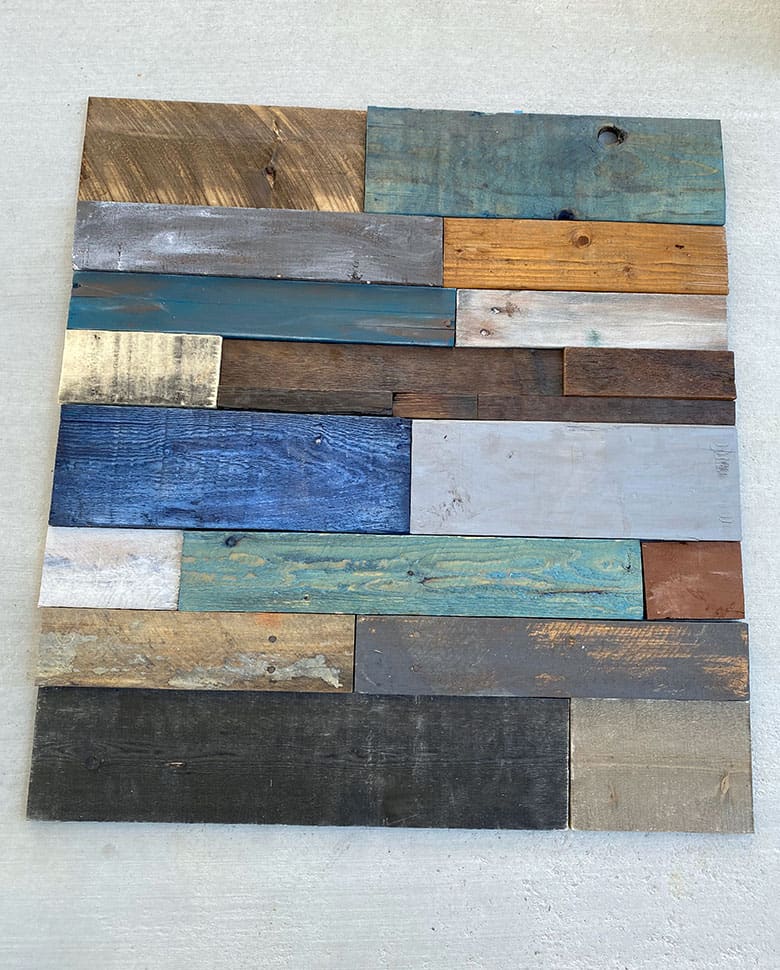
We chose to cut down pallets and paint the pieces a bunch of colors. It’s lighter than tile and stacked stone, and it’s way easier to cut.
Instead of just cutting a piece and installing it directly to the cabinet, we built each entire side on the ground. This allowed us to vary the dimensions and colors.
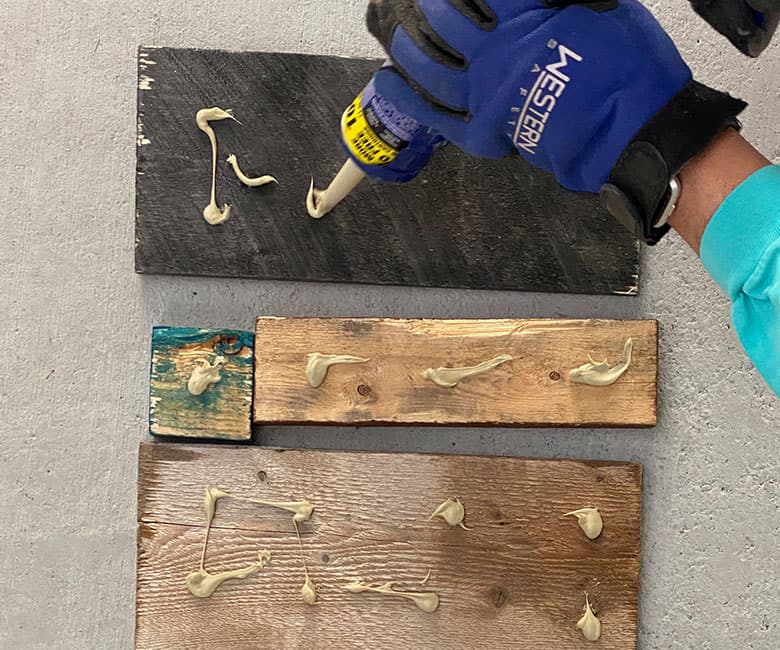
We added a bit of liquid nails to the backside of each piece.

And then secured them permanently with a finishing nail gun.
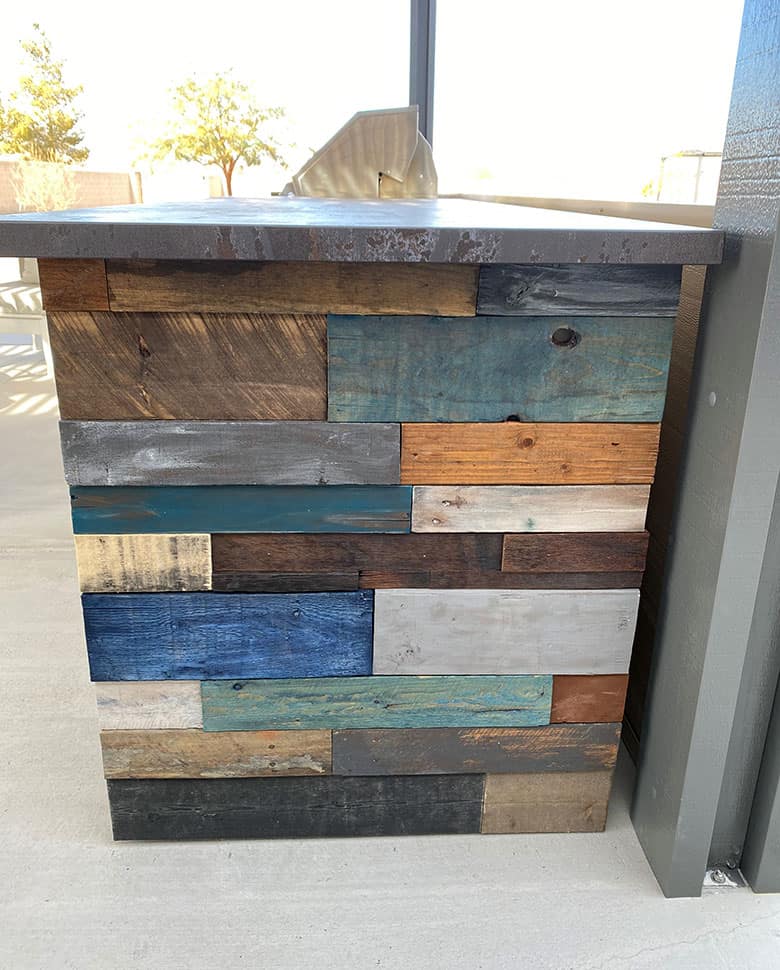
After one side was done, we finished the other side and then started working on the front.
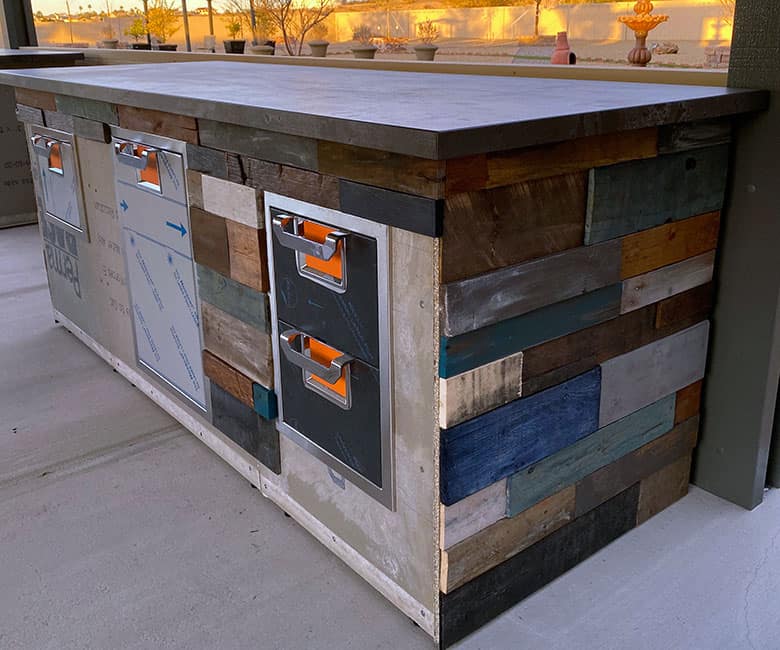
This side is a little trickier, because you have to work around the accessories. But if you follow the same plan and lay everything out in advance, you’ll do great.
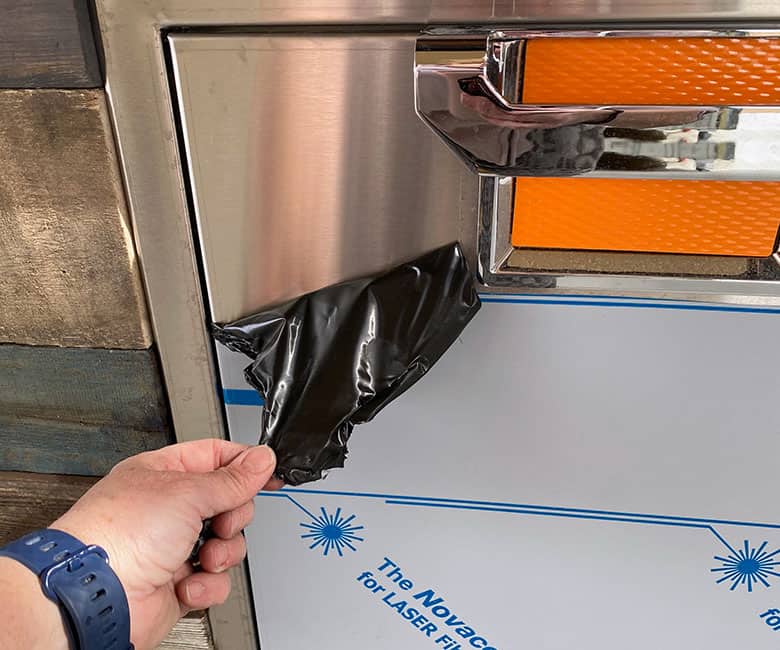
Once the finishing is done, you’ll have the joy of pulling the protective coating off of the appliances.
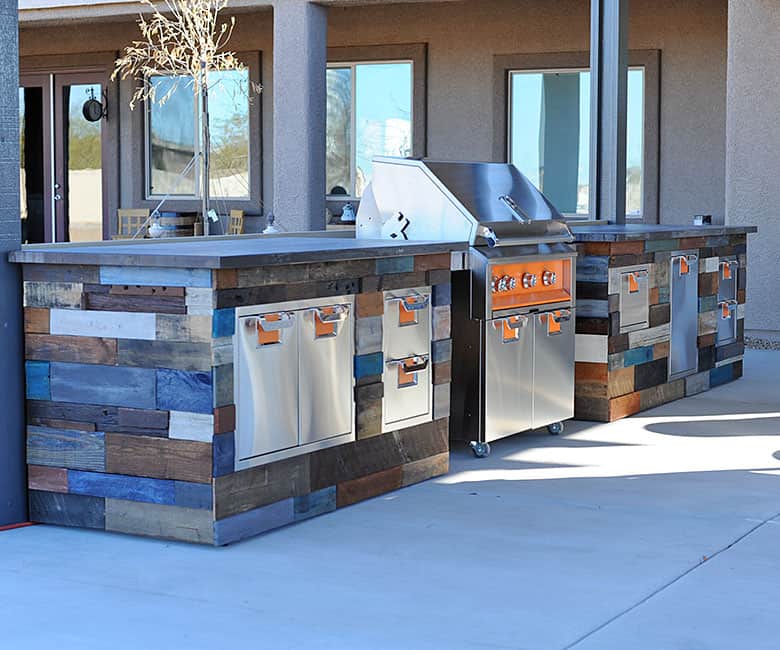
Then, just slide your grill in place and enjoy your new outdoor kitchen.
For details on all the materials I used to build this outdoor kitchen, visit my post on how to design an outdoor kitchen.
SAVE 5% ON HESTAN ASPIRE PRODUCTS AT BBQGUYS.COM


Wow this really did turn out great! I love the mix/match rustic/ repurpose feel of the wood. And its so simple, any beginner should be able to transform their backyard with this type of system. Also love that its a roll around cart so in the future you are not completely tied down to particular dimensions when it comes time to replace the grill or if you upgrade to something larger. or different style.