Assembling the Ninja Woodfire Grill is really easy. Here’s how to put everything together so you can start grilling in less than 30 minutes.
Save this BBQ Tip
Enter your email, and I’ll send this link directly to your inbox. Plus, you’ll get new BBQ recipes and tips weekly.
Table of Contents
What’s Included & Assembly
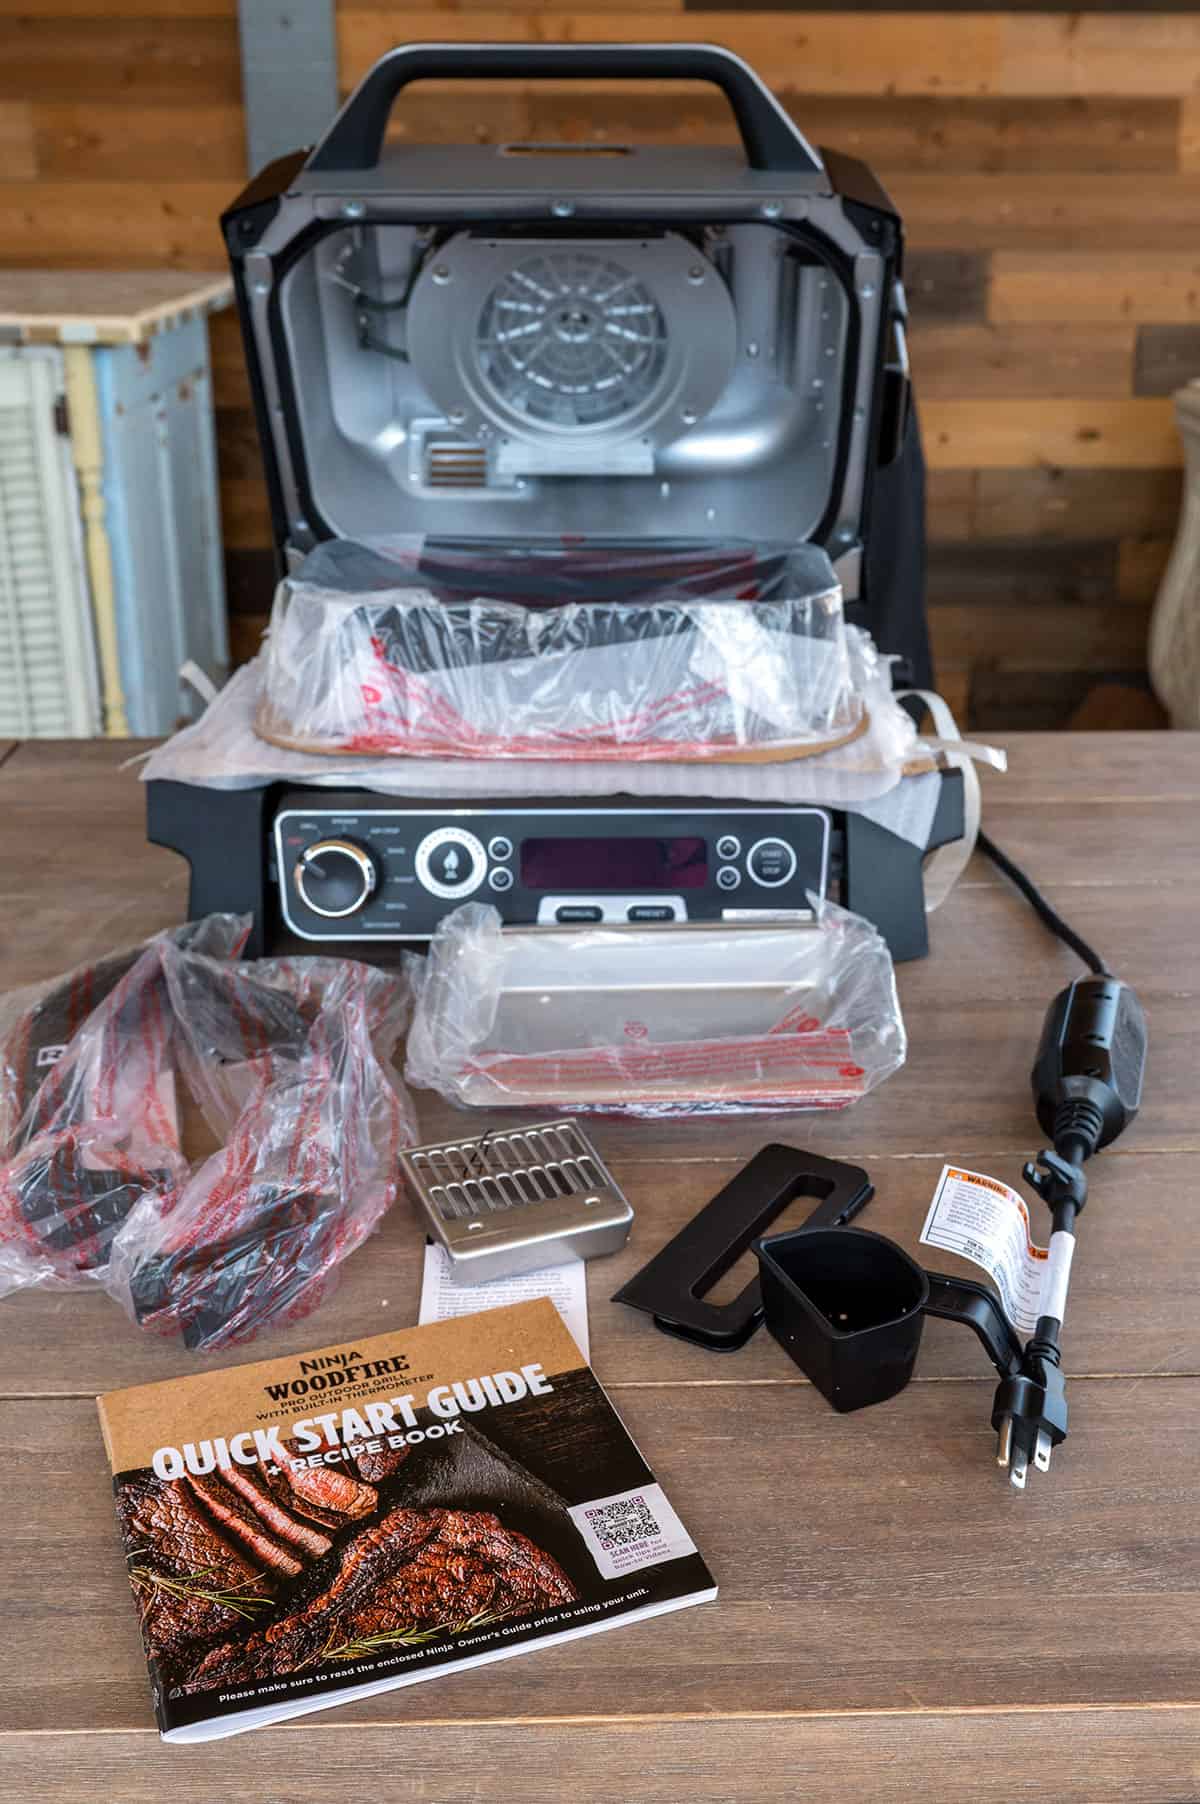
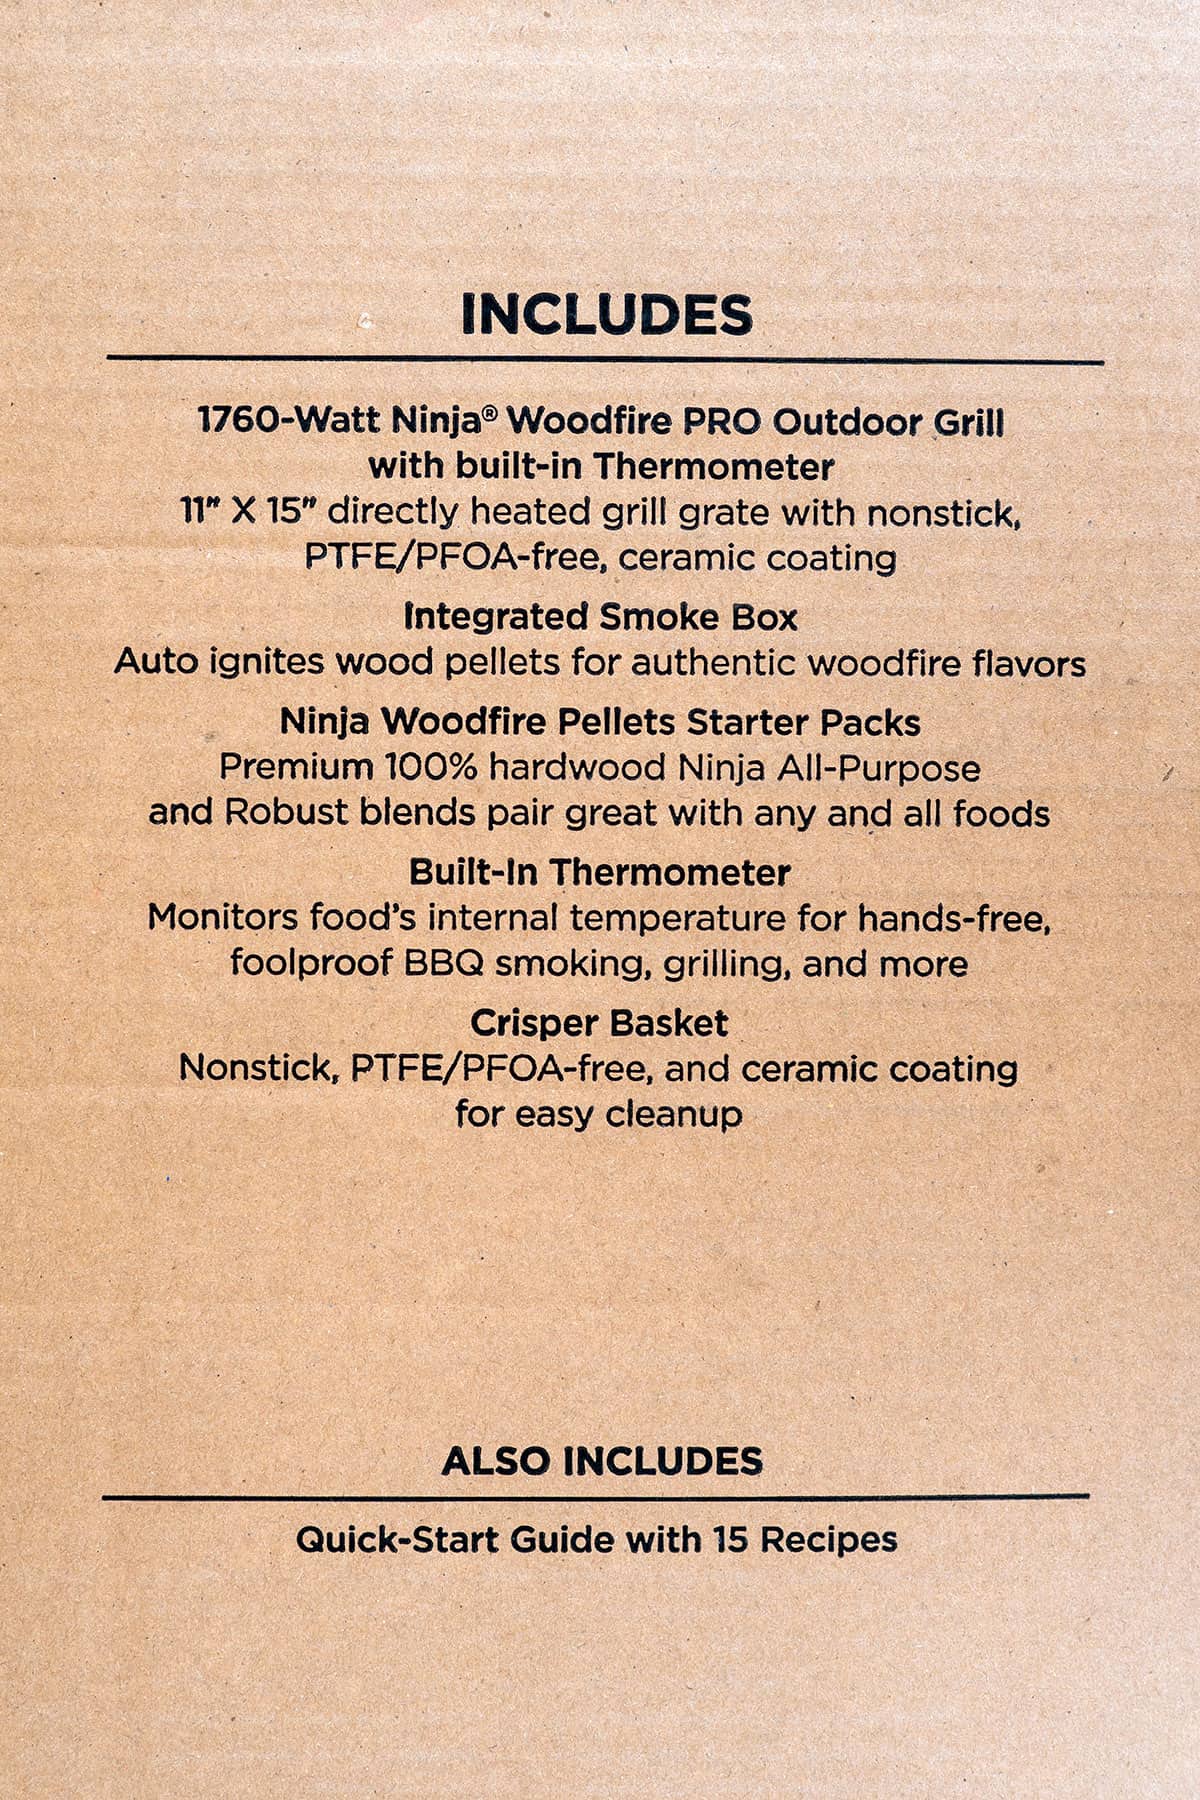
When you open the box, you’ll see the list of items that are included and what each accessory is for. The list will vary depending on whether you purchased the original model or the Pro.
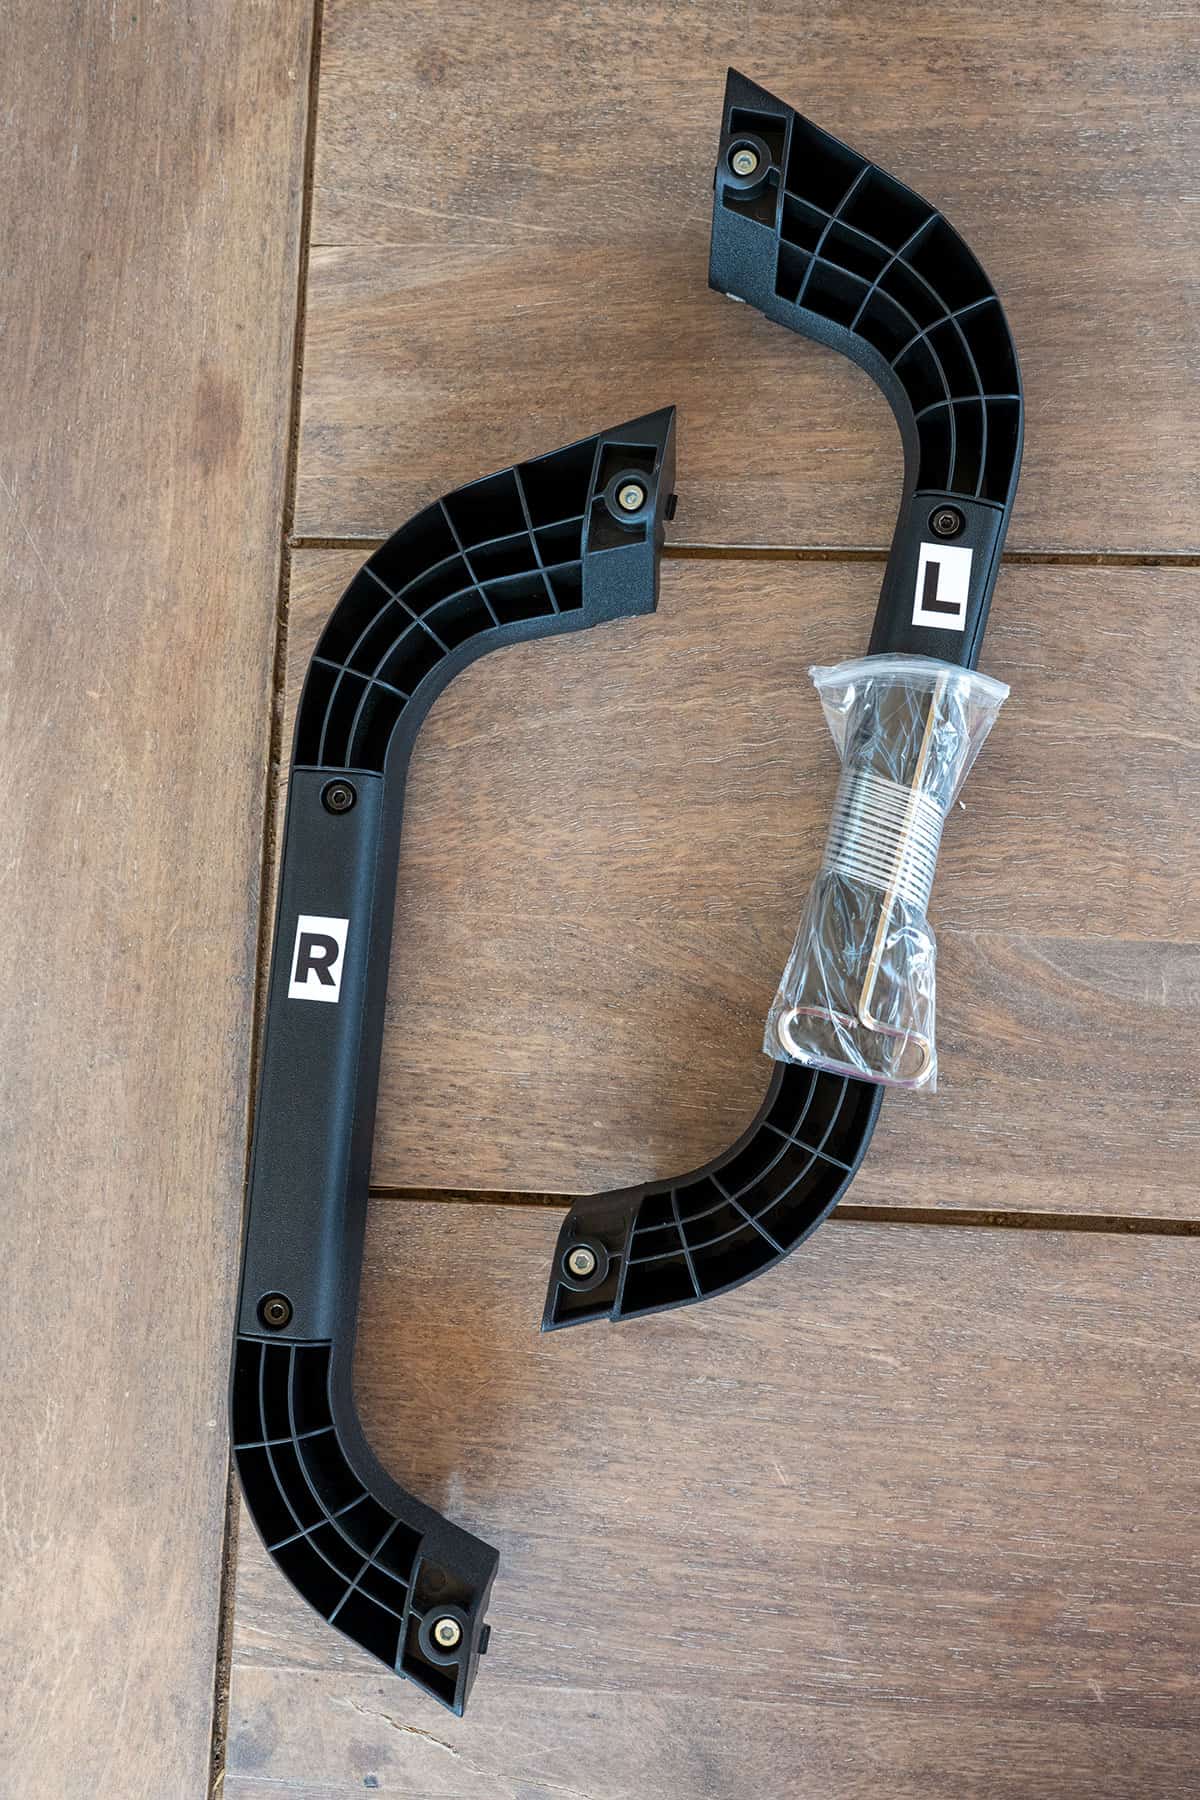
The grill is super easy to assemble. All you have to do is take the two handles and screw them onto the sides. They’re marked with an L and R to tell you which side they go on. The allen wrench is even included.
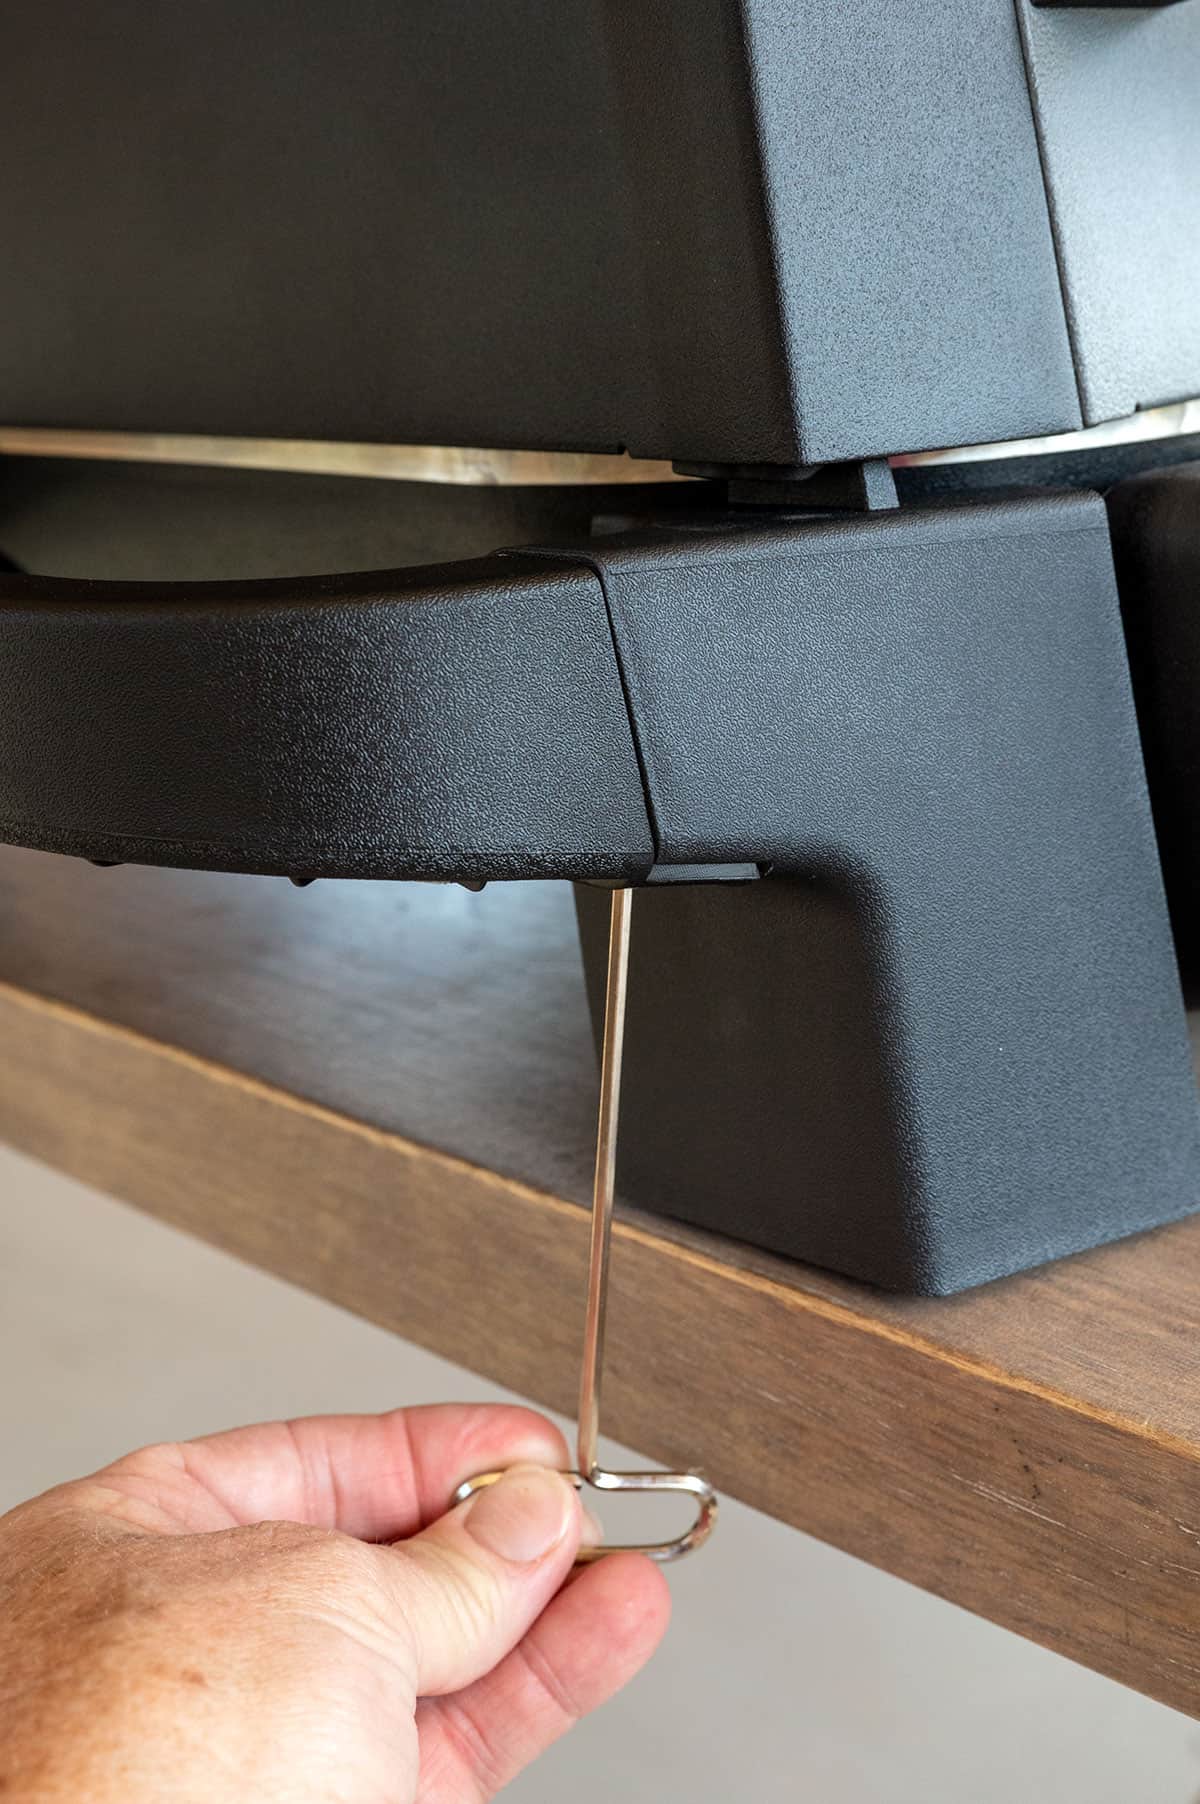
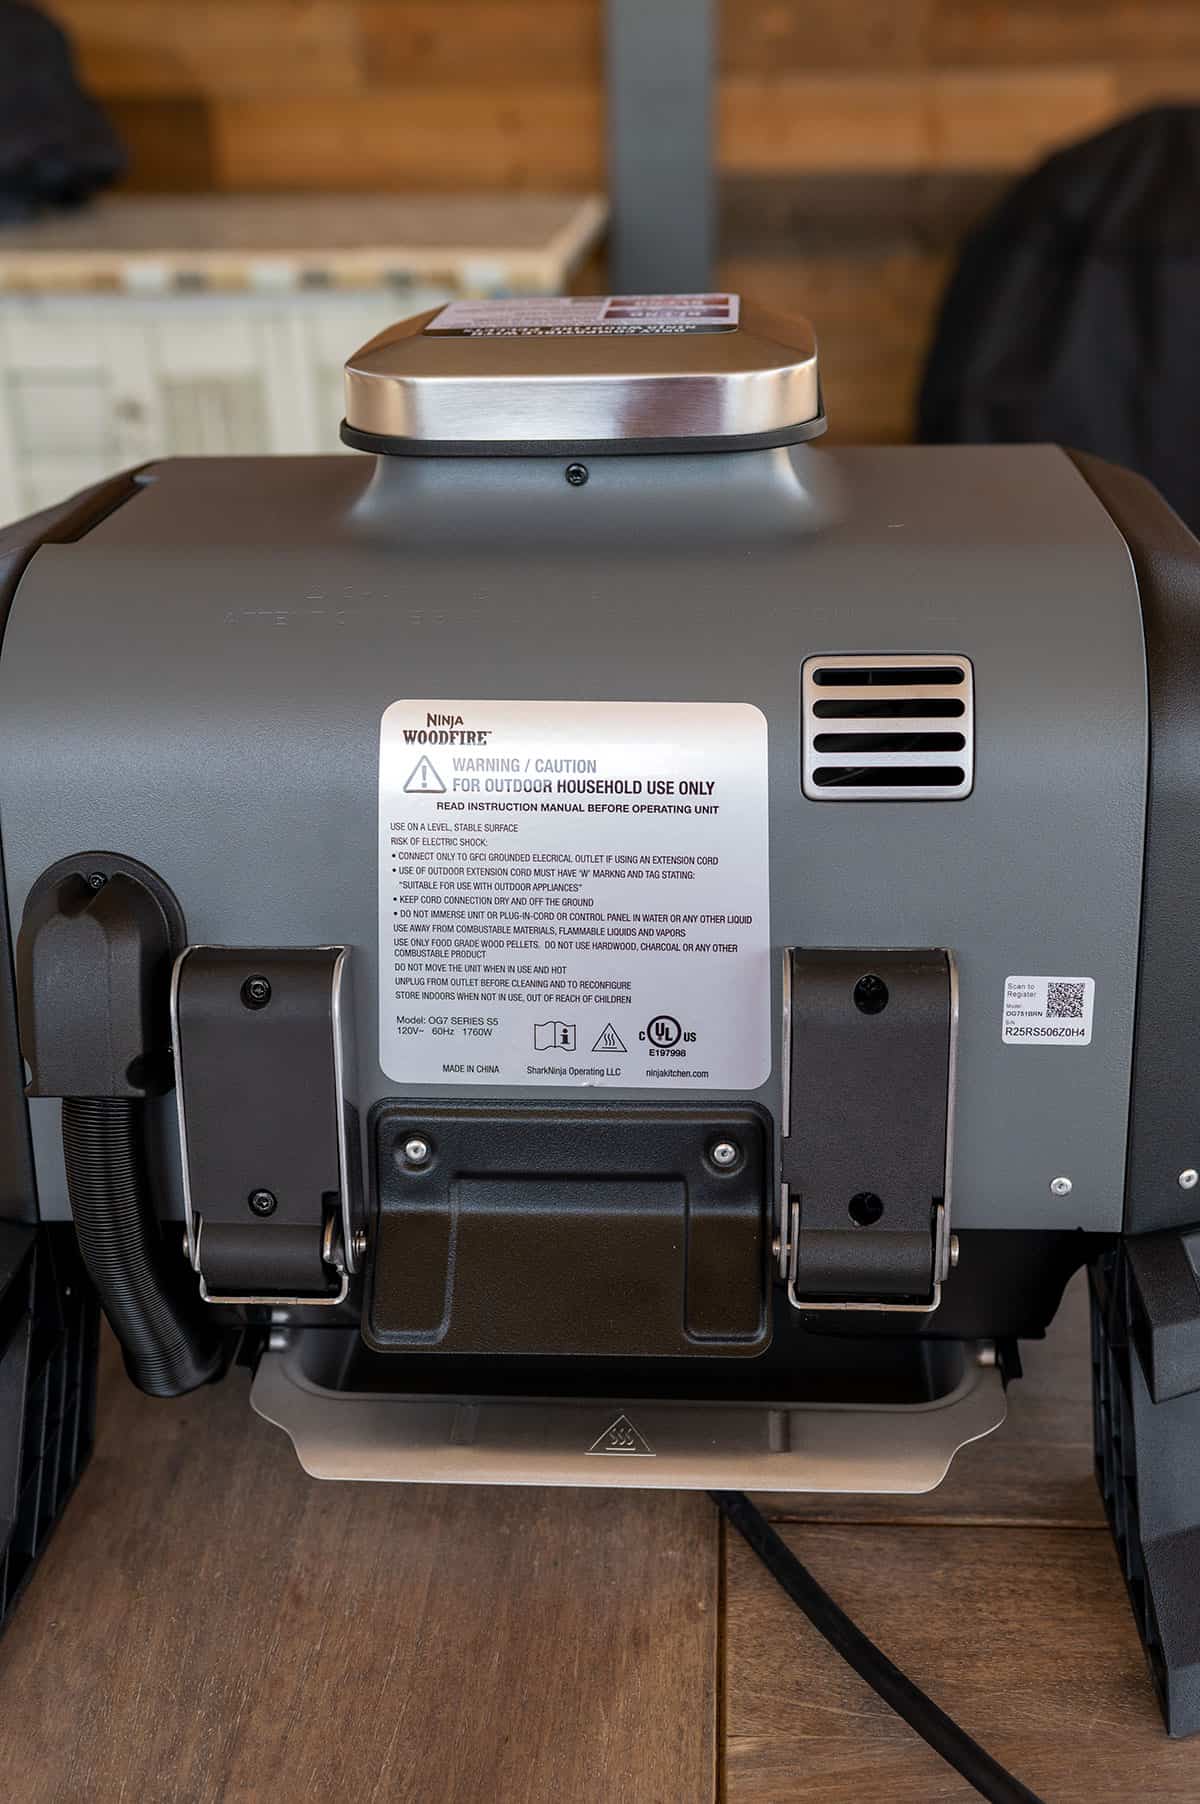
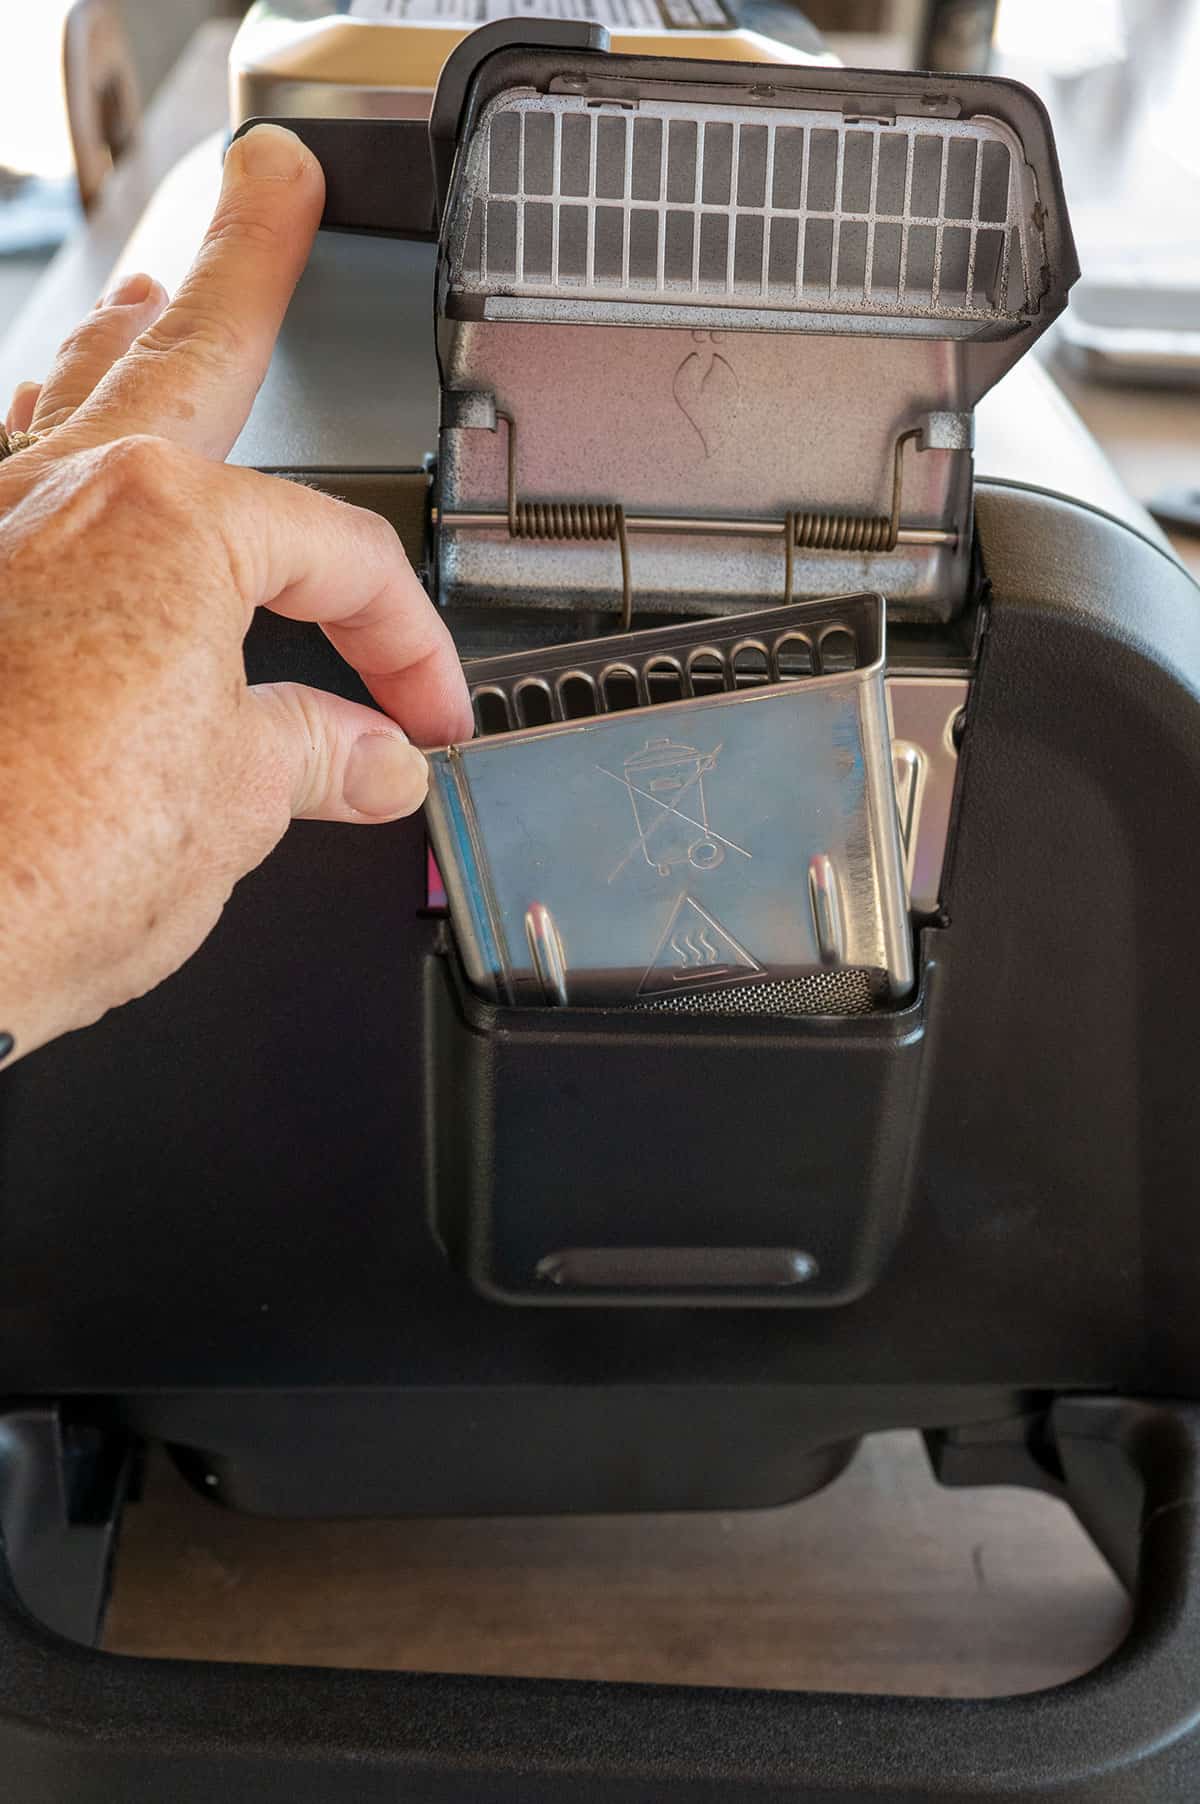
Next, you’ll want to insert the drip pan in the back and the smoke box on the side.
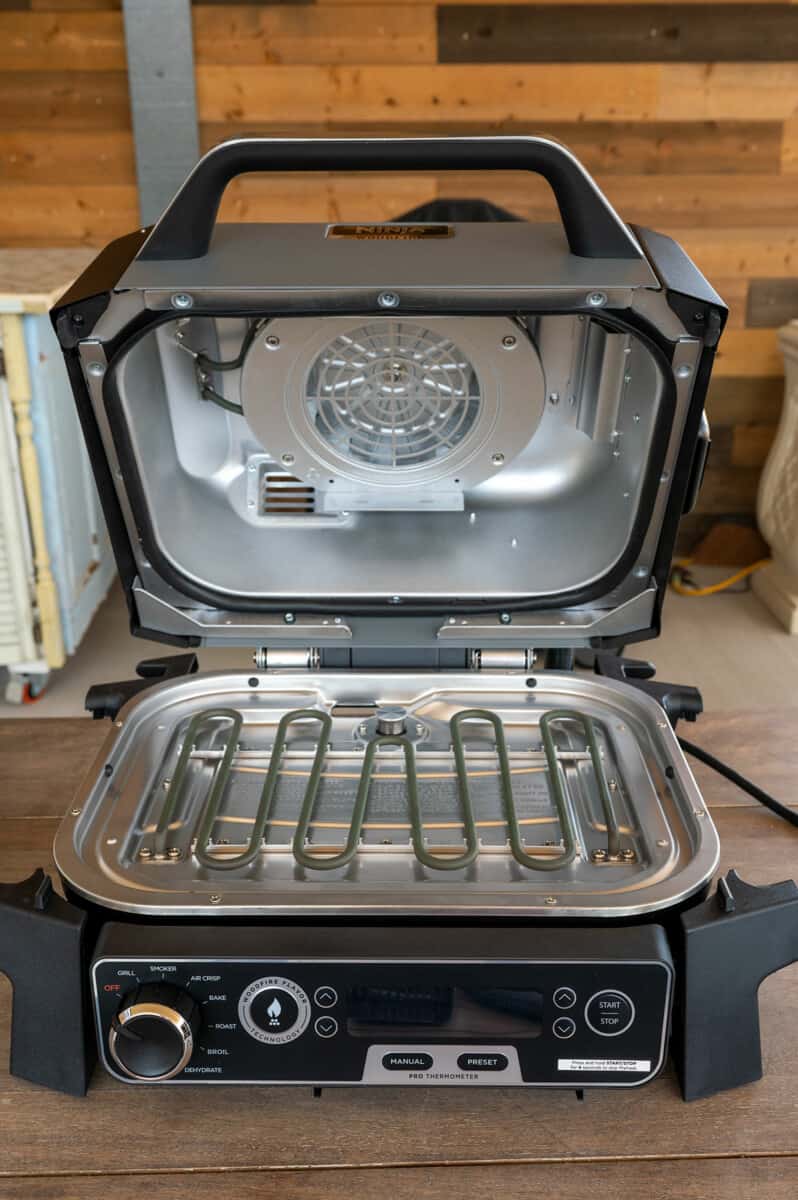
The inside of the grill includes the burner element on the bottom. The included grill grate goes right on top. This is your heat source, and it’s combined with convection technology on top, which speeds up the cooking process.
The Ninja Woodfire Grill is an electric grill, so you’ll need to have an outdoor electric source.
SAFETY TIP: If you need to use an extension cord, be sure to read the manual for safety requirements.
The grill also comes with two sample-size bags of wood pellets, a crisper basket, which is used during the air crisp setting and a quick-start guide with recipes.
Video: How to assemble a Ninja Woodfire Grill
To learn more about the Ninja Woodfire Grill, such as how to cook on it, how to clean it and my review, click on the buttons below.
If this information was helpful, I would appreciate it if you would use the link below when you purchase your Ninja Woodfire Grill. After you make a purchase, I will be provided a slight commission at no extra cost to you.
Want even more great grilling recipes and tips? Subscribe to my newsletter and follow me on Facebook, Instagram and TikTok for my latest grilling adventures. If you make a recipe, please leave a comment and rating below.