Pitmaster Christie Vanover has talked a lot about barbecuing at hotter temperatures. She finds the best way to do that is on a drum smoker.
In this week’s BBQ Tips Podcast she shares the pros and cons about four drum smokers she’s cooked on and which one she likes best.
So if you guys have listened to the past four episodes, I was talking all about competition barbecue. And you will notice there was one thing in common with every episode, and that is how high I keep the heat on my grill.
When I am cooking my competition barbecue meat. I’m cooking at what they call it hot and fast versus low and slow.
That means my barbecue grill temperatures range from 275 degrees to 350 degrees, which is a lot different than doing a 225 degree brisket all day in your backyard.
Well, you can cook at higher temperatures on any type of grill. You can set your pellet grill to 300 degrees, an offset smoke, you can set that at 300 degrees. But predominantly on the competition circuit, people are using what are called drum smokers. So that’s what I’m going to talk to you guys about today.
Listen to the BBQ Tips Podcast on
Table of Contents
I’m going to talk to you about a few different drum smokers that I’ve personally cooked on, the pros, the cons, the features of all of those, and ultimately why I picked the Hunsaker Drum as my favorite smoker for competition barbecue.
If you’re not familiar with a drum smoker, these are basically constructed out of a 55 gallon steel drum. These steel drums are predominantly used for storing like liquids or dry goods.
You put a lid on them, you can transport them around, etc. It’s really used more in kind of the industrial industry. Food storage industry.
Decades ago, someone realized that they could take this barrel and turn it into a grill. You ultimately just need a couple of alterations to make that happen.
Because it’s steel, it retains heat really well, and as long as you can take the lid off and add some sort of air intake and exhaust functionality, you can control the heat and the temperature of the fire that you have inside of the grill.
Usually the charcoal is at the bottom and the barrel sets up vertically, and then you can add your grill grates or whatever else you want to use so that your meat is above the coals.
Originally, these have been called ugly drum smokers because basically people would go and find these drums that were used before, bring them home, and then retrofit them to create a smoker.
They didn’t care how pretty they were, they just drilled some holes in it, threw some racks in it, and made this ugly drum and turned it into a smoker.
Today, there are several companies who have transformed that ugly drum smoker into something that you can commercially buy, that’s already put together for you. So I’m going to talk about those. And again, I’ve cooked on every single one of these. So I’m going to give you my honest opinions.

Save this BBQ Tip
Enter your email, and I’ll send this link directly to your inbox. Plus, you’ll get new BBQ recipes and tips weekly.
Pit Barrel Cooker
Let’s start with the pit barrel cooker. This ranges in price from $300 to $500, depending on which model you get.
Size
They have a 14 inch diameter, an 18.5 inch diameter and a 22.5 inch diameter. So it really depends on what size and quantity of food that you want to cook, as to which model you want.
Temperature Control
The way that the air intake works on this is that there’s a hole in the outer bottom side of the smoker, and you adjust the vent based on your altitude. You set it based on the recommendations that Pit Barrel provides you and based on your altitude. And it generally cooks at a range of like 250 to 300F degrees.
There’s no other way to control the temperature on this grill. It’s simply from the bottom. There’s no exhaust on the top that you can adjust. Air does escape from the top from some holes that are around the side and sometimes a little bit under the lid, but other than that, it’s all simply controlled at the bottom.
Lid
As for the lid on the Pit Barrel, it’s fully removable, so you lift it by its horseshoe handle and you can hang it on the side handle or set it on the ground, or on a table or somewhere else, but it is disconnected from the grill once you lift it off and remove it.
Cooking Setup
Deep inside the grill is where you place your charcoal basket. You burn your coals. And then above that, there’s one level where you can add a grill grate. Or, there’s the hanging option where you can insert the rods into the holes that are near the top, and then use the meat hooks to hang things like ribs or chicken or other meat that you want to hang over the fire.
Mobility
As for mobility, when it’s time to move the pit barrel, you’re going to have to lift it up and move it yourself. It’s not as heavy as some of the other grills I’m going to talk about, but it doesn’t have any wheels, so you will have to actually lift it and move it, if you want to take it to another location.
Cleaning
When it comes to cleaning, you simply remove your grates, remove your meat hooks, and you can wash those. Inside the grill itself, you’ll remove the charcoal basket once your coals are extinguished.
I do recommend getting the optional ash pan that will go under that charcoal basket to collect the ashes, because otherwise, when it is time to clean the inside of the grill, there’s no hole on the bottom.
So you can try to scrape the ash or any grease out of kind of the air intake hole. Otherwise, you’re going to have to flip the Pit Barrel on its side, or all the way upside down to kind of get out any extra. That’s inside there. Or you could use a shop-vac.
Conclusion
One bonus with the Pit Barrel is that it is fully assembled when it arrives, so that makes things really nice and easy. And again, it’s at a good price point.
To me, the Pit Barrel is a nice starter drum smoker. It is at a lower price point, but it does lack some of the features that I like with the higher price point drum smokers.
Again, it’s a little bit more challenging to clean. It doesn’t have the full temperature control that I like with some of the other smokers, and it lacks mobility because it doesn’t have wheels, but it cooks great food.
Once you set that dial at your right altitude, you’re going to have great food out of it. It’s just lacking some of those extra features that I like with some of the other models.
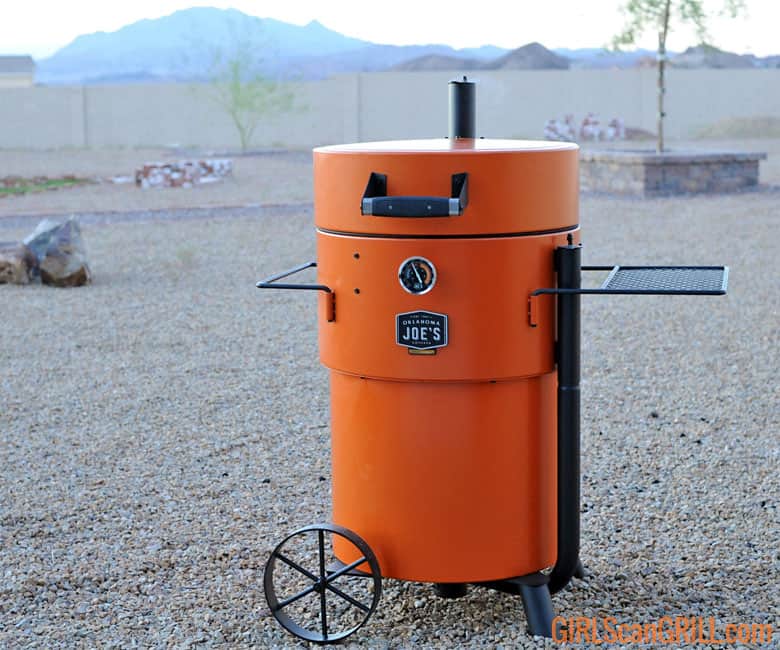
Oklahoma Joe’s Bronco
Let’s move on to the Oklahoma Joe’s Bronco. This comes in two varieties the Bronco and the Bronco Pro, and ranges in price from $400 to $850.
Size
The Bronco is 18in in diameter, and the Bronco Pro is 21.5 inches in diameter.
Temperature Control
Let’s talk about the air intake. So you will notice on the side of the Bronco there is an air intake pipe. This is how you control the air that goes into the fire to fuel the fire.
That pipe is controlled about waist level. And then it goes all the way down to the bottom so that it’s introducing the oxygen down where the charcoal basket is.
Then as far as the exhaust, that’s right in the lid. You just adjust that dial there. And that’s how you control your temperature with both the intake and the exhaust. There is a temperature probe on the front. So you can actually see where the temperature of your grill is.
Lid
I like the lid on the Bronco because it is attached and it’s hinged, so once you open it, it’s there. You don’t have to find anywhere else to set it like you do on the Pit Barrel.
Cooking Setup
Inside, the grill functions the same way. You fill your charcoal basket with coals. You light those, and you place it inside the smoker. Then as those burn, that’s going to create the heat inside the grill.
As far as the cooking setup itself, there are two grate levels. So you can have two layers of meat at the same time, or you can adjust and have one closer to the coals, one higher to the coals, whichever you prefer.
There’s also a hanging system so you can hang ribs just like you can with the other smoker.
In addition to the regular charcoal basket, there’s also a deflector plate that goes in the bottom. This basically is a metal plate that goes over the coals and it has multiple holes in it that allows the food and the fat to drip down onto that hot plate and create great steam and great flavor.
But it deflects the heat just a little bit, so you’re not getting as intense of a burn.
I find this is nice, especially when you’re hanging ribs, because once you hang ribs, the bottom rib bones are a little bit closer to that fire than the top. So by having the deflector plate in there, that kind of gives it a little bit more even heat.
Mobility
The Oklahoma Joe’s Bronco is technically mobile. It has two really big wheels on the back, and you just lift the side and kind of move it around like a dolly. However, I’m not a fan of these wheels.
They’re the traditional Wagon Wheel style that Oklahoma Joe’s makes, but they’re metal, which I don’t really care for. My competition trailer has a vinyl floor, so if I drag the Oklahoma Joe’s in there, it’s actually going to indent my vinyl and damage that.
So I don’t care for those styles. You could maybe change those out, but you definitely need wheels to move the Oklahoma Joe, because it’s much heavier than some of the other smokers.
Cleaning
When it comes to cleaning, here’s one thing that I do like about the Bronco. There is a hole in the bottom, and then it actually has a cap that connects to that.
So if there’s any grease that drips off of your meat into the bottom of the smoker, it will flow through that hole and into that little grease cup. Then you can just remove that grease cup, clean it out and then reinstall it.
Also, when it’s time to clean the inside of the grill, you simply remove the charcoal basket just like the Pit Barrel. But if there’s any ash inside or any grease inside, you can scrape that into that hole in the bottom, making it so much easier to clean.
Conclusion
A couple features I like about the Bronco that does sets it apart is it has a side shelf, which is nice because usually with a drum smoker you just have the smoker and there’s not really anywhere to set your pan of food. You’re going to have to have an extra table.
I also like that with the Bronco you can do direct grilling. There’s a way that you can actually lift the charcoal basket so that it’s not all the way in the bottom of the smoker, but it’s up more towards the top.
Then you put your grill grate on, and then you can grill up hamburgers, hot dogs, steaks, whatever you want. You don’t just have to do the big meats over a long period of time.
Unlike all the other smokers, this does not come fully assembled. You are going to have to put it together yourself. And that does create one little flaw, because the body is in two parts.
I did find that sometimes grease would seep through the seam of where they connect together and kind of drip down the side. If you have the black version of the Bronco, that’s not a problem.
If you have the orange version of the Bronco Pro, you will see some of those grease marks. So if cleanliness is important to you and the look of your grill is important to you, you’re just going to want to keep an eye on that and keep that clean.
I do like the Bronco a little bit more than the Pit Barrel, because it offers you a little bit more variety.
You can control the heat better. It has the wheels for mobility. You also have that two-zone level of cooking, of either smoking or grilling. So those are some benefits of the Bronco that I really like.
What I don’t care for is that it’s heavier and that those wheels are just not too functional for me, because they tear up my trailer.
Gateway Drum Smoker
All right, let’s move on to Gateway Drum Smokers. If you have been at a competition any time in the past five years, you’ve seen these all over the place.
These are probably one of the smoker brands that most competitive cooks use. It’s going to be between the Gateway and the Hunsaker. Those seem to be the top two favorites.
Gateway actually trademarked the term hot and fast, which we all use all the time now in competition barbecue. But hot and fast is what Gateway Drum smokers are all about. They are designed to smoke at levels from 250 to 325F degrees.
The Gateway is priced at $900 to $1,300.

Size
It comes in a 30 gallon size and a 55 gallon size. The 55 gallon size is what most competitive cooks are using.
Temperature Control
The Gateway functions pretty much the same as those other smokers. You fill the charcoal basket up. You place that inside of your smoker and then you adjust your air intake.
While the Bronco has one air intake on the side, the Gateway actually has two.
So there are two pipes on the side of the drum that are about waist level, and you can control those for your air intake. Those go all the way down towards the bottom and again feed oxygen to that charcoal basket.
Then in the top in the lid you’re going to find your exhaust where you can adjust your temperature there as well.
Lid
When it comes to the lid, it’s not connected in any way. So you just lift it up and you can actually hang it on the side of the drum if you want to. Or you can set it on a table or on the ground. Whatever’s convenient for you.
Cooking Setup
The Gateway does not come with a deflector plate for the charcoal basket, but it is an available option that you can purchase separately.
When most teams are cooking on the Gateway, they’re actually not using the deflector plate. They just cook the meat straight on the rack. And then they use the spin method. So they rotate those grates as the meat is cooking. So that gets an even cook all the way around.
Inside there are three cooking levels. So you could have three grates in there. Or you can just adjust, have one grate in there and adjust what level you want it at. There’s also a way that you can hang ribs just like all the other drum smokers.
Mobility
As for mobility, there are wheels on the bottom, but they’re caster wheels, so they roll really well on my trailer or on my back patio, which is concrete.
But when it comes time to push them in the grass or to push them on landscape rocks, they don’t roll as well. However, teams must not have a problem with it because there are hundreds of them out there on the competition circuit, so they’re obviously getting them from point A to point B.
I just personally don’t find that the Gateway is very easy to move around unless you have a solid surface.
Cleaning
When it comes to cleaning the Gateway, there is no hole on the bottom. It’s a completely solid surface.
You’ll have to take out your grill grates and then take out your charcoal basket. Empty that. Replace your coals. But if you have any ash or grease on the bottom, you’re either going to need to use a shop-vac, or you’re going to have to physically turn the barrel over and then scrape it out, or vacuum it out, or sweep it out, whatever.
So it’s a little bit more complicated because there’s no bottom access. So that’s a little bit more challenging for someone who’s more petite like myself, because the drum is about as big as I am.
I’m not a fan of tilting it over because it’s a little bit heavy, and I don’t want to damage the paint job on it.
Speaking of paint though, this paint can withstand up to 1,000F degrees, so that is pretty phenomenal. Plus it comes in a variety of colors and if you contact them, you can actually get your own custom color.
Conclusion
If you’re looking into doing competition barbecue and you’re ready to up your game to a drum smoker, the Gateway might be an excellent choice for you. Again, it’s reliable, multiple world champions have cooked on the Gateway Drum smoker.
The only reason that I’m not cooking on a Gateway is I don’t care for the side air intakes. I do find on windy days that that can affect it. The wind can kind of get in there and mess with the temperature of my grill.
I also don’t care for the mobility, and I don’t care for the fact that it doesn’t clean out as well as the others.
But when it comes to cooking, it’s an amazing smoker and you’ll have success. I’m sure if you cook with this on the competition circuit.
Hunsaker Smoker: My Top Pick
The last drum I want to talk to you about today is the Hunsaker Smoker. This is by far my favorite. It ranges in price from $800 to $1,000. A little bit more, if you want to do some extra custom work on it.

Size
It comes in a 30 gallon and a 55 gallon. I personally have five Hunsakers. Four that are the 55 gallon, and I have one that’s the 30 gallon.
I use the 55 gallon drums on the competition circuit and then the 30 gallon drum, I just leave in my backyard for when I want to smoke on an afternoon.
Temperature Control
The air intake on this is different than the other smokers that I’ve talked to you about. Instead, it’s actually on the bottom.
There’s a hole in the bottom of the smoker, and there’s a lever that adjusts from off to run to start. So when you add your coals, you leave it on start, which leaves the whole wide open. And that allows all the air into the smoker so that I can get those coals lit.
Once your coals are ready, there’s no more dirty smoke and that smoke is running clean. Then you adjust that lever to the run position, which basically closes down the hole about halfway. This allows some oxygen in, but it doesn’t allow too much oxygen in.
Then there’s an exhaust on the lid, and that’s basically where you control your temperature.
I run my Hunsaker smokers at about 275 to 350F.
Once we have it on run, all we have to basically do is adjust that exhaust until it’s right there in the temp zone that we want. And there’s a temperature control right there on that smokestack. So you know right where you’re at. And that is a pretty reliable temperature probe.
Lid
When it comes to the lid, it’s attached, which I love. It’s a floating hinged lid, so it stays there. You don’t have to find somewhere to put it. You’re not going to mess up the side of your drum by hanging a lid on it.
There is also a little lever that you can use so that it doesn’t swing closed on you in case it’s windy day.
Cooking Setup
One of the things that makes the Hunsaker different from all of these other smokers is the Vortex. So when you light your charcoal and you place the basket inside of the drum smoker, you actually add a metal Vortex on top.
It’s like a deflector plate. But unlike the Bronco, which just has holes inside of metal, this has like this fan type feature. It doesn’t actually twirl like a fan, but it it forces the air through it so that it makes the air kind of circulate inside the drum itself.
With this feature, there’s no need to spin your racks or spin your meat, because I always get even cooking the way that the air circulates.
When it comes to the rack system, there’s actually five levels. So you could do five cooking grates and cook five levels. Granted, the space in between the levels isn’t too thick, so you’re not going to do like five levels of pork butts, but you could definitely lay multiple layers of ribs or you can hang them.
The Hunsaker comes with so many different accessories of hanging racks for ribs, for turkeys, half rack so you could do something flat and hanging something at the same time.
There are a lot of different options.
Mobility
The mobility is by far the best of any drum smoker. It has actual like heavy duty rubberized wheels, so it is more like a dolly. Plus it has a caster wheel in the front that locks.
When it comes time to moving my Hunsaker around, you basically just tilt it back like a dolly and I can roll it on up to my trailer. I can roll it through grass. I can roll it through landscape rock.
No surface seems to be a problem, and it doesn’t tear up the floor on my trailer, which I appreciate.
Cleaning
Cleaning is also superior on the Hunsaker because the air intake is on the bottom when it comes time to clean it.
You take out your grates, you wash those. You take out your charcoal basket. There is an ash pan under the charcoal basket. So that collects the ash, which is nice, but you will end up with some ash and some grease inside the drum smoker itself.
You simply open up that lever on the bottom all the way to start so that the hole is open, and then you can push any ash or grease right through there, through the bottom, making cleanup a breeze.
And Hunsaker has added a flange around that hole. So if you do have grease buildup, it’s not going to leak onto your concrete. In the past, they didn’t have that, and sometimes the grills would leak on the bottom, but that’s been fixed with that flange.
Conclusion
Some of the extras you’re going to find with the Hunsaker is that you can get it in virtually any color to match your team. You can also get a logo plate added so you can put on a magnet or a sticker so everybody knows what team the smoker belongs to.
There’s an optional side shelf if you want, and the Hunsaker is made in the USA, which I respect.
The Hunsaker Drum Smoker is by far my favorite of all the drum smokers that I’ve ever cooked on. The way that you manage the temperature is so easy and it’s so reliable, even on windy days.
The mobility is far superior to every other drum smoker that I’ve cooked on, and the way that you clean it out is so much easier as well. Plus, you can get it in the custom colors, which I love that I have my orange drums.
I’ve known the Hunsakers now for several years. The whole family is amazing. Customer service is priority number one to them. They will help you with any issues that you have.
Build Your Own Drum Smoker Kit
There’s one more option out there that I want to give you guys, especially if you’re not quite ready to invest in the $800 to $1,300 price point.
You can actually buy build your own kits. There are several brands out there that allow you to basically come with your own 55 gallon barrel, which you can find online for $100-200, and then you buy a kit, and then you put everything together.
You cut the holes. You might have to do a little bit of welding, but you can create your own drum smoker.
If you’re going to go this route, I actually highly recommend that you go with the Hunsaker kit. That way you’re getting all of those benefits that I talked about with the Hunsaker Drum, but you’re building it yourself.
Their kit usually cost around $350, so if you find a drum for $150 plus that $350, you’re at about $500. So that’s a really reasonable price.
It may not be as shiny and pretty as the ones that I’m cooking on, but it’s going to function just as well. And you’re going to take pride in it because it’s something that you built yourself.
I hope these tips have been really helpful for you guys. If you have more questions about drum smokers, or if there’s another drum smoker out there that maybe I need to try that I haven’t tried yet, shoot me a DM, let me know.
I won’t be doing a podcast next week. This is the first week that I’m skipping since we’ve started, but that’s because I’m going to be at SmokeSlam in Memphis, Tennessee. So May 16-18, I will be cooking at the Live Fire Extravaganza with B and B Charcoal and Cowboy Charcoal.
If you guys are there, come on out and see me. We’re going to be doing lots of demos and lots of samples. It’s going to be a really great time.
Tune into more of my BBQ Tips podcasts or scroll around the website for even more helpful BBQ Tips.