In this week’s BBQ Tips Podcast, world champion Marcio Borguezan of Hog Addiction shares how to trim a whole hog for live fire cooking.
Here’s how today’s podcast actually came to be. I was at the Steak Cookoff Association World Championships in Texas a few weeks ago. The way that process works is you have to compete in the preliminary round, and then if you do good enough, you get to advance into the next round.
Well, unfortunately, I tied for, I think, 14th place in my division. So I did not move on to the finals, which means that the next day there I was in Fort Worth, Texas, with nothing to cook and nothing to do.
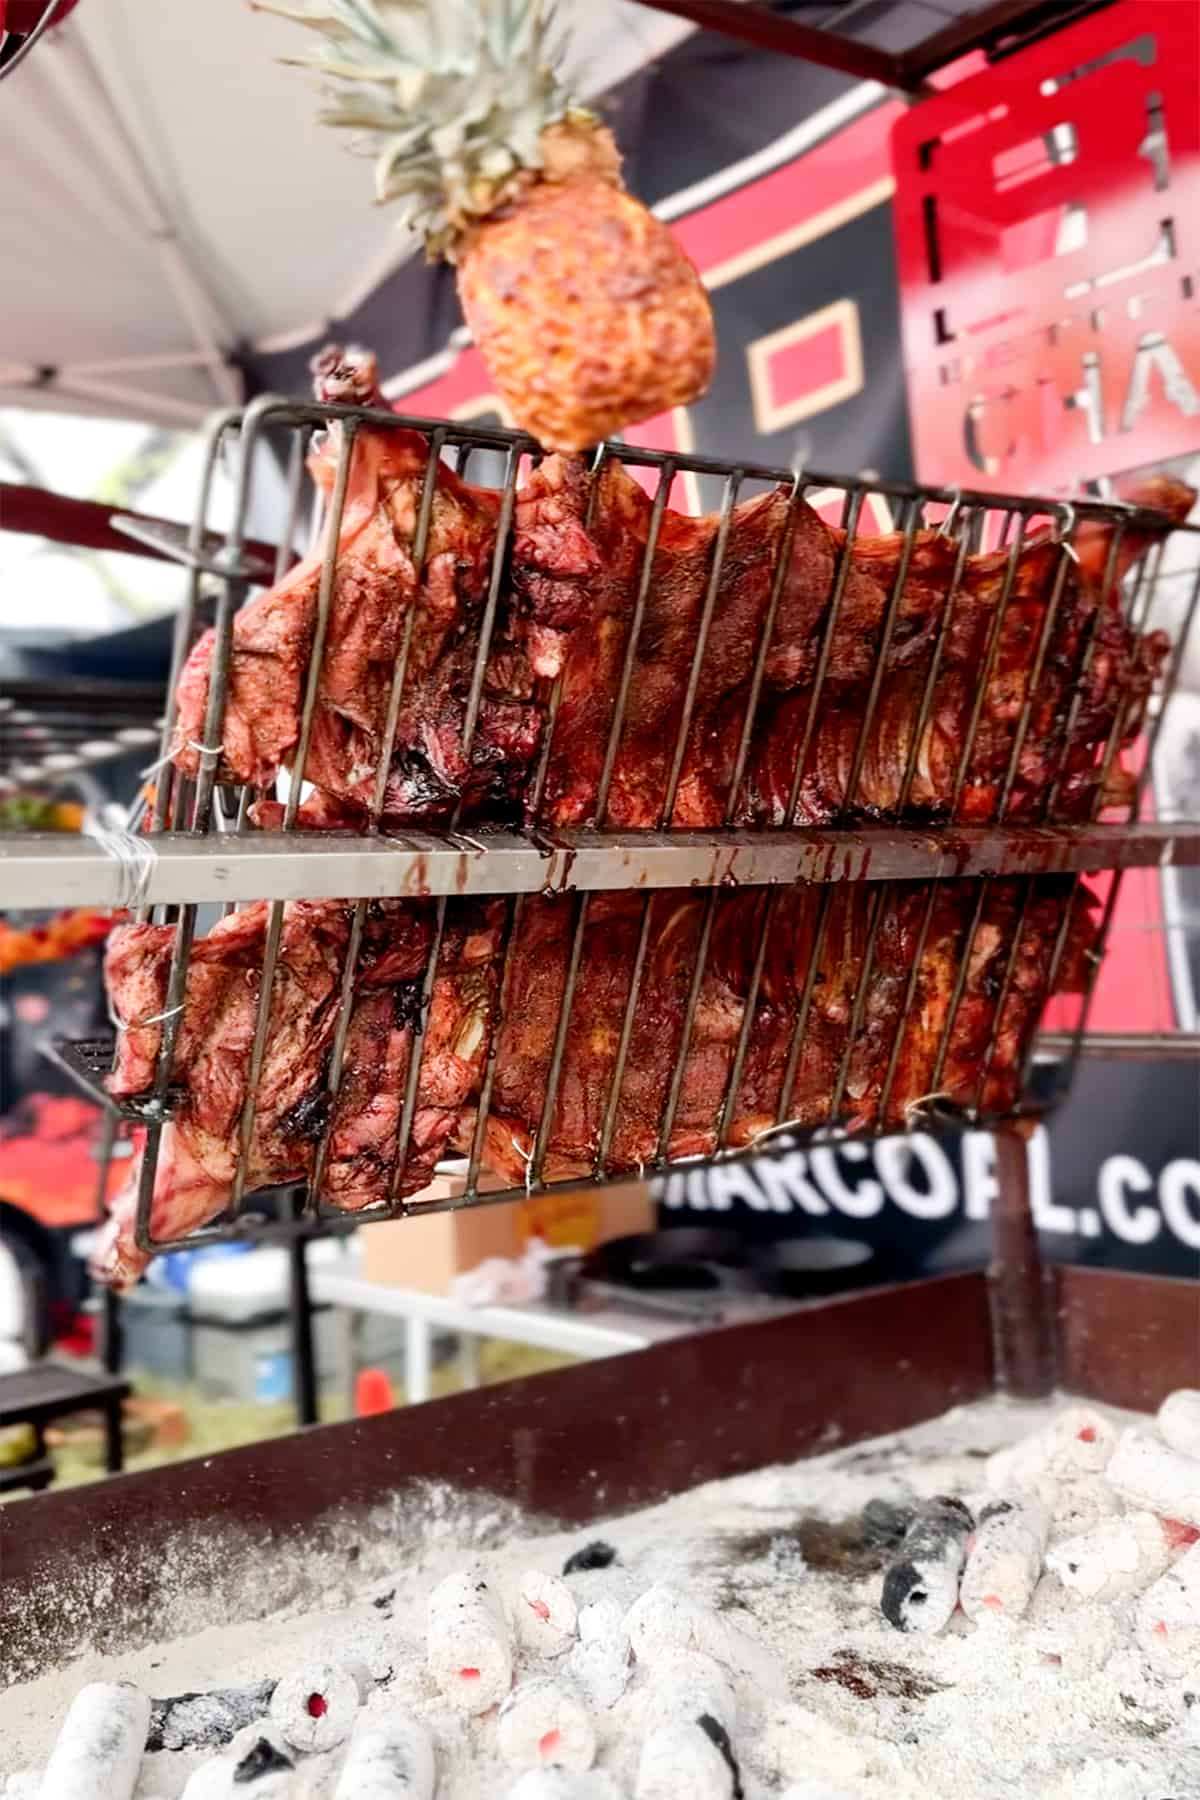
So I wiggled my way into the B & B Charcoal tent where they were throwing down this incredible hospitality party.
Save this BBQ Tip
Enter your email, and I’ll send this link directly to your inbox. Plus, you’ll get new BBQ recipes and tips weekly.
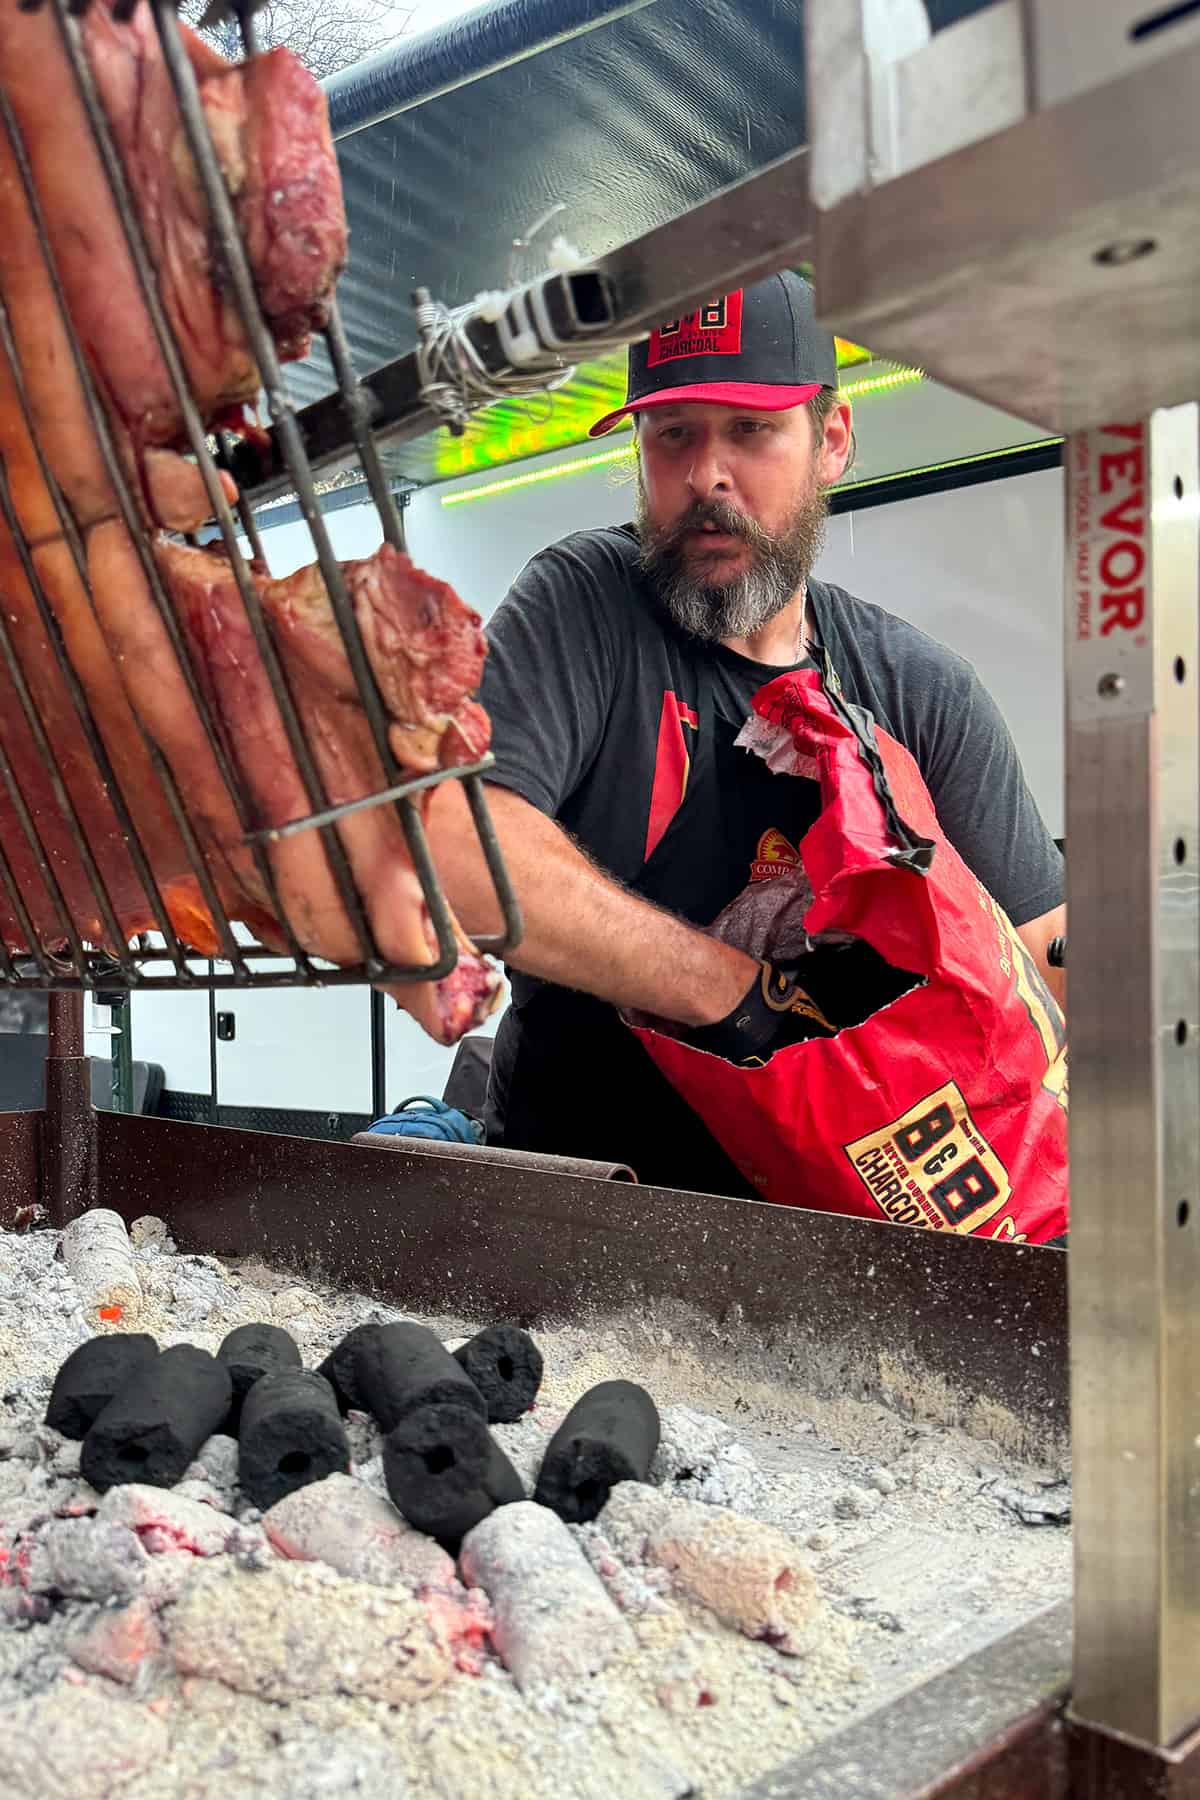
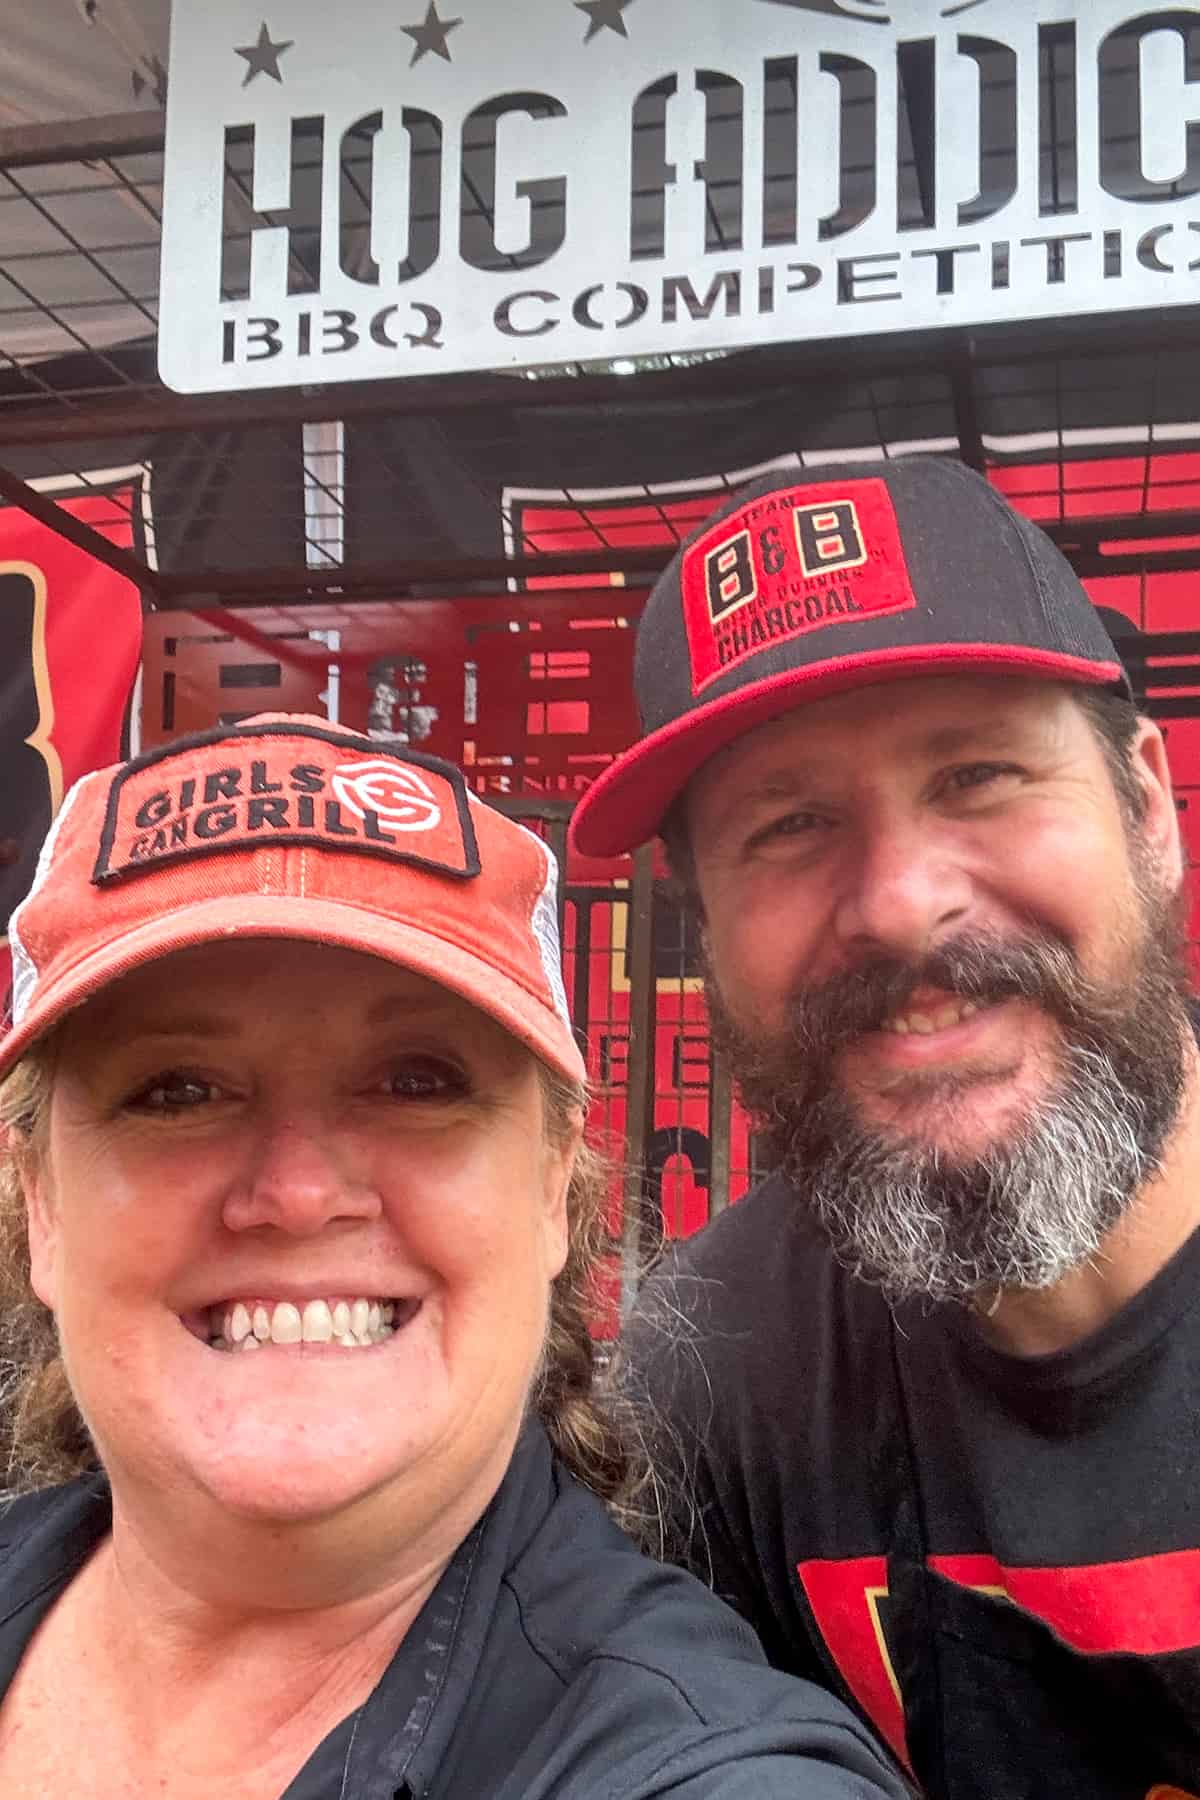
Well, Mark Lambert and Marcio Borguezan were both there. Both of them are Memphis in May world champions. They’ve won so many awards I can’t even count.
They were cooking up two whole hogs for all of the teams, and I had the opportunity to really get in and get dirty and learn how to break down a whole hog, the way that Marcio does.
Listen to the BBQ Tips Podcast on
Table of Contents
Hogs for the Cause
Before I get into that, though, I want to talk to you about Hogs for the Cause. This is a huge food and music festival that tens of thousands of people attend.
There are usually about 100 teams competing, in addition to all the fun music and festivities. And those teams cook up ribs, shoulder, whole hog and pork-pourri, which is basically anything exciting that you want to make with pork.
These teams and all these festival goers last year raised $3.6 million to provide free housing and grants to children with pediatric brain cancer.
This year, their goal is to raise $5 million. The event is actually this weekend, and if you can’t make it, that’s fine. You can still donate and you can still support this cause.
And what’s really cool is that Marcio has set a personal goal to reach out and raise $100,000 himself.
It’d be really amazing if you could just click on the link below. Drop a few bucks in there and help Marcio reach his goal of raising $100,000 to help Hogs for the Cause reach $5 million to help more and more kids with pediatric brain cancer.
What makes this hog trim different
All right, let’s get into this hog trim. So I will have to say I’m going to verbally illustrate it through this podcast. If you do watch it Embers TV or on YouTube, I will include some of the video of the actual hog trim that I did with Marcio.
I have cooked several whole hogs in my life over open fire. I’ve done it on a spit. That’s what we did on the Food Network. But most of the time I have the cavity wide open over the fire. Usually, on an asado cross.
Well, the way that Marcio was doing his whole hogs at the World Championships is that he had them wide open, but he trimmed them a really unique way.
So they had even cooking, and he showed up to the SCA with this fire pit war wagon. It was this amazing grill setup that he actually created himself. It’s basically this huge wagon, like the size of a car, and it has two rotisserie areas where you could lay two hogs flat, and then they rotate as they cook.
Plus, it’s got the charcoal basket in the back, it’s got shelves, it’s got all sorts of stuff. But it quite a show, let alone the whole cooking of the hogs.
When he puts these hogs on that pit, what he does is he tries to get the meat as even as possible.
Usually, if you’re going to buy a whole hog, which in most cases is actually a smaller pig, usually weighing between like 30 to 40 pounds or so, when the butcher gives it to you, it’s going to be cracked open.
Most of the organs, if not all, will be removed, and it’s still going to be a little bit curved because of the shape of the ribs.
Most of the time I just flatten it out and do the best I can to attach it to an asado cross.
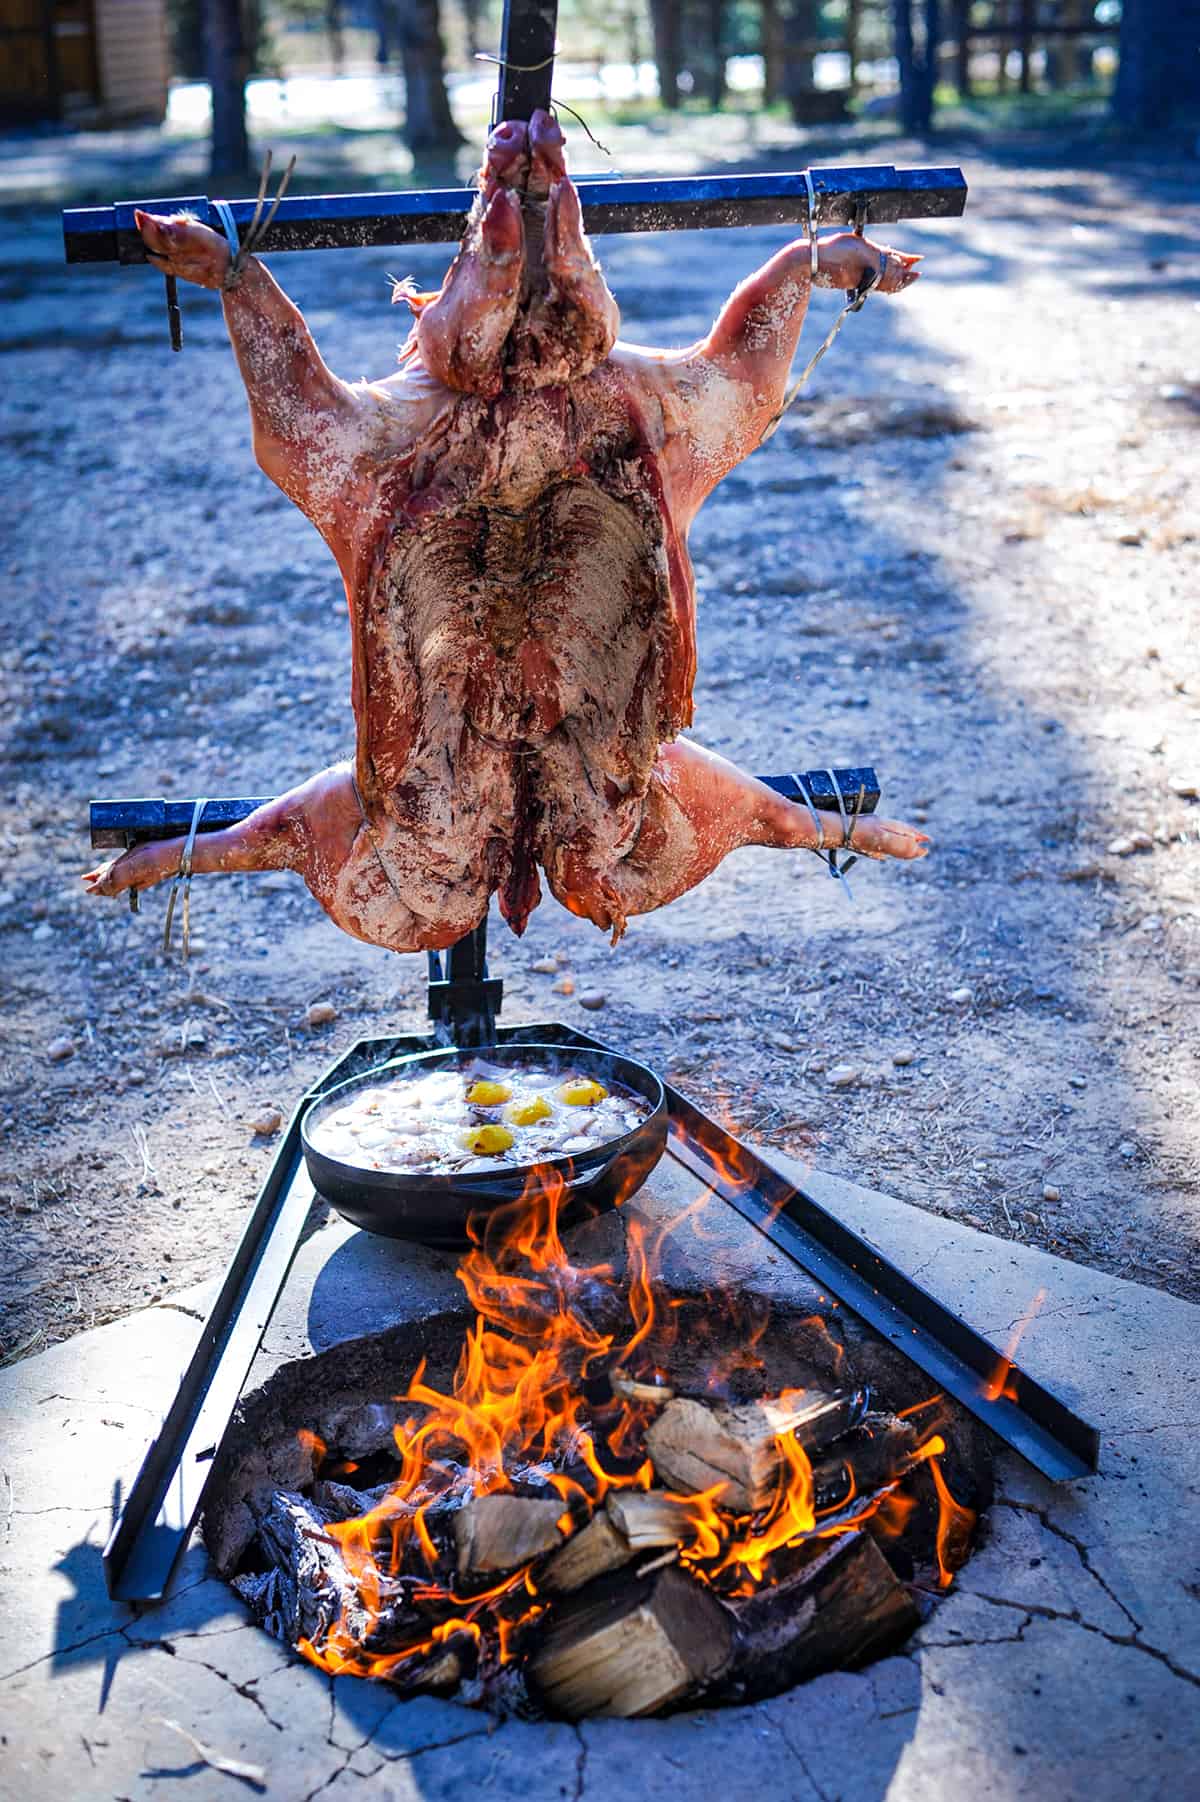
Whole hog on an asado cross
For those of you who don’t know, an asado cross is basically like two metal pipes that are in the shape of a cross. And you basically wire the hog to that, and then you cook it over the fire and rotate it manually.
The challenge with that, though, is that the shoulders, which are located toward the front of the hog, and the hams which are located toward the rear of the hog, are wider and thicker than the center meat, the ribs and the pork belly.
So it’s really hard to get that even cook to where the hams and the shoulders are done without overcooking the ribs and the belly.
With this whole hog trim method that Marcio taught me, nothing is overcooked, nothing is undercooked, and the skin is OMG crispy.
Marcio’s method for trimming a whole hog
So let’s get started. The first thing that you’re going to need is a table a large enough to accommodate your whole hog. Plus you need a really sharp fillet knife.
Place the whole hog on the table with the belly facing up. You’re going to want to need some paper towels to pat out some of the liquid that may have accumulated inside of the cavity.
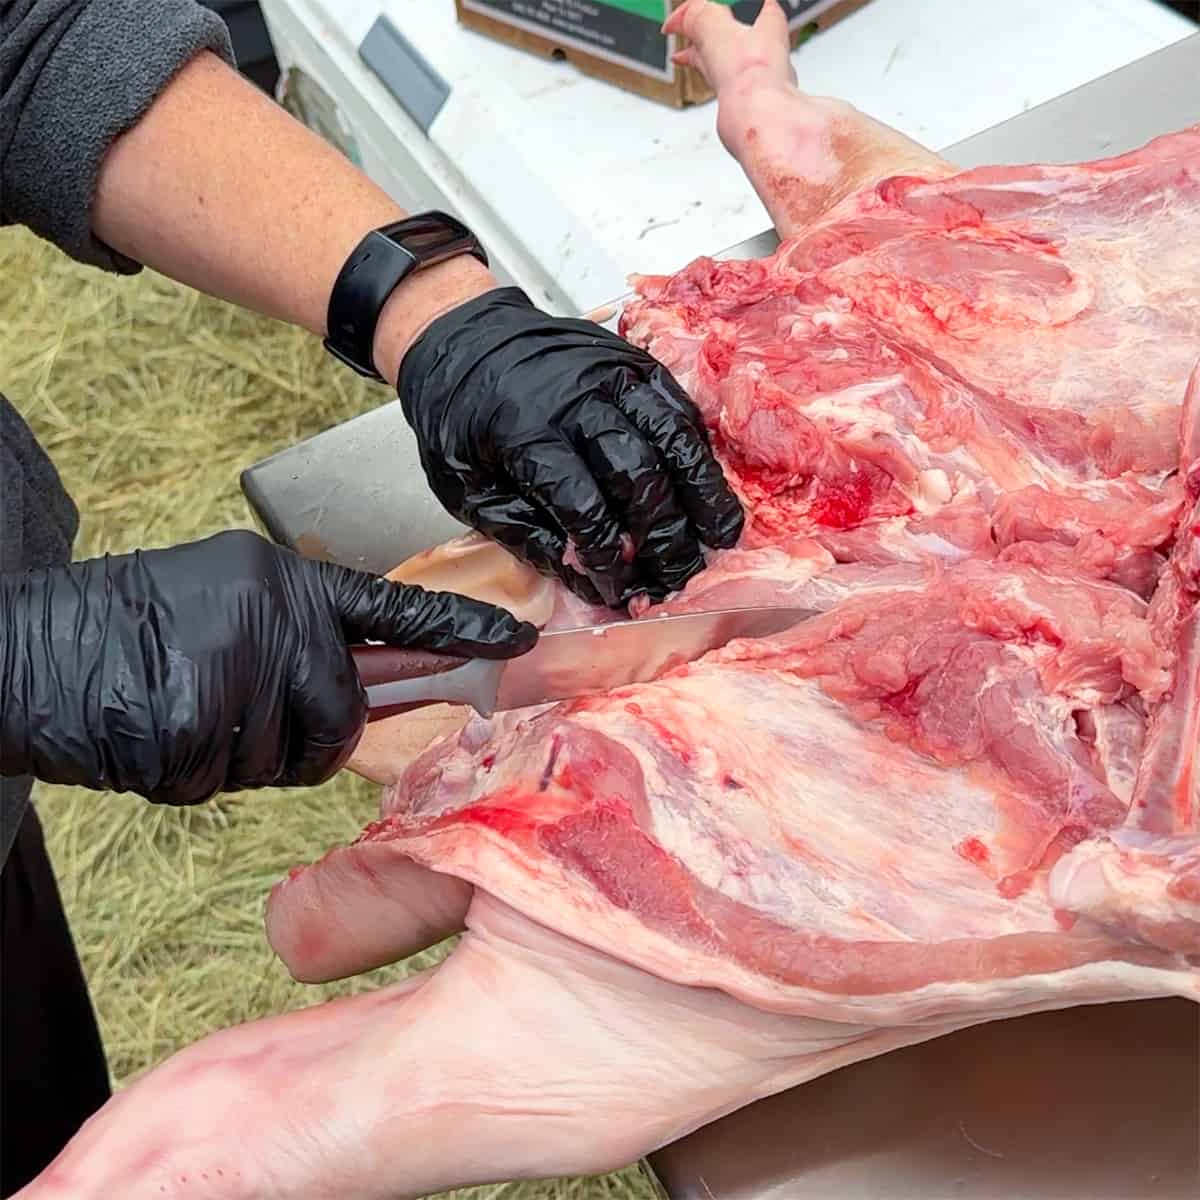
Remove some ribs
The first thing that Marcio does is remove the top 4 to 5 rib bones to fully expose the shoulder meat. To do that, he runs the tip of his knife down along the spine, down to those first 4 to 5 bones.
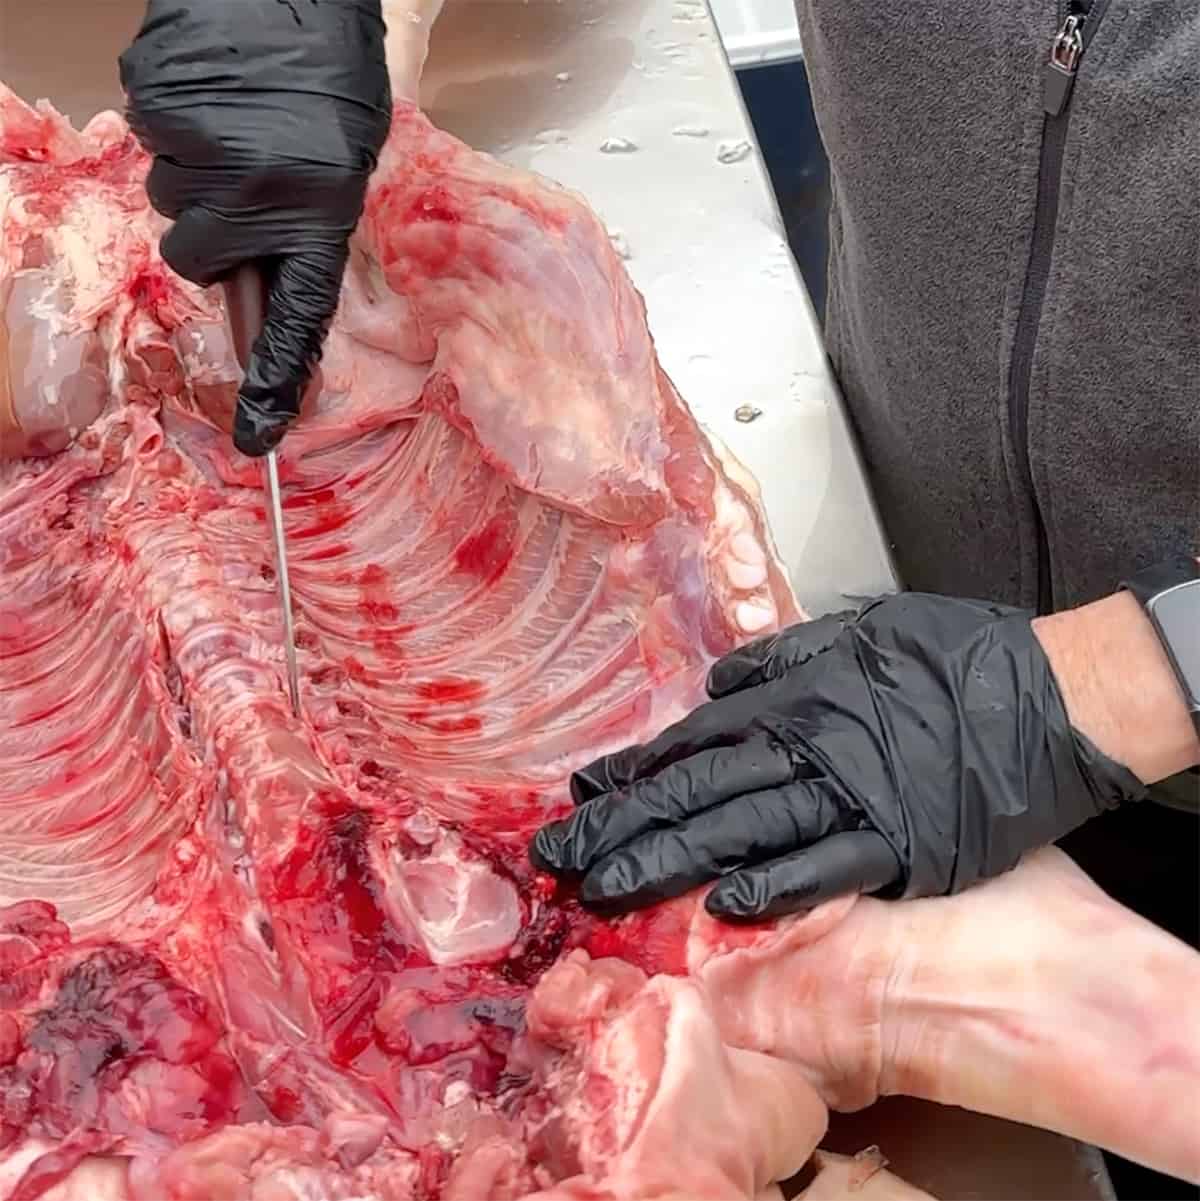
Make sure that you don’t insert your knife all the way through. You don’t want to puncture through the skin. You just want to cut down the bones.

Once you get down to bones four and five, you’re going to rotate your knife 90 degrees. Now you’re going to cut that intercostal meat. That’s right there between bones four and five. Just do a nice clean even slice.
Next you’re going to turn your knife so that you can get up and underneath of those ribs. You want to get as close to the bone as possible because you want to leave as much meat as possible on your hog.
So just gently run your knife under those four bones that you’re getting ready to remove. And then once you get to the end, you’re just going to be able to slice right along the top of that first rib bone. Then you should be able to remove those four ribs.
So again we cut down the spine. We cut between rib bones four and five. We ran our knife under the ribs and then just finish the cut right on top. Now those four bones are removed and you can move on to the next side of the hog and do the exact same thing on the other side.
Remove the head
Next we’re going to remove the head of the hog. Now, I know you’ve probably seen whole hogs with their heads still attached. Sometimes there’s an apple in its mouth, but this is different.
Remember the whole concept with the way that this cook is going is we want the whole hog to be as flat and even in thickness as possible.
So we don’t need the head on there. However, there is a lot of good flavorful meat on the head. So we’re going to keep the cheeks and we’re going to keep the ears.
You want to look for a white line along the spine. It’s in about the neck area. So it’s above the ribs right around where the neck is. You’ll run the tip of the blade of your knife right through that until you can crack through that.
Then you’ll gently fold the head backwards and you’ll hear the snap. Before we fully remove it, though, you want to sculpt along the face so that you can save that cheek meat.
You want that to be connected to the whole hog and then also trim around again so you save those ears.
Then you can continue to fold the head backwards and run your knife until you get a clean cut. Separate that head. You can cook that if you want to, or you can discard it whichever you prefer.
Prep the shoulders
Let’s finish the upper front portion of the hog. So the shoulders are still pretty thick. So what Marcio does is he scores them several times, which kind of lets the meat kind of fall loosely, so it’s a little more flat.
He takes the tip of his knife and he puts it toward the spine and runs it down along the meat to the outside edge.
Then he rotates his knife about 20 degrees or so and continues that 4 to 5 times. It’s not rocket science, just kind of rotate and fan that meat out until it starts to flatten.
Remove organs, veins, fat
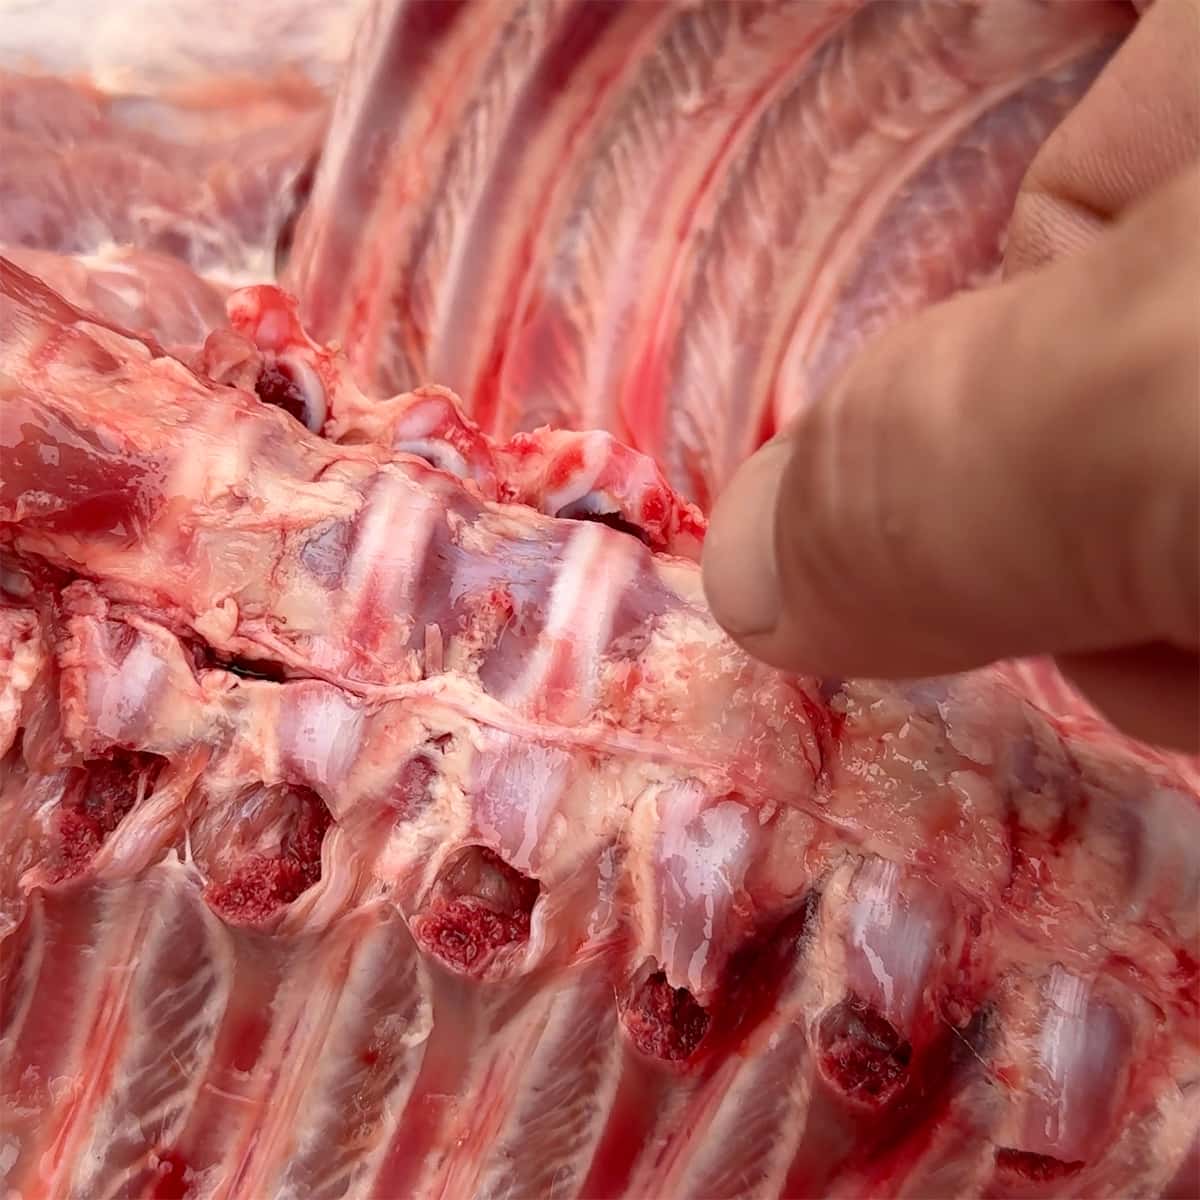
All right, let’s move down the body. So as you get into the cavity, look around. If you see something that doesn’t look edible, something that you wouldn’t enjoy eating, go ahead and pull that out.
You may have some kidneys in there. You’re going to want to discard those or save them for some other use.
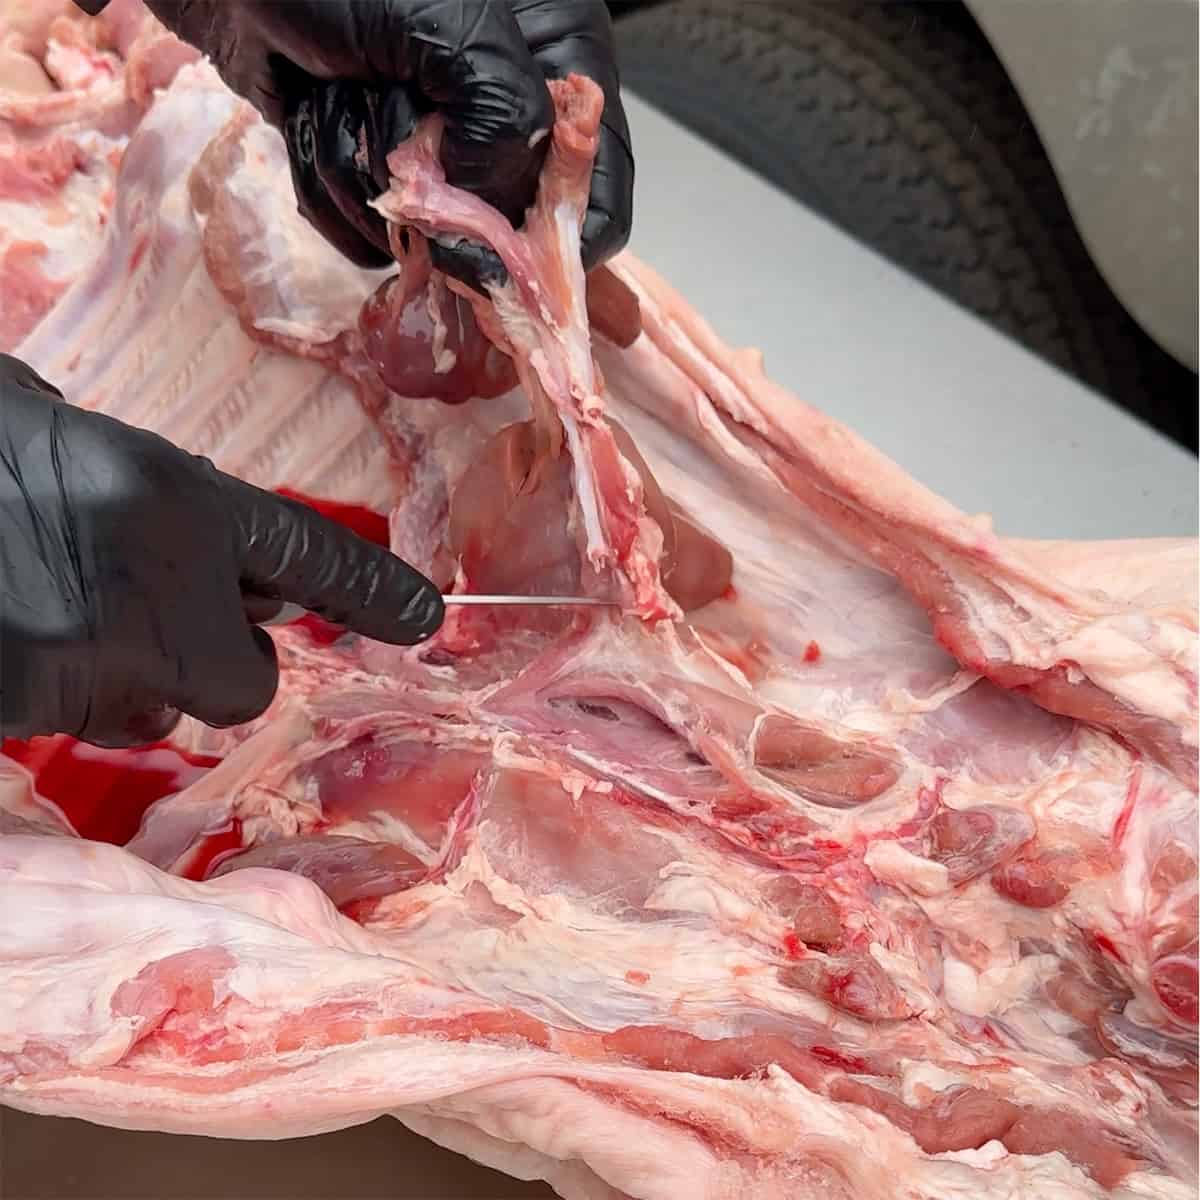
There’s also a vein along the lower portion of the spine. You’re going to want to just slide your knife under there and pull that vein out. You may also notice some glands located in the pelvis area. If you see anything that looks kind of gelatinous and again, something that you wouldn’t want to eat, just go ahead and pull those out.
Also along the belly there’s going to be a thick layer of fat. You’re going to want to pull that off too. Marcio said, if you render that down, it makes delicious lard.
Prep the hams
Okay, pretty much all we have left are the hams. So those are still pretty thick. Instead of just scoring them like we did with the shoulders, Marcio recommends kind of butterflying for laying them out.
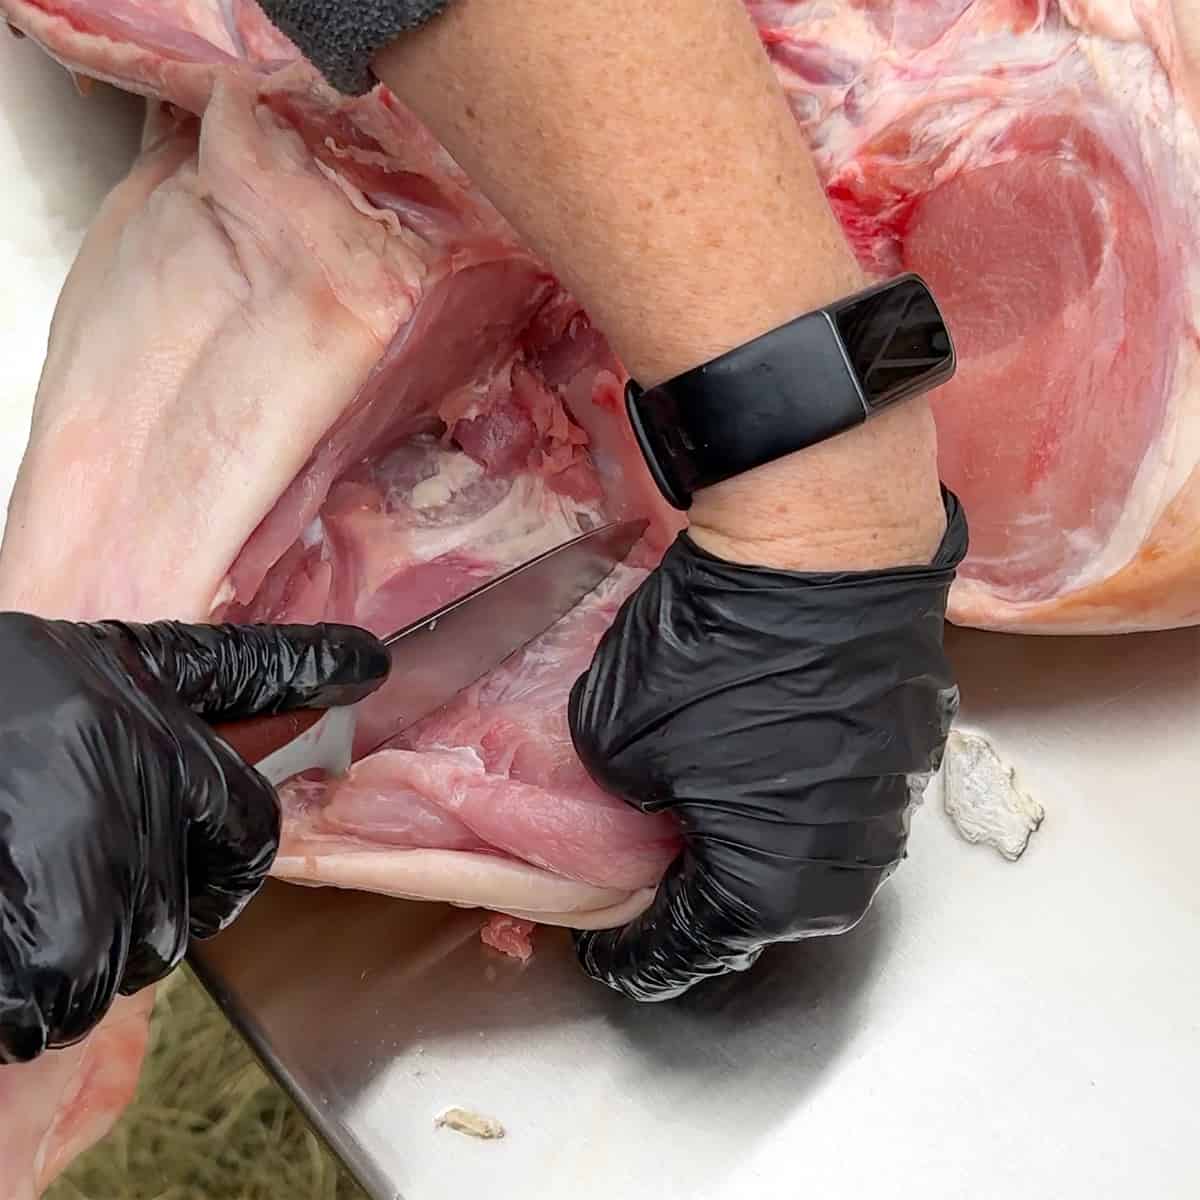
So you’re going to run your knife kind of horizontally or perpendicular to the meat and kind of fillet it and let it fold itself out. And then continue doing that until it just kind of fans out. Then you can go ahead and score it like you did the shoulders.
The reason for that scoring is not only does it give you even cooking, but it also gives you some crevices where you can add seasoning, which is going to really flavor your meat.
Remove the feet
All right then, the last thing that he does with his whole hogs when he’s cooking them this way is actually take off the feet themselves.
If you look at each leg down towards the foot, down towards the ankle, it’s going to have 3 or 4 joints down there. He recommends going to the highest joint.
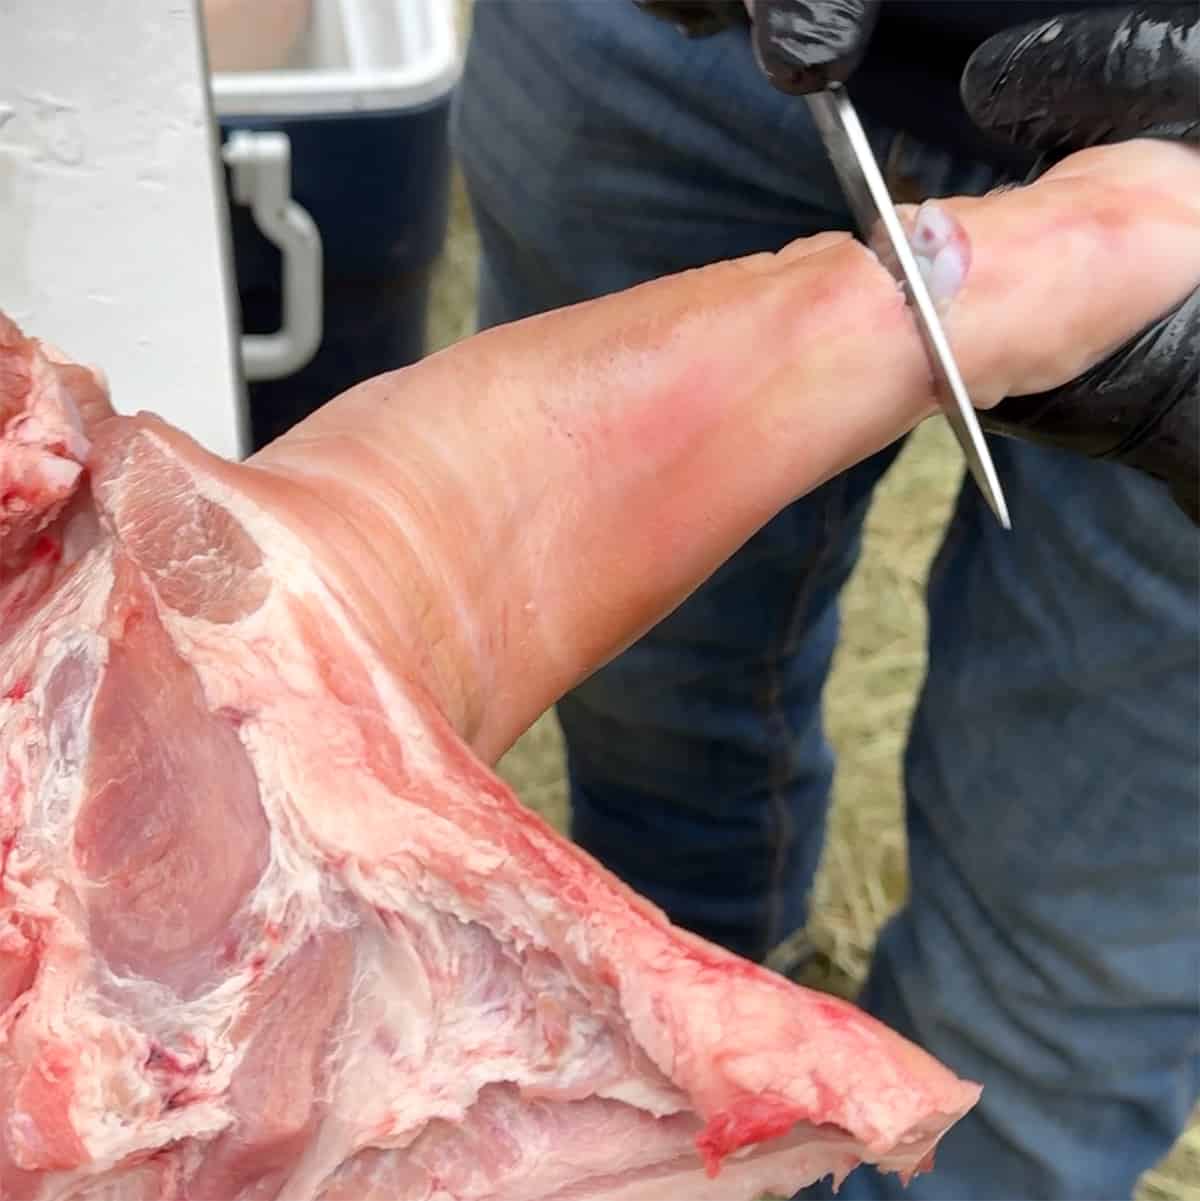
Run your knife along the top side just to break the skin, and then there’s going to be a tendon in the backside.
So you’ll need to run your knife behind that tendon under the skin. Cut that tendon. Then you can run your knife again from the top. And you should just be able to bend it and break it. And then you can remove it.
Prep for the cook
Once the hog is fully trimmed up, he seasons it liberally. Make sure that you sprinkle it from the top to the bottom and massage that rub right in there, so it gets into all of those score marks and crevices that you made.
Then it’s time to tie the hog down. Now, as I mentioned, he’s got this amazing grill set up that most of us probably don’t have in our backyards. But I still want to talk you through his process because it’s something that maybe you can replicate at home. I’m sure you can find a way to make this style your own.
He has two grates that are kind of like a panini press. So they’re on a center pole because this is going to go on a rotisserie. And then he has that bottom grate.
He places the seasoned hog right on that bottom grate. And he uses some heavy gauge wire to tie the hog down everywhere.
He ties down on the belly, on the sides, towards the top, towards the bottom. He simply just runs his tip of his knife right through the hog, right through the skin, and then pushes the wire through there and ties it to the rack.
Once he feels it’s pretty secure on the bottom rack, he goes ahead and adds the top rack, and the way his contraption works is that it can then be pushed down and kind of locked into place, which is great, because then the hog is going to be really stable when he adds it to the grill.
Cooking with char-logs
Let’s talk about the fire. The way that his grill is set up as he has a brasero, which is a basket in the back where you add wood.
You light it on fire, and as the coals and ash drop, you push those under the hogs. He uses that and uses whole pecan logs inside, but under the hogs themselves, not only does he use those coals and ashes, he also uses B & B charcoal char-logs.
He said those are the best for the consistent heat.
Now, if you’re not familiar with a char-log, it’s kind of formulated like a briquette. But instead of being in the shape of a pillow, it’s about a four-inch log that’s cylindrical. So maybe like two inches or so round by about four inches long. And it has a hole in the middle which helps with the oxygen.
He adds a few of those B & B char-logs right where the hog is going to go, pulls some of those pecan ashes right over, which is going to light those coals. And then he sets his two hogs right on the grill and lets them rotate.
He said with the consistent heat of the char-logs, it takes about five hours for the hogs to be cooked perfectly through.
The art of smoking whole hog
I will tell you, there is definitely an art and a science to cooking whole hogs. It’s not like just putting something in the oven and setting a timer.
He was constantly watching the fire, managing it, adding heat, adding coals, removing heat, removing coals, just keeping an eye on that.
He was also paying attention to the meat itself, whether through smell or through visuals. Marcio was seeing how the skin was doing, how the meat was cooking. And it was on a mechanical rotisserie, but at times he would actually stop it in its place because he could visually see if the skin needed to get a little bit more heat, or if the belly needed a little bit more heat.
So again, it’s definitely an art. He’s a world champion. He knows what he’s doing. He’s got this art down to a science.
But if you’re going to do this at home, it’s going to take some practice and it’s okay if you don’t get it right the first time, but you’ve got to try. I asked him how many hogs he’s cooked and he couldn’t even give me a number. He’s cooked so many, so it’s quite impressive.
None of us are going to be as good as Marcio in the beginning. Maybe ever. But we’ll never even get there if we don’t try. So go ahead and give it a shot.
So grateful for the experience
When I was at the World Championships, when I didn’t make it to the finals, I was a little disappointed. But I’ve got to say, God works in mysterious ways.
Having a walk on stage at the World Championships again would have been amazing, but honestly, the experience that I had with Marcio and the B & B team was priceless.
The fact that I could learn this was so special to me, because not only did Marcio show me how he did it and talk me through the process, but with the second hog, he actually gave me the knife and said, “Girl, now it’s your turn.”
So for him to trust me with that process as we are going to serve these whole hogs to a big crowd, was really something that was special to me.
And thank you, Marcio, for that, and I’m so glad that he’s okay with me sharing all these tips with you. That’s what BBQ Tips is all about, is passing on all of that information.

Serving cooked whole hog
After the hogs were ready, the teams pulled the hogs off the pits. Marcio, Mark Lambert, Bruce, Billy, Daniel, they pulled those down. The crowds were all around, even though it was pouring down rain. You could just hear that crispy skin and they just shredded that meat.
And then there was this whole pot of this special sauce that Marcio made, that has like a vinegar, sugary, sweet, peppery kind of profile to it.
You dunk the meat in there and it’s it’s one of the best bites that you’re going to ever have. It was so amazing. I wish I had that recipe to share with you, but I’m sure that’s a family secret.
I hope you guys have been fascinated by today’s show. Again, if you want to watch the techniques of what Marcio showed me, I am going to share those visually through YouTube and Embers TV.
Tune into more of my BBQ Tips podcasts or scroll around the website for even more helpful BBQ Tips.