These delicious St. Louis ribs are topped with a mouthwatering rib rub and smoked to absolute perfection. The combination of flavors and the tenderness of the meat make these ribs an irresistible treat for any barbecue lover.
This recipe and video will show you just how easy it is to achieve incredible results right in your own backyard.
Save this BBQ Tip
Enter your email, and I’ll send this link directly to your inbox. Plus, you’ll get new BBQ recipes and tips weekly.
Table of Contents
What are St. Louis style ribs?
You guessed it, St. Louis style ribs originated in the St. Louis area of Missouri. Essentially trimmed down spare ribs, these are extremely tender and meatier than other cuts. They come from the belly of the pig, have a bit more fat and are more flavorful than lean rib cuts like baby back ribs.
A full rack of spare ribs includes the brisket bones, which are often used to make riblets or rib tips. Once those are removed, the rectangular rack or ribs is called a St. Louis cut.
PRO TIP: St. Louis ribs usually cost a bit more per pound than spare ribs, so to save money, you can purchase spare ribs and trim them down yourself.
One end of a rack of St. Louis style ribs will be thicker and fattier. The opposite end will have smaller thin bones. Each rack usually has at least 11 bones and weighs 3-4 pounds.
When you look at the sides of the ribs, you’ll see that one side has obvious hard bones. The other side includes a strip of cartilage. If you want to trim your bones to be a certain length like for a barbecue competition, trim them from the cartilage side.
The meat rests on top of and in between the bones. The backside of the rack includes a strip of meat that is usually trimmed down before they’re packaged. Most of the time, the bones are covered with a membrane, also called silverskin. This should be removed before cooking.
For best results, cooking your St. Louis pork ribs low and slow using a 3-2-1 method is the secret to perfection. This method makes the meat incredibly tender and juicy.
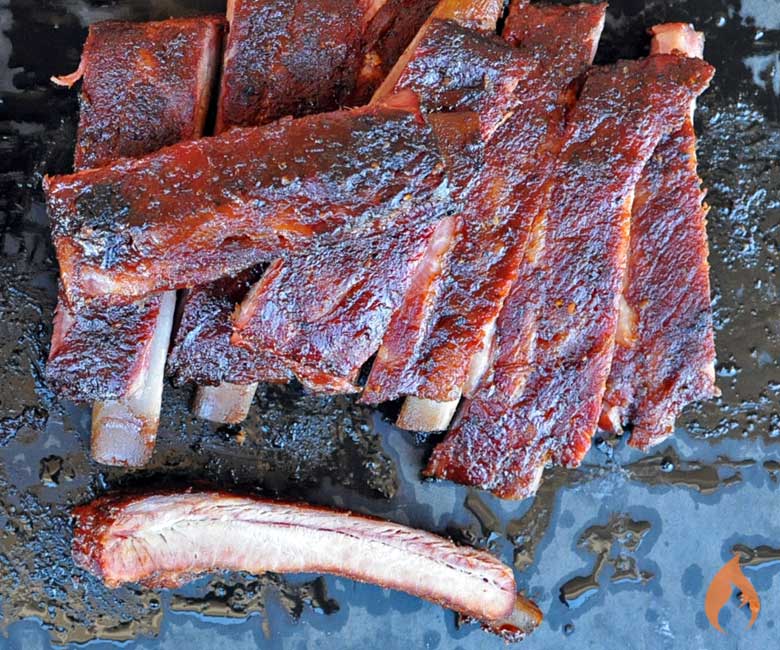
You will be amazed at the tenderness and flavor of these ribs. Once the ribs are cooked, they are ready to be served. They can be eaten as-is or with your favorite barbecue sauce for extra flavor.
The smoke and the spices from the rib rub blend together to form an amazing flavor and make for a recipe making the best ribs. You will definitely want to return for more.
Ingredients
- St. Louis Style ribs
- Yellow mustard
- Your favorite dry rub seasoning: Pork ribs taste great with a rub that is a little bit on the sweeter side.
- Butter: The butter helps the ribs to stay moist and fall-off-the-bone good.
- Brown sugar
- Honey: This adds a hint of sweetness, along with the brown sugar.
- Juice: Use grape juice or apple juice as a braising liquid.
- Your favorite barbecue sauce
Substitutions: Instead of buying a pre-made BBQ rub, you can also make your own by combining kosher salt, black pepper and garlic powder. Add a little brown sugar for sweetness and cayenne or chili powder for heat.
See the full recipe card below for servings and a full list of ingredients.
How to cook St. Louis ribs
St. Louis style ribs can be cooked on any type of grill or smoker at 225F degrees over indirect heat.
If you have a kettle charcoal grill, push the lit coals to one side and smoke the ribs on the grill grate over the side without coals.
If you’re cooking on a charcoal ceramic cooker like a Big Green Egg or Kamado Joe, insert the diffuser plate and adjust the vents until you reach 225F degrees.
For a gas grill, turn on one burner. Adjust that burner until the grill temperature reaches 225F degrees. Cook on the side with the burners turned off. To add smoke, use wood chips in a foil pouch.
If you have a pellet grill, simply set the temperature to 225F degrees.
For the Ninja Woodfire Grill, add pellets to the smoke box, set the function to smoke and the temperature to 225F degrees.
PRO TIP: Pecan, hickory and apple woods are the best choice when choosing smoking woods for ribs.
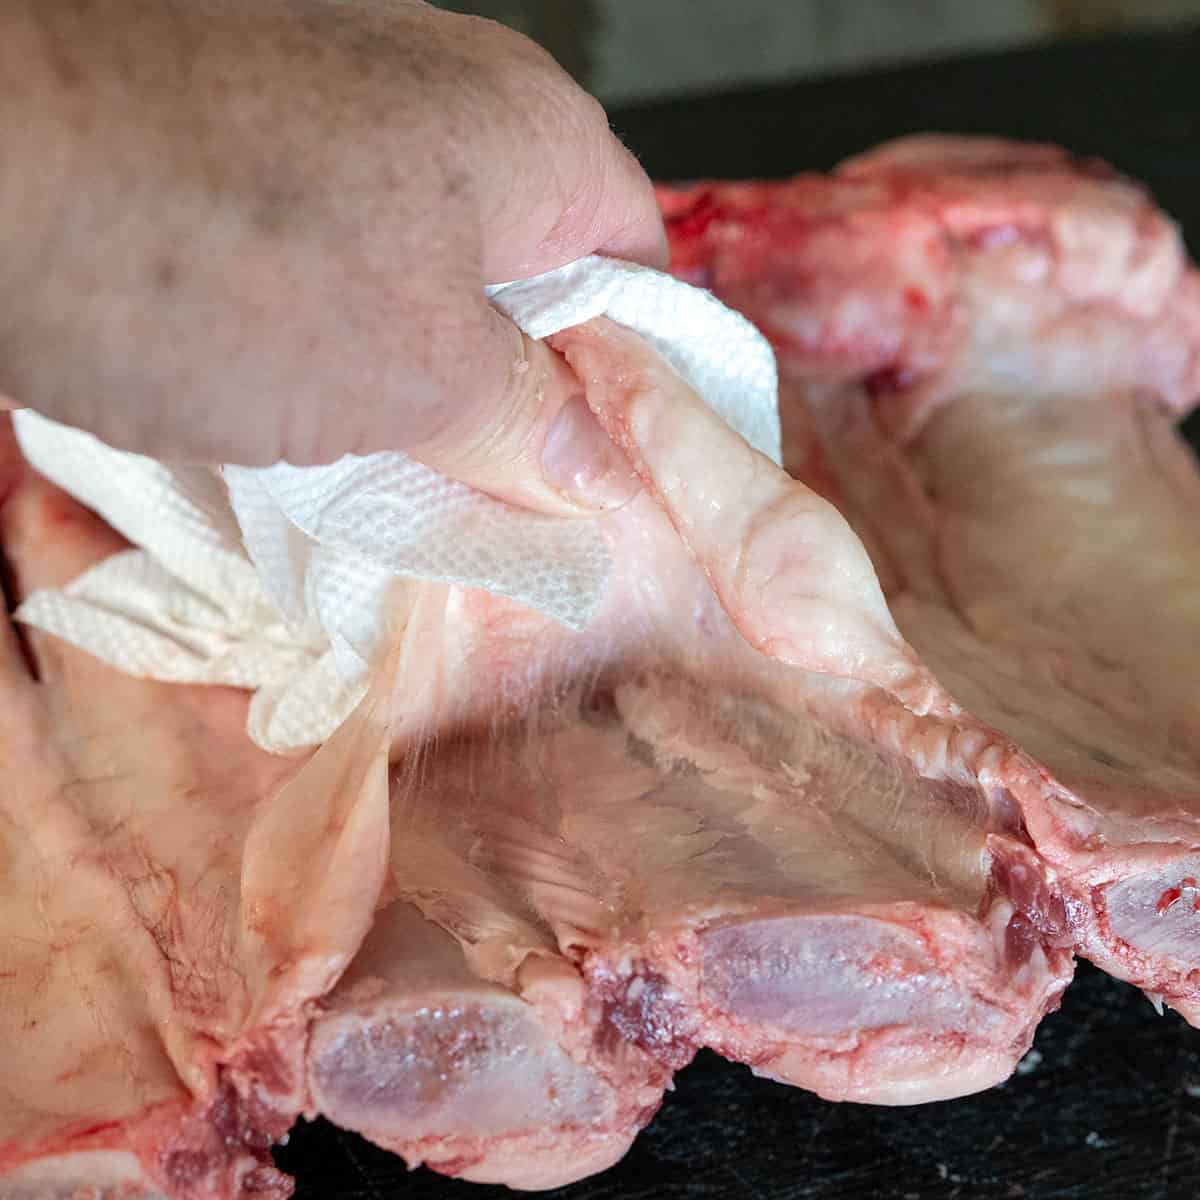
- STEP ONE: With your fresh pork ribs bone-up, pull off the thin membrane and discard. This connective tissue is called the silverskin. The easiest way to remove the membrane it is to grip it with a paper towel.
- STEP TWO: With a sharp knife, trim away any excess fat on top and the flap of meat on the backside.
- STEP THREE: Rub the backside of the ribs with mustard and your favorite spice rub. Let rest for at least 15 minutes. The rub will start to sweat. Flip and repeat on the top side of the ribs.
- STEP FOUR: Place the seasoned ribs on the grill over indirect heat with the bones facing down. Smoke with the lid closed for 3 hours. After three hours, your ribs should have developed a nice mahogany bark.
- STEP FIVE: Place two sheets of heavy-duty aluminum foil on the counter. Crimp up the edges so the ingredients don’t flow off. Using a butter knife, add 4-5 pats of butter, 1-2 tablespoons brown sugar, a liberal drizzle of honey and 1/4 cup juice onto the foil. Place the ribs on the ingredients, meat side down. Add 4 pats butter, 1-2 more tablespoons brown sugar and another drizzle of honey to the bone side of the ribs. Wrap tightly, crimping up the ends.
- STEP SIX: Place wrapped ribs back on the grill with the meat side facing down. Smoke for 2 more hours.
PRO TIP: Wrapping the ribs creates a braising environment, which ensures the ribs will be nice and moist.
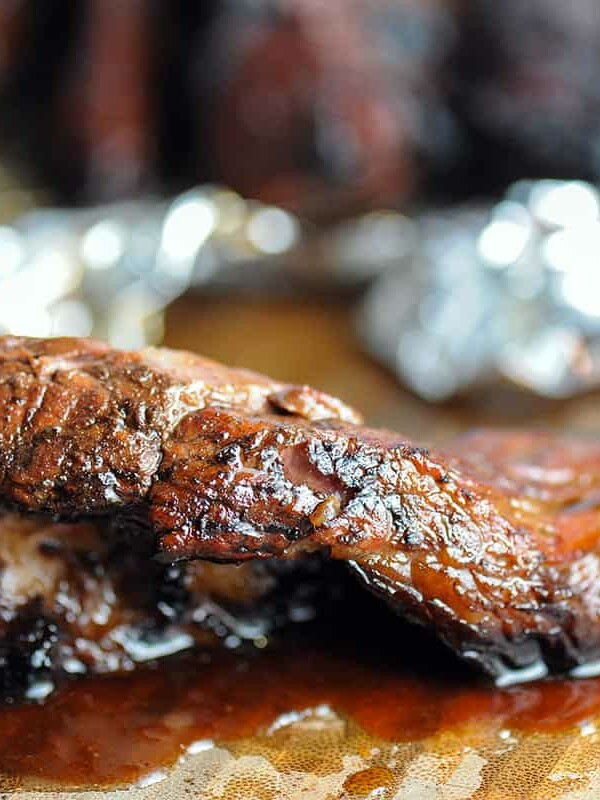
- STEP SEVEN: For the final step, you want to unwrap the ribs and get that lip-smacking candy sauce gloss on the ribs. Remove them from the smoker and unwrap them from the foil. Flip the ribs over and brush the meat side with barbecue sauce. Return to the smoker with the bones down for one more hour.
How to tell when St. Louis ribs are done
- When you pick your cooked ribs up with a pair of tongs, they should bend. If they bend and break in half, they’re overcooked. If they barely bend, they’re undercooked. You want them to bend to the point where they start to crack but don’t break.
- Another surefire way to know when St. Louis ribs are done is to measure the internal temperature with an instant-read thermometer. Insert the probe into the meat from the side, in between the bones. A temperature of 205-210F degrees will result in a perfectly tender rib that’s not overcooked.
How to serve St. Louis ribs
Allow the ribs to rest for about 15 minutes. Then, place them on the cutting board with the bones facing up. Slice between the bones with a long serrated knife.
I personally love serving St. Louis ribs with some delicious sides like corn on the cob, macaroni salad or potato salad.
For those who like it extra saucy, serve them with a bowl of your favorite BBQ sauce on the side.
Storage
After the meat is cooked, you can freeze for up to four months or refrigerate for three to five days. You’ll want to ensure that whatever method you use to store creates an airtight environment.
GCG Pro Pitmaster Tips
- For tender ribs, look for a rack that has visible white marbling in the meat
- Be sure to remove the silverskin from the back of the ribs
- Use the 3-2-1 method to form great bark and juicy meat
Frequently Asked Questions
St. Louis ribs are pork and are cut from the pork belly.
While you definitely could, I personally do not boil before grilling because it waters down the meat and can make it mushy. Making these delicious ribs requires coating them with a dry rub and allowing the seasoning to develop as they smoke.
When preparing St. Louis ribs, it is important not to overcook them, as this will result in tough, dry ribs. To guarantee succulent and tasty ribs, use a meat thermometer. Check the internal temperature. When it reaches a final temperature of 205-210F degrees take the ribs off the grill.
A full rack of pork spareribs can be broken down into two smaller cuts: St. Louis style ribs and brisket bones. The St. Louis style cut of ribs are a favorite among barbecuers, especially competitive pitmasters. The brisket bones are great for making rib tips.
One rack of ribs includes 10-12 rib bones and should serve two to three adults. Each person will generally eat 3-4 rib bones, depending on what other proteins and side dishes you’re serving. If you’re planning a party for 10 people, cook at least three racks of ribs.
What to serve with St. Louis ribs
- Best Baked Beans
- Classic Potato Salad
- Sweet Corn Pudding Casserole
- Chorizo Hot Maple Grilled Sweet Potatoes
More delicious rib recipes
Want even more great grilling recipes and tips? Subscribe to my newsletter and follow me on Facebook, Instagram and TikTok for my latest grilling adventures. If you make a recipe, please leave a comment and rating below.
Save this BBQ Tip
Enter your email, and I’ll send this link directly to your inbox. Plus, you’ll get new BBQ recipes and tips weekly.
Smoked St. Louis style ribs
Ingredients
- 2 racks St. Louis Style Ribs
- 1/4 cup yellow mustard
- 1/4 cup BBQ rub
- 1/4 cup butter
- 1/2 cup brown sugar
- 1/4 cup honey
- 1/2 cup apple or grape juice
- 1 cup BBQ sauce
Instructions
- Heat Grill: Heat your grill or smoker to 225F degrees with an indirect heat zone.
- Remove membrane: Flip the ribs, so that the bones are facing up. Using a paper towel, pull off the membrane and discard.
- Trim: Trim off the flap of meat on the backside. Trim and remove any excess fat on top of the ribs.
- Season: Rub the backside of the ribs with mustard and season with rib rub. Let the ribs rest for 15 minutes. Flip and rub the topside with mustard and rib rub. Rest for 15 more minutes.
- Smoke: Place the ribs on the smoker meat side up. Smoke with the lid closed for 3 hours.
- Wrap: Place two sheets of heavy-duty aluminum foil on the counter. Crimp the edges so the liquid doesn't fall off. To the foil, add 4-5 pats of butter, 1-2 tablespoons brown sugar, a liberal drizzle of honey and 1/4 cup juice. Place the ribs on the butter, meat side down. To the bone side of the ribs, add 4-5 more pats butter, 1-2 more tablespoons brown sugar and another drizzle of honey. Wrap tightly, crimping up the ends.
- Braise: Place the ribs back on the smoker meat side down and cook for 2 hours.
- Sauce: Remove from the smoker and unwrap from the foil. Flip the ribs over. Brush with sauce on the top side of the ribs. Return to the smoker bone side down for one more hour.
- Slice: Remove from the smoker. Let rest a few minutes and slice.
Notes
Nutrition
Nutrition information is automatically calculated, so should only be used as an approximation.


3-2-1 method the last hour is that wrapped
In foil ?
Unwrapped
Tried these today and they turned out great!
Trying this recipe today but making 3 slabs. Would I change anything since your recipe is for 2 slabs?
Not really. Just use the amount of butter, sugar and juice described in the instructions.
I own a camp chef with wifi, I can set the smoke from 1 to 10. 1 being low. When cooking 321 ribs, the first step what smoke setting should I use?
It really depends on how much smoke you personally prefer. You can try your first batch set on 5. If you decide you want more smoke next time, adjust from there.
Your recipes are always straightforward, easy to follow, and most importantly, they always work! Made my first brisket using your method a few weeks ago, everyone loved it. Even friends who told me everyone ruins their first few briskets. I’m making St Louis ribs in my WSM tomorrow.
During the 2 hour foils stage, are you still producing smoke?
No. At this point, you’re done absorbing smoke.
Did I miss where you gave a smoking temperature? Or doesn’t it matter?
For this recipe, heat your grill to 225F.
Thank You!!!! This was amazing!! I’m a begginer and this was EASY!! and…….delicious!
Yay! So glad to hear it.
Christie,
I am a beginner smoker and this will be my first shot at smoking anything. I can’t wait to try your recipe. I have a Masterbuilt 40 smoker. When smoking, how ever so often do you add wood chips during the first 3 hours? How much liquid do you put in your water pan? Can I use a mixture of apple cider vinegar an water? How ever so often in those first 3 hours do you spritz the ribs with fluids? Thanks so much, can’t wait to give you feedback.
I add wood chips at the beginning. If they burn out, I add more.
Fill your water pan with warm water. If it evaporates, add more.
Yes. You can definitely spritz with a water/vinegar combo. I spritz about every 30-45 minutes.
Ours looked done after the two hour wrapped in foil cook. Is the purpose of the last hour just to caramelize the sauce?
Yes. If you feel that you’ve reached the level of doneness you like, You can cut that last hour down to 15 minutes or so, just to set the sauce.