After judging a recent barbecue competition, Team Girls Can Grill is back at the pits.
In this week’s BBQ Tips Podcast, pitmaster Christie Vanover shares what she learned about judging chicken and how she preps and cooks her competition chicken thighs.
I’ve got a couple quick announcements before we get started with this week’s podcast. First, thanks to everyone who supported Hogs for the Cause. Last weekend, they raised more than $4.3 million to help kids with pediatric brain cancer.
Also, I want to give a quick shout-out to Frank from Montana. He watches this episode every week without fail and always leaves me a comment on YouTube, so I just wanted to say hi.
Listen to the BBQ Tips Podcast on
Table of Contents
2024 GCG Pro Team
Next, I’m excited to announce the 2024 Girls Can Grill Pro Team. I have decided to sponsor nine talented young ladies who are already active on the competition circuit, and they’re all under the age of 18.
This year, I’m sponsoring MacKenna York out of Utah, Raelyn Barker out of Texas. Sammie, Katie and Abby of Lucky Ladies BBQ out of Las Vegas, Nevada. And Jocelyn, Brooklyn, Addy and Katie of Moodswing BBQ out of Tennessee.
Keep an eye on these ladies because they are doing amazing things in barbecue. Some are going to be at Smoke Slam, some are going to be at a competition near you, and several of them have already competed in world championships.
So I’m really excited to help empower these girls, and I really believe in them. And I know they’re going to do great things in barbecue. They will be the future female pitmasters.
KCBS Chicken Category
All right, talking about competition barbecue is what this week’s all about. But we’re focusing on one protein chicken.
So if you guys recall, I’ve been competing for several years now, but I’ve been in kind of a rut. My scores have just kind of been a little bit steady. I haven’t won a grand championship in a little while.
So a few weeks ago I went to California and decided to judge instead of compete, and I shared in one of my episodes, some of the secrets and the tips and kind of what I learned from inside the judges’ tent. So definitely go give that a listen if you haven’t yet.
But today, I just want to focus on one protein, which is that chicken. This week, I have a competition in Perris, California.
So this week, as I talk about the chicken category, I’m going to talk about what I learned in that judges’ tent and the process that I go through. So hopefully it’ll help you out as you’re entering the chicken category yourself.
Judging Chicken
Let’s start with the judging process and rules. So as a reminder with a chicken category you can turn on any kind of chicken. They can be breasts, thighs, wings, legs, you name it.
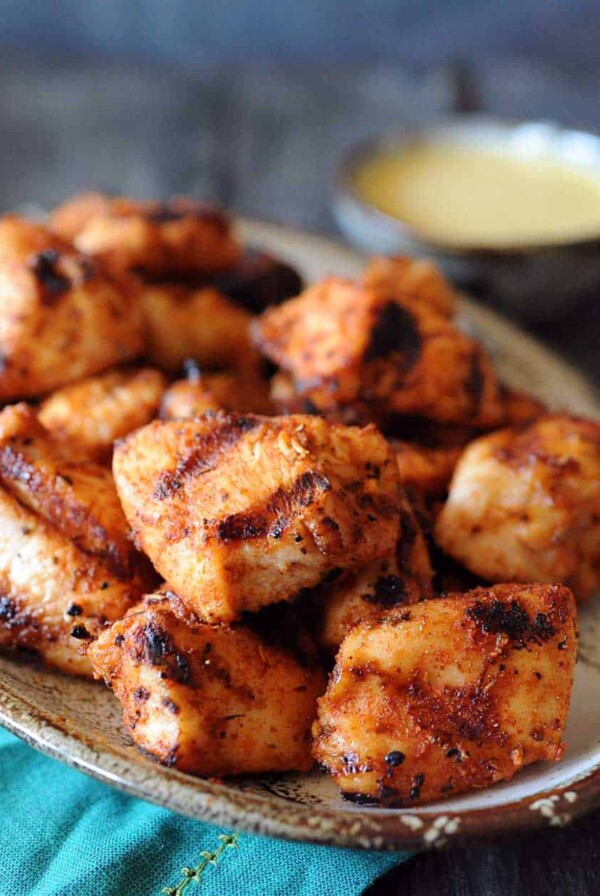
But I’m really going to focus on the competition chicken thighs today because that’s traditionally what I turn in.
With any chicken entry though, the judges are not allowed to have a preconceived idea of what should be in the box. If they want thighs and they get wings, they cannot judge you down for that. That’s against the rules.
What they are supposed to do is take a bite from the meatiest part of the chicken piece that you provide to them. Then they can also take a second bite just to confirm their thoughts on the taste and the tenderness.
You’re not required to have a bone, but it can have a bone or not. But they’re not allowed to judge you either way.
If it does have skin, they are supposed to take a bite of the skin on the first bite. So you’ve got to make sure that you’ve got nice tender bite-through skin. And we’ll talk a little bit about that.
They are not allowed to judge the skin separately. If your piece has skin on it, they’re supposed to take a bite with the skin included.
Appearance
The first thing they’re going to judge you on is appearance. When it comes to appearance, you want your meat to look as beautiful as possible.
The judges are not supposed to judge you down if your pieces are not exactly symmetrical, because chickens don’t grow the same. But I do do my best to make them as evenly shaped as possible.
You want to make sure that you have six portions. You’re actually allowed to have three thighs and three legs. You don’t have to have six portions of each cut, but it’s just something that people routinely do. They want to give the judges the same experience.
If you want to do pulled chicken that’s allowed to, you just have to make sure that you have enough pieces in your box so that you can get even distribution of taste for all the judges.
Taste
Taste is the most important category because it carries the highest weight when it comes to the score.
When a judge tastes your chicken, they are looking for something that’s pleasing. A little savory, a little sweet, but nicely balanced. If it has sauce or rubs, those should enhance the flavor of the meat, not overpower it.
Don’t forget the meat itself. While the exterior and the skin might have a beautiful rub and sauce on it, if the meat inside is bland, you can get docked for that. So you want your entire piece of chicken to taste really nice.

Save this BBQ Tip
Enter your email, and I’ll send this link directly to your inbox. Plus, you’ll get new BBQ recipes and tips weekly.
On the KCBS optional comment card, there are different boxes that a judge can check to let you know why they gave you a certain score.
They don’t always give you comment cards, but I like to go through what’s on the comment card just so you know some of the things that they might be thinking about when they’re tasting your chicken.
They may dock you down if it’s too salty, too peppery, too spicy, too sweet, too smoky, or even if it’s burnt. They could also knock you down if it’s sour or bitter or bland, or has some kind of an unknown flavor that’s a little bit off-putting to them.
There are also boxes on the common card that they can check when they do like the taste of your chicken like pleasant, enjoyable, satisfying and savory.
Tenderness
Next up is the tenderness category. This has to do with the mouthfeel of the bite itself. Is your chicken nice and tender, or is it rubbery? Is your meat juicy or is it dry?
For tenderness, they should score you on the mouthfeel and the overall chewing experience.
Some of the boxes that they could check on the comment card if they don’t care for the tenderness of your meat are: Is it mushy? Does it feel dry? Is it tough or chewy or rubbery or maybe even grainy?
If they do like it, they can check that it’s pleasant, enjoyable and satisfying.
Selecting Competition Chicken
Now that you know the judging criteria, let me talk to you about my process. When it comes to cooking chicken, I always do chicken thighs. I’ve tried legs in the past, but I just prefer chicken thighs and that’s what I turn in.
So let me talk to you about how I pick out my chicken thighs.
I almost always cook Sanderson Farms chicken thighs that I pick up at the local WinCo, which is a grocery store here in Vegas.
I buy the ten-pack of chicken thighs. When I start with the chicken thigh, I like it to weigh between 8 to 10 ounces before I trim it. So if you’re buying a ten-pack, that’s going to be about 6 to 7 pounds is the weight you want to look for on the pack itself.
If you get a smaller pack, you’re going to end up with a bunch of runts. If you get something that’s on that higher end of 6 to 7 pounds, you’re likely to have some good 8 to 10 ounce pieces in there. You’ll probably have some 6 to 7 ounce pieces in there as well, which is why I buy 3 to 4 packs, because I’ve really got to find those pieces that weigh the most.
I like the larger pieces, because that means there’s more meat on the bone, and hopefully that will be a better, more enjoyable experience for the judge.
When I get the chicken home, I open it up and I get out the kitchen scale. I always cook 12 chicken thighs, so I’m looking for 12 pieces that are in that 8 to 10-ounce range, and I just weigh each one.
The runts get set aside and vacuum sealed for a meal later. The larger ones all get pulled together. If I have more than 12 that are in that range, I look for the 12 that are going to be most consistent in weight, and I separate those, and those are the ones that I trim.
Trimming Competition Chicken
Chicken trimming is no joke. It’s a lengthy process and it takes some time. It could take you a few hours until you kind of get the hang of it. Personally, I find it therapeutic and I actually like trimming chicken thighs.
Once I have my 12 thighs picked out, I usually keep six on the counter and put six in the fridge. You want your chicken thighs to be cold, especially when it comes time to scraping the skin.
I trim each chicken thigh one by one. I’m not going to go through the whole process today, but I do have a video showing my process.
I start by removing the skin and setting that aside. Then I trim away kind of the excess fat that’s on top of the meat itself.
I flip the thigh over. I use garden shears to actually cut off one of the knuckle bones, and then I look at the other knuckle bone, and if it’s kind of sticking out, I may give that a little bit of a trim too. Then, I square up the sides.
Next I look at the meat itself. There’s a little fat pocket in there that I like to trim away with my scissors. I don’t get it all because fat is flavor, but I take out most of it, so there’s not kind of a mushy, weird bite when the judge bites into that.
I also look for this big vein that is kind of near the bone, and I pull that out. It helps if you have gloves that have a little bit of a grip to them. I use Gloveworks gloves.
Once the vein is removed and that fat pocket is trimmed, I roll the thigh back up and I look at the shape again.
I want it to be pretty square. I may take my scissors and just kind of cut along the edge. I may take my knife a little bit more, but I’m looking for a nice square, pillowy, consistent shape. Once I have that, I set it aside. Then I take the skin. I flip it so that it has fat side up and I use a boning knife.
You want to put that boning knife at a 45-degree angle, right on top of that chicken skin on the fat, and you’re going to push that away from you, scraping the fat away from the skin.
The reason you do this is because if you don’t, there’s a chance that that fat on that skin will not fully render in the time it takes to smoke the chicken.
And if a judge takes a bite, it can be rubbery. And that right there will dock you in tenderness.
Another method that people do is they will take a jaccard, which is like a meat tenderizer that has a lot of metal little prongs on it, and they will pound that on top of the chicken skin.
That creates a kind of perforation which allows the heat to get in there to help render it. I still prefer the scraping method. I think that is the no-fail method, but it is more time consuming.
Once I have all the fat scraped off, I make sure that it’s in the shape of a rectangle, and I lay it back on top of the chicken thigh with the fat side down, wrap it around.
And that’s it. And I move on to the next one.
If you find that scraping the skin is kind of hard, I recommend putting the chicken back in the fridge or even in the freezer for maybe ten minutes or so. The colder the fat is on that chicken skin, the easier it is to scrape.
Once all my chicken thighs are done, I put them in a vacuum-sealed bag and I throw them in the refrigerator until the competition.
Seasoning competition chicken
You have to bring your meat to a competition without seasoning it or without injecting it. It just has to be raw chicken. Then once I get to the competition and I have my meat inspection, then I can do all the magic.
Now, you do have a choice. You can brine your chicken thighs. You can inject your chicken thighs. You can season your chicken thighs. You can do all three of those if you want to.
I’m going to talk to you about the brining process first. There are a few cautionary things I want you to know about it.
Brining chicken
The brining process includes a salty, watery solution that you put your chicken thighs into. You soak them for a couple of hours and then you take them out.
That solution is going to help really tenderize the meat and make it juicy. But if you soak your chicken thighs too long in the brine, your chicken can become rubbery, both with the meat and with the skin.
I learned that the hard way at a competition in Indio. I meant to brine my chicken thighs for two hours. I accidentally did it for 3 or 4 hours and they were horrible. The meat was rubbery, the skins were rubbery. I got second to last place in that competition and I deserved it.
I haven’t brine my chicken thighs again since, but if you want to try that process, give it a go. But I recommend testing it at home first so that you can really get the accurate timeline for your cook.
Injecting chicken
Instead of brining, I love to inject my chicken. I have a dry brine mix that I take with me on the road, and then on Friday I mix that with some water.
Then to inject my chicken thighs, I run the needle kind of parallel along the side of the bone right into the meat, and I plump it up as much as I can.
I do that on the left side of the bone. I do that on the right side of the bone. Then I turn my chicken thigh 90 degrees, and I give a few more shots in there, right into the meat.
Again, you want it to be really plump until it almost can’t hold any more liquid.
I set those in a pan, and I let him rest in the fridge for a couple of hours. Then I pull them back out to season them.
Seasoning chicken
When I season my chicken thighs, I start with them with the skin side down. I use a couple different rubs and I do a really light seasoning right on top of the meat.
Then I flip them over and do another light seasoning on the top side. When I’m seasoning the top, I’m focusing on the side edges mostly, not the top itself. Remember, once it’s all folded up, when a judge takes a bite, they’re going to bite from the side. So that’s where you want most of the flavor to be.
After they’re seasoned, I reshape them into their little pillows, put them on a pan, stick them in the fridge or in the Cambro until it’s time to smoke them.
Smoking chicken thighs
I smoke my chicken thighs on my Hunsaker drum at 275F degrees over Cowboy Charcoal. I use both the lump and the charcoal briquets and a couple pieces of pecan wood.
Most pitmasters cook their chicken thighs in a pan and some sort of a butter bath. Well, there are different pans that you can use.
Traditionally, a lot of pitmasters will use just a like 13×9 pan. They’ll put all of their pieces in there with the butter and get it smoking.
Personally, I think there are two better options that really help your chicken thigh maintain its shape.
Mini loaf pan
The first pan is the mini loaf pan. This is a pan that bakers often use. It’s kind of like a cupcake pan, but instead of the round holes, they have rectangles.
The great thing about this pan is when you put your chicken thigh in there, it’s going to hold its shape great because it fits perfectly into that little rectangle.
The downside of using that pan is it is a bitch to clean. And I don’t really like scrubbing pans after a long day of competing. So I use a different method.
2-pound loaf pan
I use a 2-pound aluminum loaf pan. I just pick these up on Amazon, and they’re disposable, so no washing required.
Each pan will perfectly hold three chicken thighs. So because they’re all nestled into that pan, they hold their shape both on the ends and on the sides.
Adding fat
No matter which pan you use, you’re going to want to add a little bit of fat to the bottom.
I like to use Kerrygold salted butter. I also like to use chicken schmaltz. If you don’t know what chicken schmaltz is, it’s rendered down chicken fat and it has so much flavor.
After I scrape my chicken skins, I render that down and then I save that for competitions. It is a little bit time consuming, but it adds so much great flavor.
Once you have your butter in the pan, you can go ahead and add your chicken pieces. You can also add some fat on top.
I have learned if you add too much fat on top, it can cause your skins to split and to crack. So I use this little butter shaver that I picked up on Amazon, and it gives me the thinnest slices of butter that I just layer on top of each chicken thigh when I put them in the pan.
Smoking
Once my pans are ready, I go ahead and take them out to the smoker. Because I’m cooking 12 thighs, I use four 2-pound loaf pans, again with three thighs in each loaf pan. I go ahead and I just set them on the grill and I let them smoke for about 45 minutes.
During this process, they’re picking up that smoke flavor. They’re starting to cook. They’re starting to get their beautiful color.
Braising
After that point, I go ahead and cover each pan with foil, and I cook them for another 20 to 30 minutes. During that process they’re braising, and this is helping that butter really get into the meat and really keep it nice and juicy.
Then I go ahead and probe them, and I’m looking for a temperature of about 195F degrees.
I know chicken is technically ready at 165F, but with chicken thighs it’s dark meat, so they’re actually better if you cook them a little longer. So I cook them to about 195F.
Once I reach that point, I take my chicken thighs off of the smoker and I bring them into my trailer. Now it’s time to get them ready for the box.
Boxing chicken
First thing I’m going to do is dunk them in my sauce. You want to make sure that your sauce is warm. I usually put my sauce in another 2-pound loaf pan and either set that on the lid of the grill or inside the grill, depending on how cold it is outside, until it gets warm.
You don’t want it to boil, but you do want it to be warm, so you don’t shock the chicken by dunking it into cold sauce.
Before I sauce my thighs, I take a look at them. I may squeeze them a little bit to find the juiciest ones. I also look to see which ones are the most symmetrical, even though that’s not a requirement.
I also look to see if any of the bones may be protruded from the sides, and if they do, I take my kitchen shears and I give them a little slice, or I use my knife and I kind of cut that up, because again, I want them to be as squared as possible.
Then I use two little cocktail forks. I pierce them into the sides of the thighs, pick them up and put them right into that warm sauce and give it a flip until it’s sauced on all sides.
Then I take my chicken thigh out of the sauce, place it back on the rack, and I try to put my six favorite pieces together so that they’re ready for me when I need them.
Once all 12 pieces are on that rack, I take it back out to the smoker and I smoke it for another ten minutes. This is just going to help the sauce set during this process.
PRO TIP: I like to throw a handful of pecan wood chips, or pecan pellets right onto the smoker. That way, a little bit of smoke flavors the sauce, which is going to add to the taste.
During that ten minutes while they’re on the smoker, I go back in the trailer and there’s a couple things I do to get my box ready.
Touch of sweetness
First, I have a cutting board and I do six little dollops of agave syrup on that cutting board. I also hit them with a little bit of finishing rub.
Then I make sure my box is ready. I take it out of the fridge. I usually have a damp paper towel on top of the greens, so I remove that.
Ten minutes are up. I go get my chicken thighs off the smoker, bring them back inside the trailer. Then I use those two little cocktail forks to take them off the rack and place them on that agave.
I hold it by the sides gently and kind of give it a little swirl.
Then I use my little forks and I place six of them in the box. I try to make them nice and even as possible. I use a damp paper towel to clean up any sauce that might have got on the box.
I double check my greens to make sure that they look nice and even. Then, I close the lid and deliver it to the judges.
The reason we did that agave syrup process is because when a judge takes a bite, the first thing their tongue is going to hit is the bottom of that chicken thigh.
By adding the agave syrup, it’s going to give a nice sweet surprise. Then they’re going to bite in. They’re going to taste your sauce. They’re going to taste your seasoning, hopefully really juicy chicken and really bite through skin.
And hopefully you’re going to get nines across the board.
It’s quite a process, but that’s what competition barbecue is all about. I hope that my insider tips have really helped you guys out.
Good luck if you’re competing this weekend. Until next time, happy grilling!
Tune into more of my BBQ Tips podcasts or scroll around the website for even more helpful BBQ Tips.