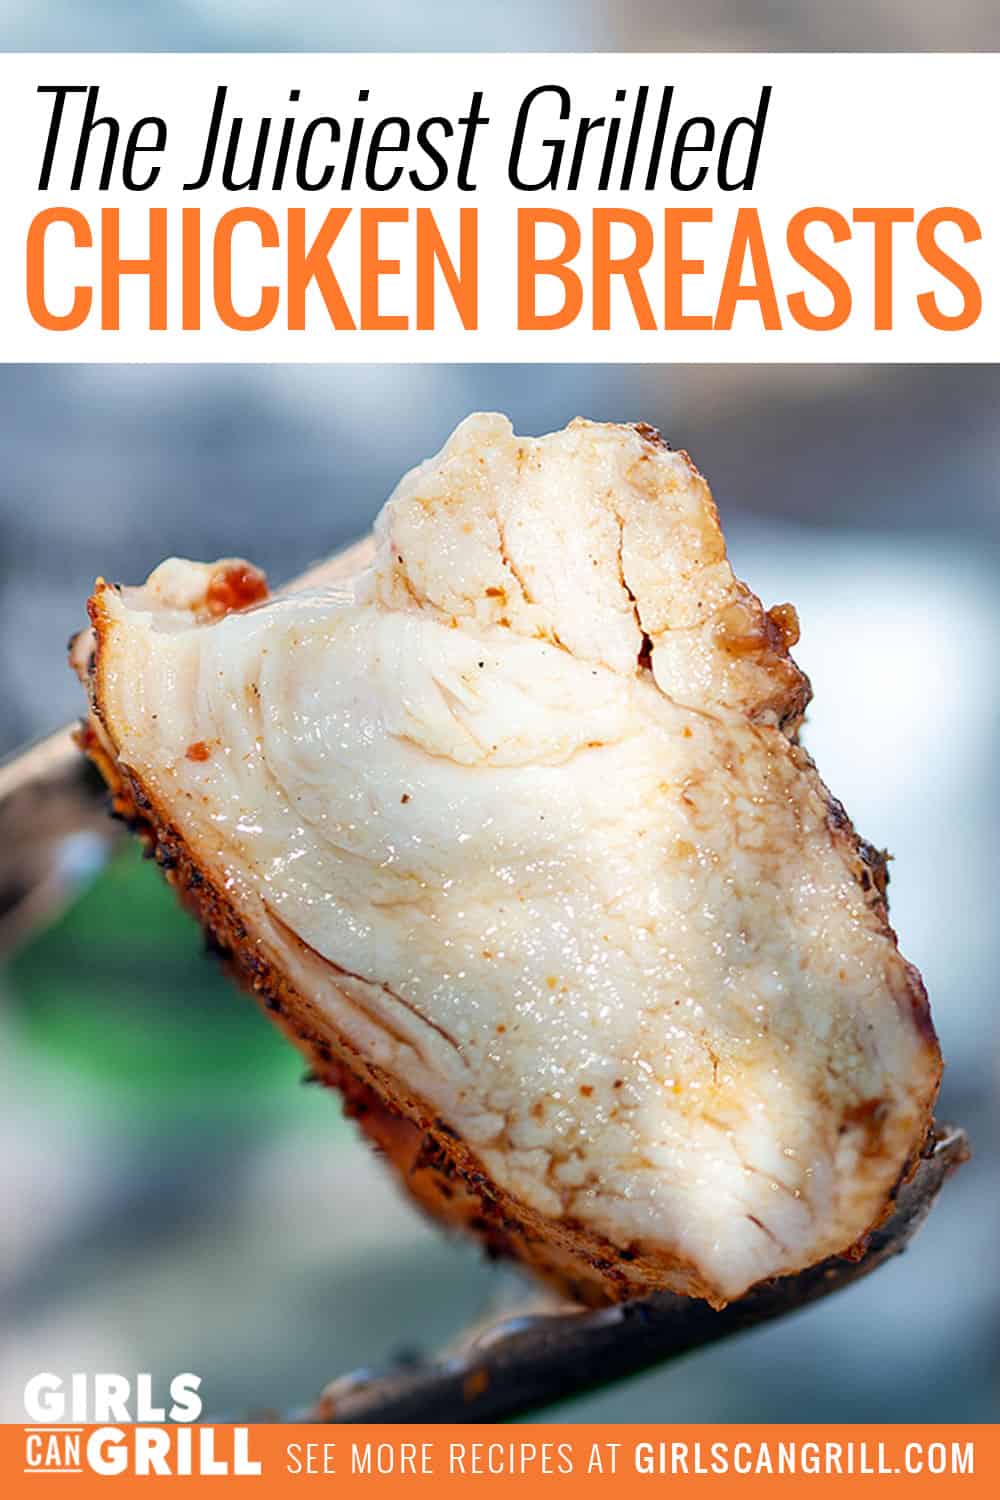
This recipe delivers the juiciest grilled chicken you’ll ever make, and it includes instructions for different types of grills.
Save this BBQ Tip
Enter your email, and I’ll send this link directly to your inbox. Plus, you’ll get new BBQ recipes and tips weekly.
I went through numerous chicken breasts in my test kitchen to come up with the juiciest method for grilled chicken breasts. I tested the recipe on multiple types of grills and included detailed instructions for them all in this post.
I recommend reading the trimming and brining sections of the post and then following the method for the type of grill that you have.
Table of Contents
- Grilled Chicken Breast Ingredients
- Grilled Chicken Breast Equipment
- How to Trim a Chicken Breast
- How to Make Sure the Chicken Breast is Juicy
- How Long Does it Take to Brine Chicken
- How to Season Chicken Breasts for the Grill
- How Long to Grill Chicken Breasts
- Grilling Chicken Breasts on a Gas Grill
- Grilling Chicken Breasts on a Charcoal Grill
- Grilling Chicken Breasts on a Pellet Grill
- Grilling Chicken Breasts on a Ninja Foodi Grill
- How to serve grilled chicken breasts
- Storage
- Sides to Serve with Grilled Chicken
- More Chicken Recipes
- Grilled Chicken Breasts Recipe
Grilled Chicken Breast Ingredients
The ingredients for this recipe are super simple. You only need the chicken plus 4 ingredients for the brine and then two ingredients for the rub.
This recipe is great on its own, but you can also add your favorite sauces to the chicken at the end to enhance the flavor even more.
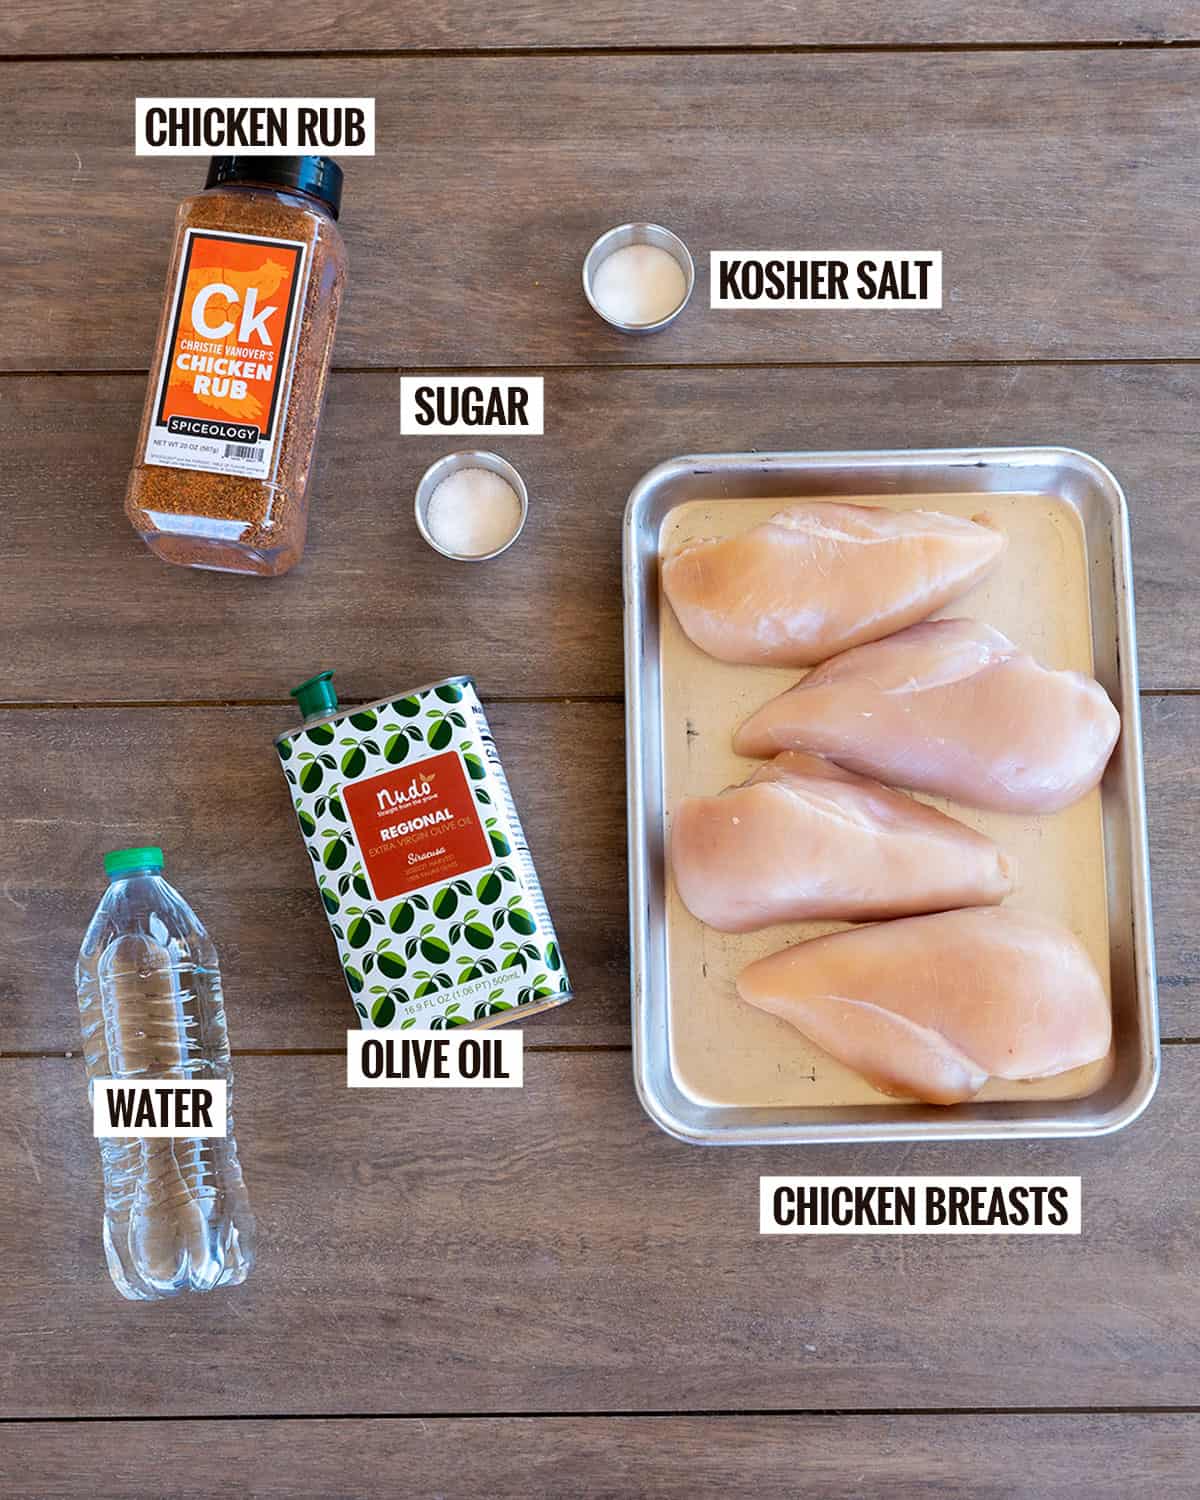
- Boneless Skinless Chicken Breasts: Be sure to buy the skinless breasts that still have the rib or tenderloin meat connected. This ensures even thickness.
- Water: A bottle of water is the perfect size for this recipe, but you can also use 2 cups of tap water.
- Chicken Rub: You’ll use this in the brine and as a rub.
Substitutions: You can also use virtually any type of cooking oil in place of the olive oil.
Grilled Chicken Breast Equipment
The equipment you’ll need will depend on the type of grill you’re cooking on.
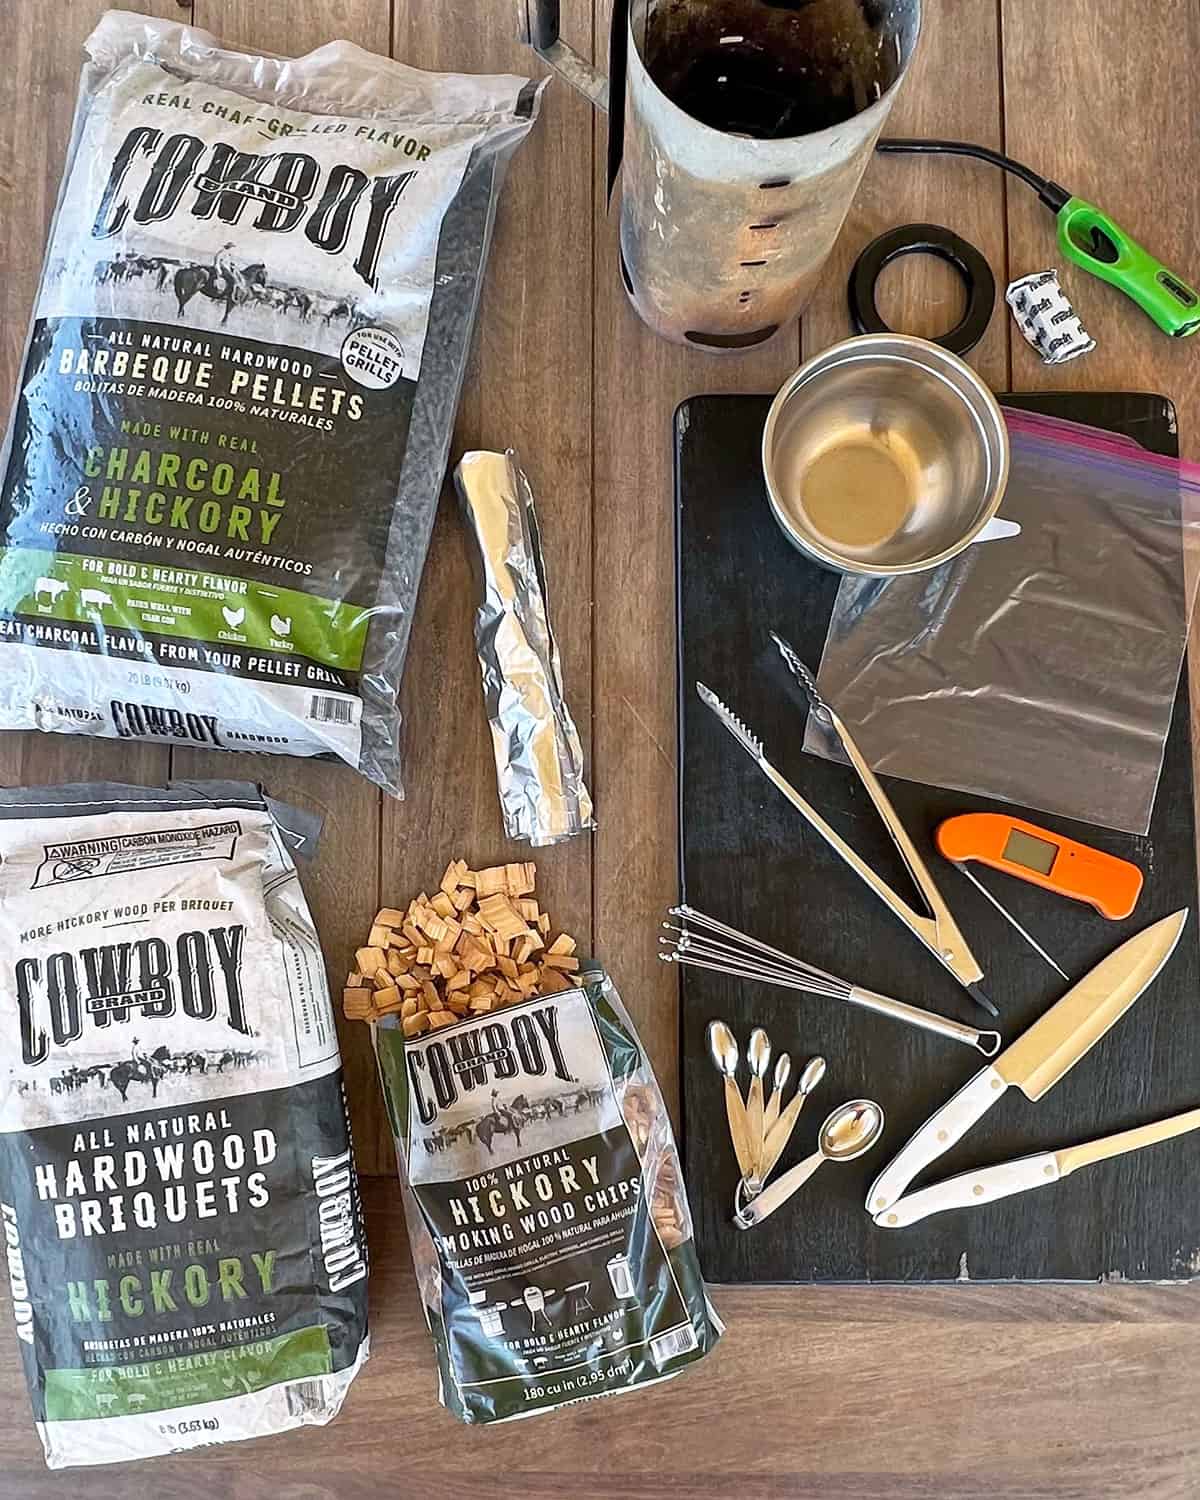
- Knives: A boning knife will help with the trimming. A chef’s knife is great for slicing at the end.
- Cutting Board
- Mixing Bowl
- Whisk or Spoon
- Measuring Spoons
- Ziptop Bag
- Tongs
- Digital Meat Thermometer
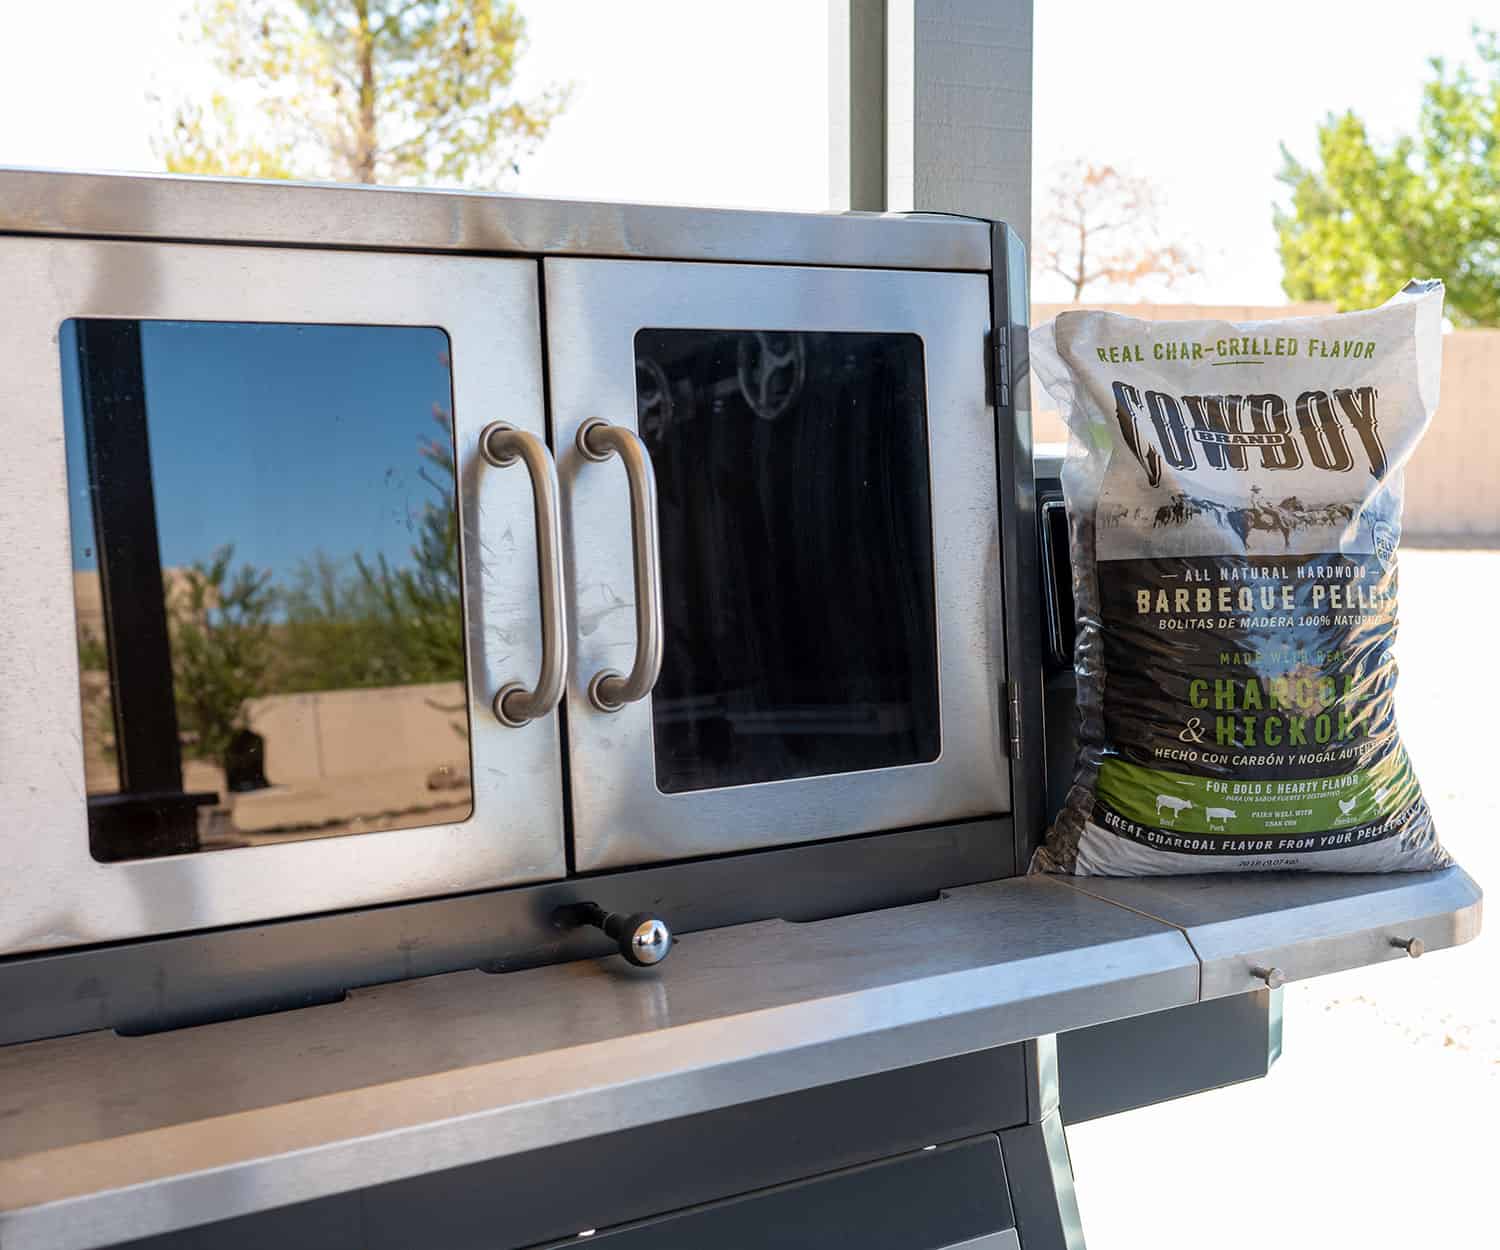
- Gas Grill Equipment: Gas Grill, Propane or Natural Gas, Foil, Cowboy Charcoal Hickory Wood Chips
- Charcoal Grill Equipment: Charcoal Grill, Cowboy Charcoal Hardwood Hickory or Apple Briquets, Charcoal Chimney, Lighter, Firestarters
- Pellet Grill Equipment: Pellet Grill, Cowboy Charcoal and Hickory Barbeque Pellets
- Ninja Foodi Grill Equipment: Ninja Foodi Grill with Grill Grate Installed

How to Trim a Chicken Breast
When shopping for chicken breasts, you can buy bone-in or boneless chicken breasts. Personally, I like to grill boneless, skinless chicken breasts hot and fast. Whereas I barbecue bone-in, skin-on breasts longer at lower temps.
Today’s recipe is for boneless, skinless chicken breasts with rib meat.
I have found that how chicken breasts are butchered varies greatly, depending on the brand. You can purchase breasts that say pre-trimmed on them, but they’re usually more expensive, so I’m going to show you how to trim them yourself.
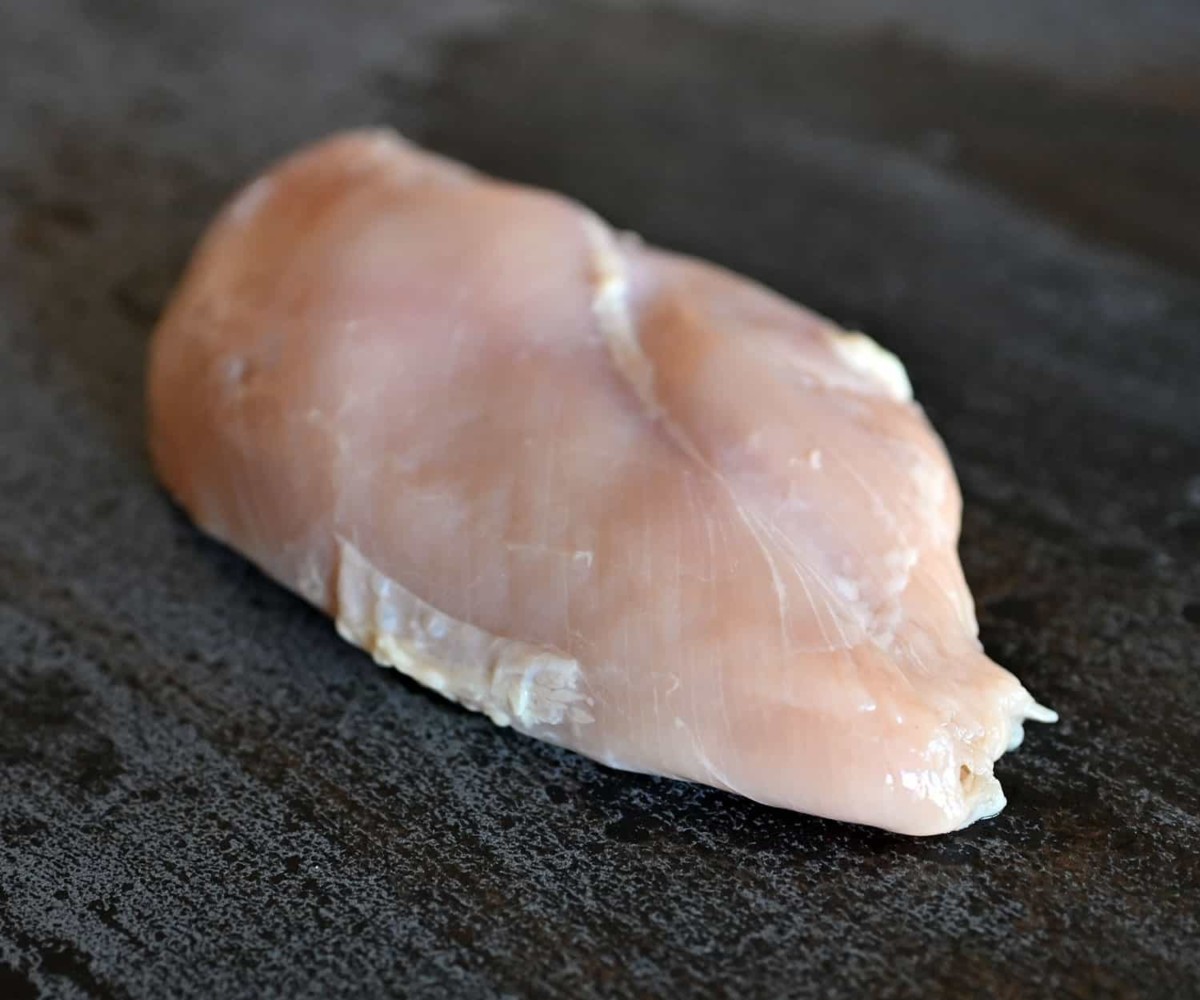
When you take the breasts out of the package, look them over. One side will likely have a thin white layer of fat. I like to trim this off.
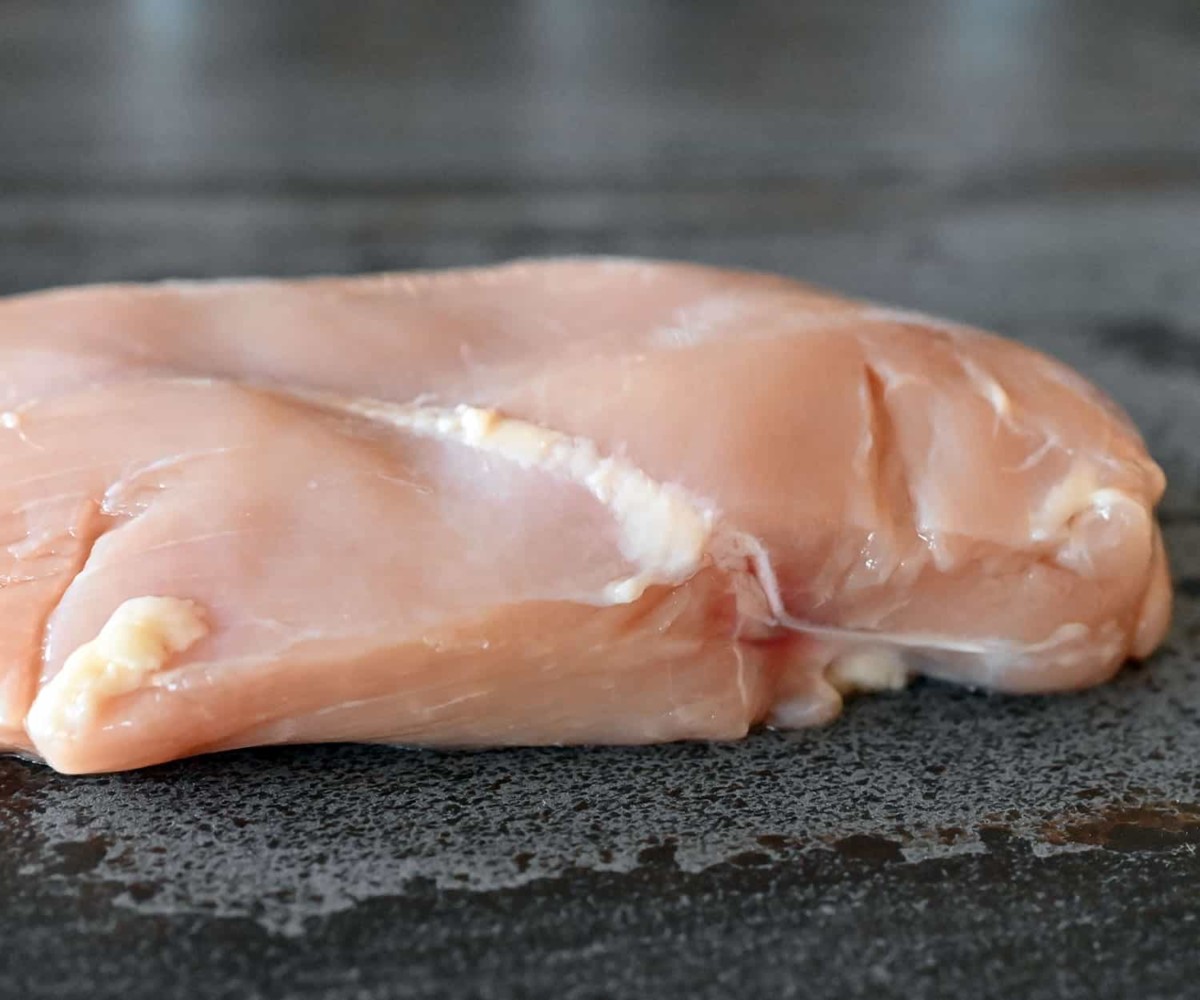
The other side will have the socket where the wing was connected to the breast. Feel it with your finger. If you notice a little gristle, trim it away with a sharp boning knife.
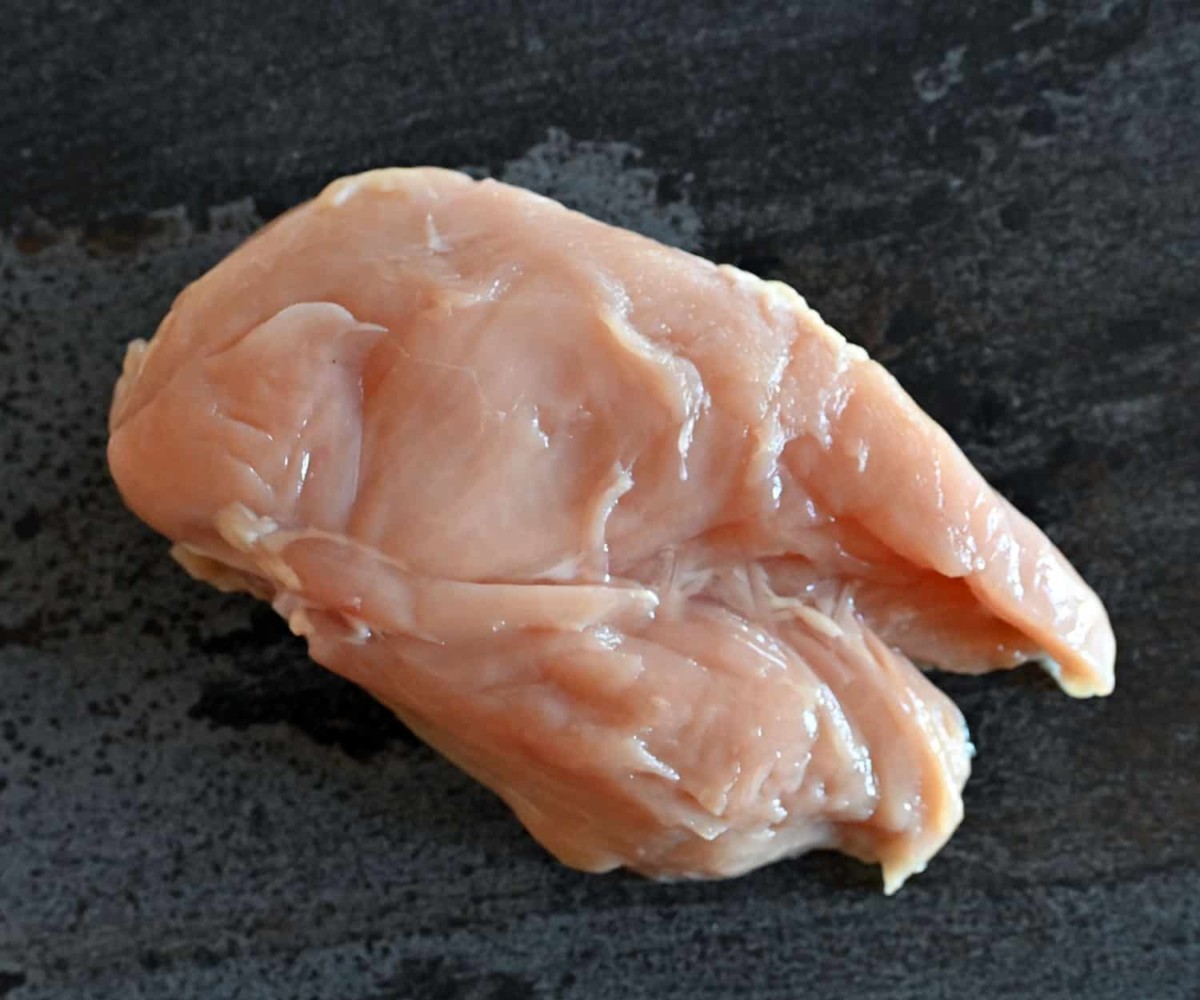
When you flip the breast over, it should have a flap. This is the chicken tender or rib meat. I like to leave this attached, because it helps balance out the thickness of the breast.
If the breasts you buy already have the tenderloin removed, you may notice that one end will be significantly thicker than the other. If that’s the case, place the chicken between two sheets of plastic wrap and pound the thicker side a bit, so it’s even with the thinner side. This will help it cook more evenly.
How to Make Sure the Chicken Breast is Juicy
Now that your chicken breasts are trimmed, it’s time to ensure they are juicy.
While some people like to use marinades, I find the brine method works much better to create juicy and flavorful chicken. Marinades are generally made with oil and vinegar and flavor enhancers like soy sauce and garlic.
Those do a great job at flavoring the meat, but they don’t necessarily make it juicy. And if you leave your chicken in an acid-based marinade for too long, it will actually start to cook and will get rubbery.
Brining, on the other hand, works differently. When the chicken breast is introduced to a salt water bath, the proteins begin to break down and relax while the meat absorbs the liquid. It’s like juicy chicken magic.
Brining Bonus: Brining liquid doesn’t include oil, so it’s much healthier and lower in calories than marinades.
A typical brine is made up of water, kosher salt, sugar and seasonings. For this recipe, you don’t need to make a big batch. I use a really simple technique.
Mix one bottle of room temperature water with a tablespoon of kosher salt, a tablespoon of sugar and a tablespoon of my personal Chicken Rub, which is a blend of salt, pepper, sugar, paprika, garlic, onion, bell pepper, lemon zest, chiles and natural hickory smoke.
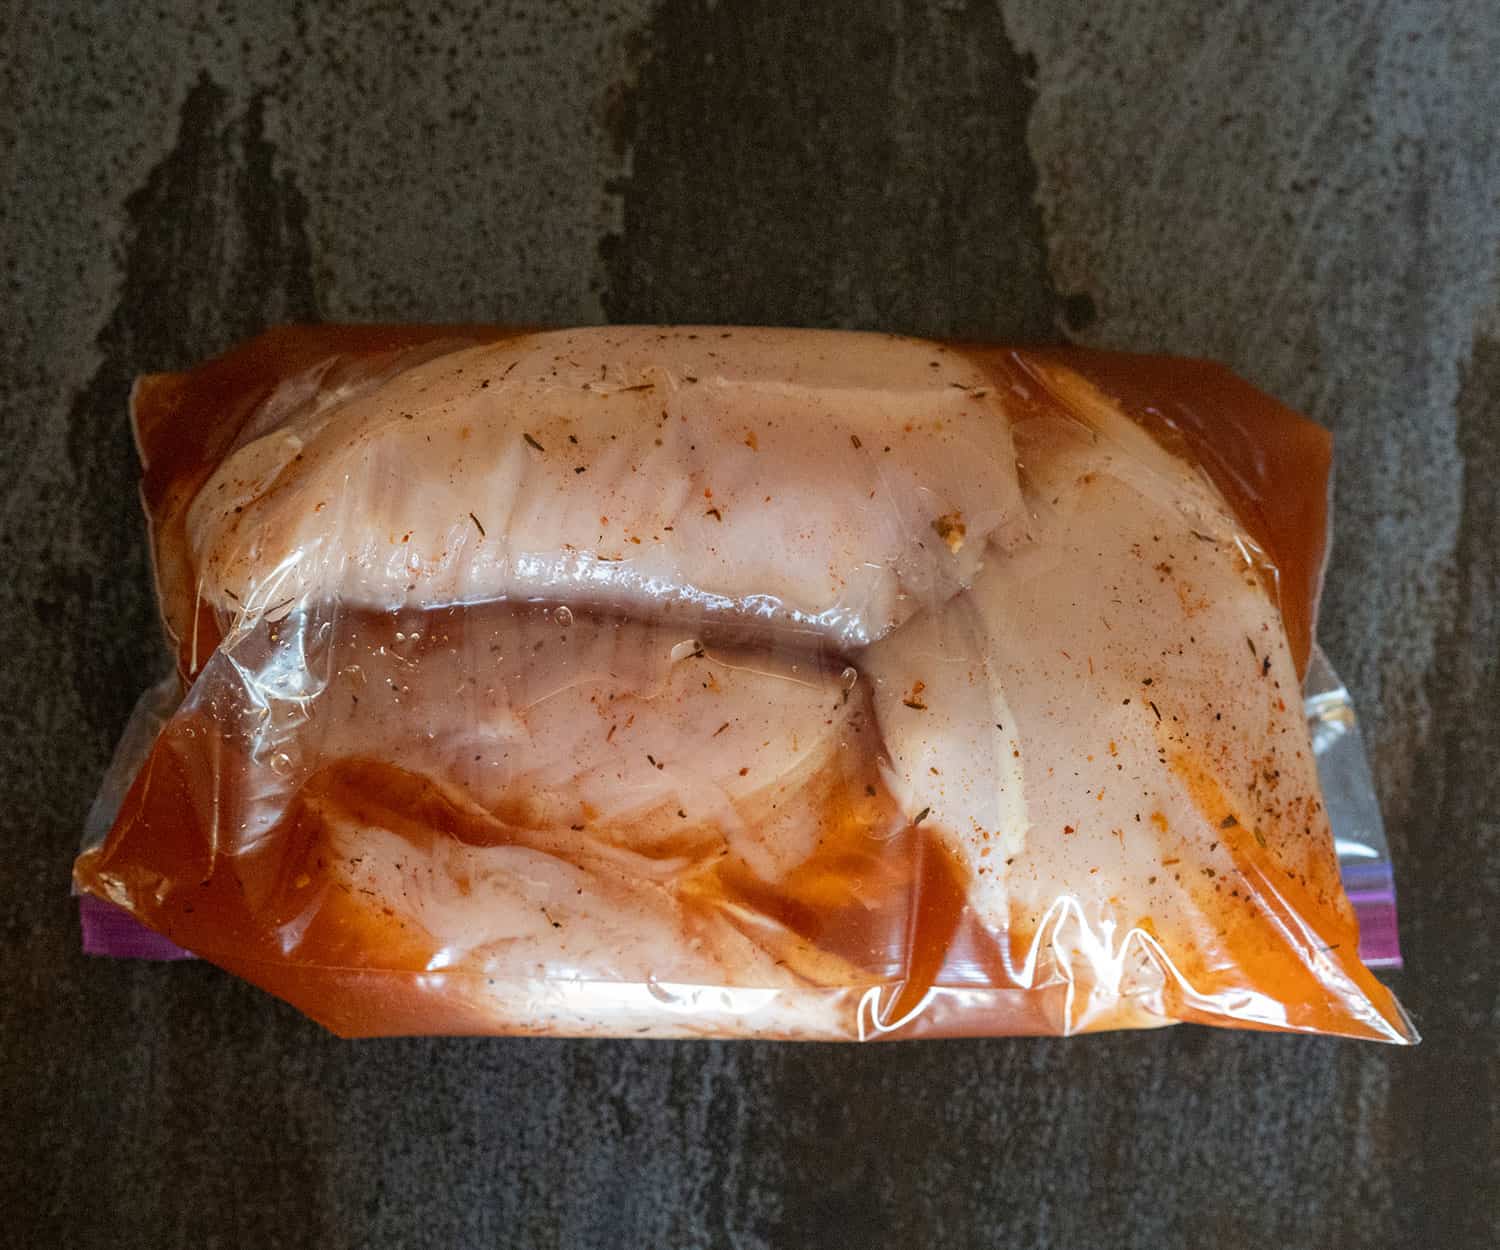
You don’t need to heat the water or anything. The salt, sugar and seasonings will dissolve just fine. Place the brine ingredients in a bowl and mix it well. Place the chicken breasts in the zip-top bag and add the brine. Seal and massage it gently. It’s a good idea to place the bag in a large bowl (just in case it leaks).
How Long Does it Take to Brine Chicken
Honestly, there is no need to over think this. I have brined chicken for 30 minutes, and I’ve brined chicken for 24 hours.
I find 1 hour to be a nice sweet spot. It gives the meat plenty of juiciness without me having to plan dinner hours in advance.
I have a recipe for Turkey Brine, too. Check it out.
I start the meal by trimming the chicken, making the brine and letting it soak in the bag on the counter. Then, I heat up the grill, prepare my sides and set the table. Once that’s done, the chicken is ready to be seasoned to go on the grill.
How to Season Chicken Breasts for the Grill
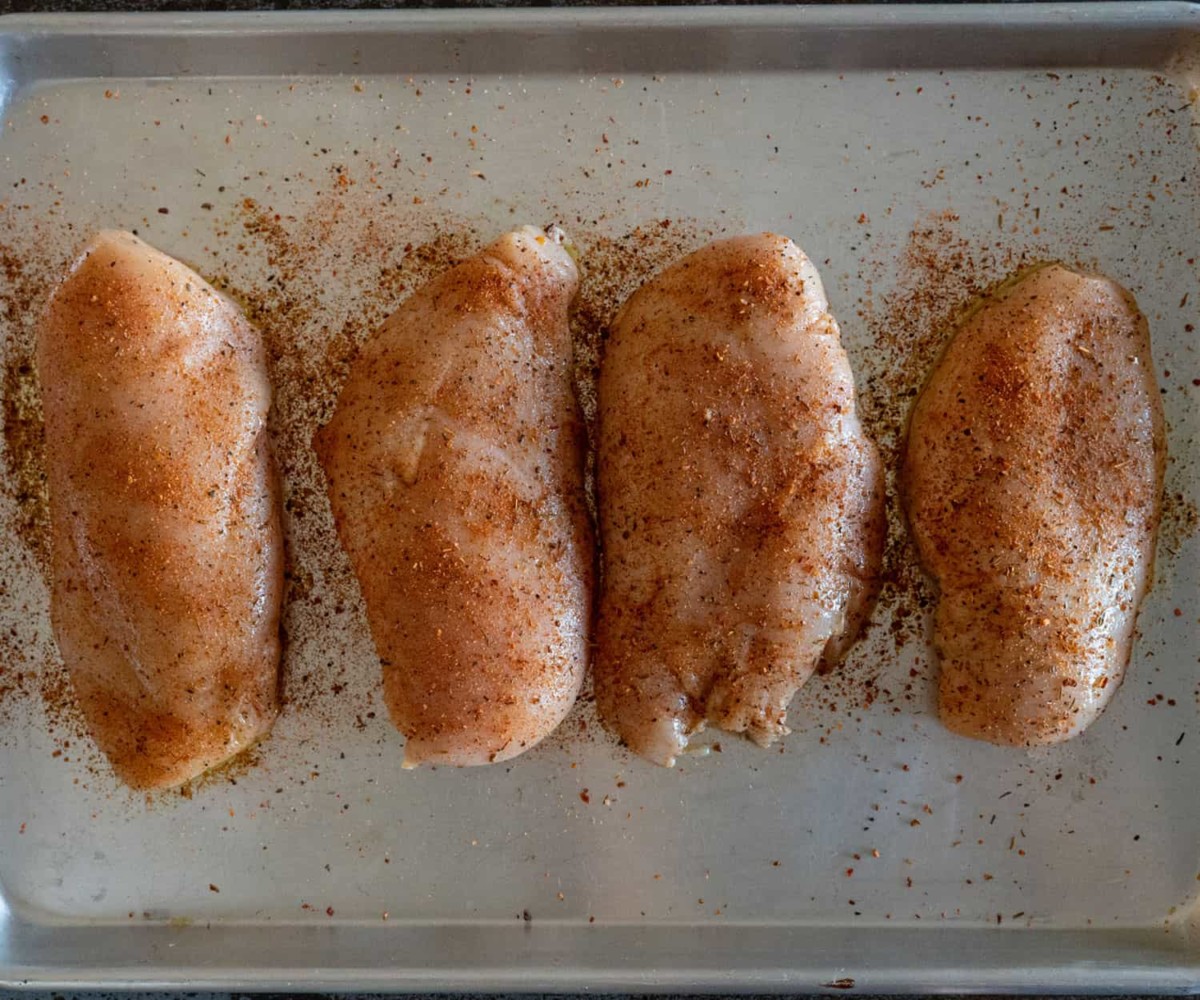
The brine solution is already adding great flavor to the chicken breast meat, but you’ll want to add a couple more things to the exterior to get that great barbecue texture and color.
To keep the chicken breasts from sticking to the grill, rub them with a drizzle of olive oil. Then, add a light dusting of Christie Vanover’s Chicken Rub to give them a beautiful ruby color.
How Long to Grill Chicken Breasts
One of the most important things to learn about grilling is that it’s better to cook to temp versus time. The U.S. Department of Agriculture has outlined safe minimum internal temperatures for all proteins.
However, if you’re using full chicken breasts with the tenderloins attached and you follow the instructions for the type of grill you have, they should be cooked through in about 15-25 minutes, depending on your grill and the thickness of the chicken.
USDA Safe Cooking Temperature for Chicken Breasts
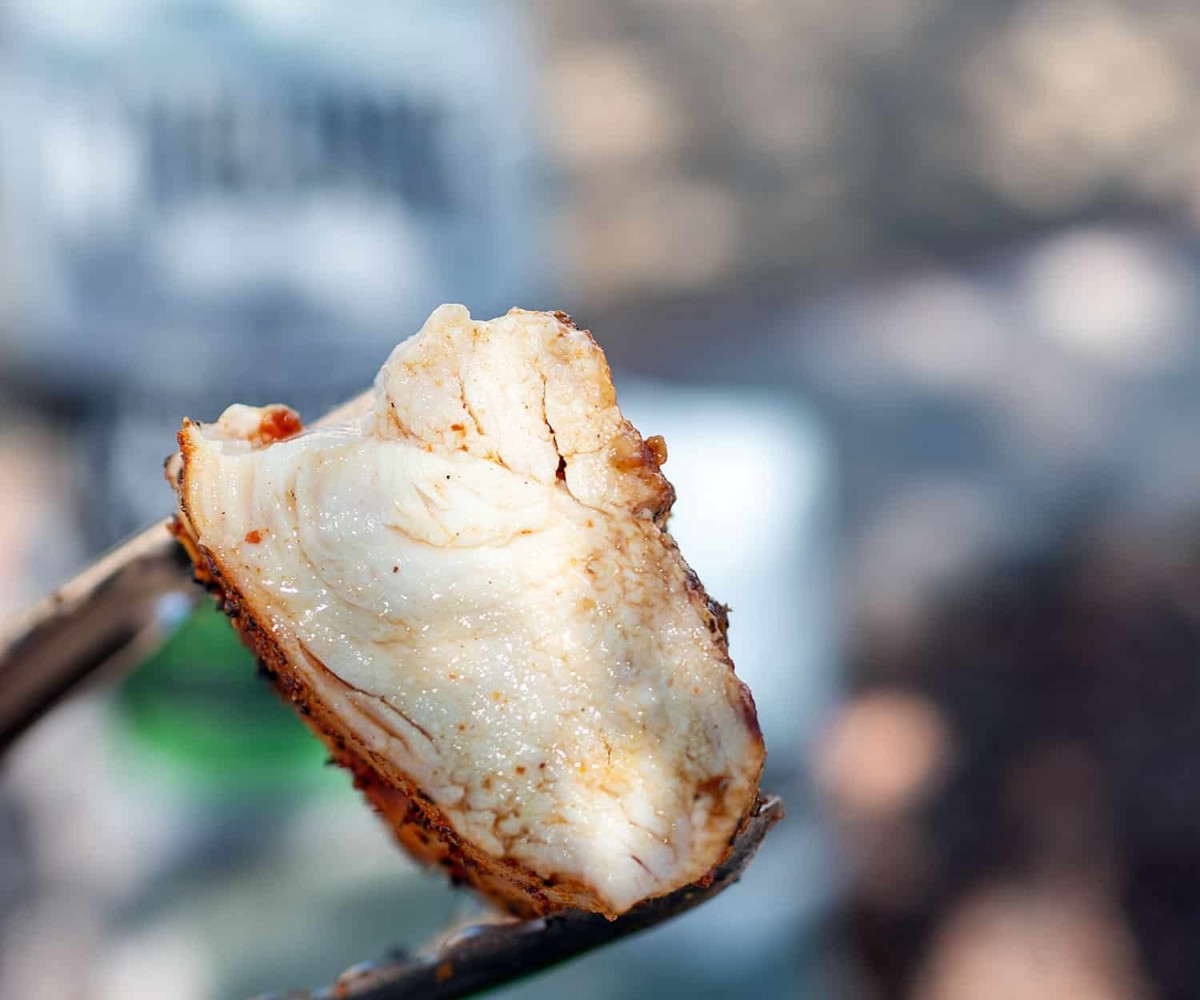
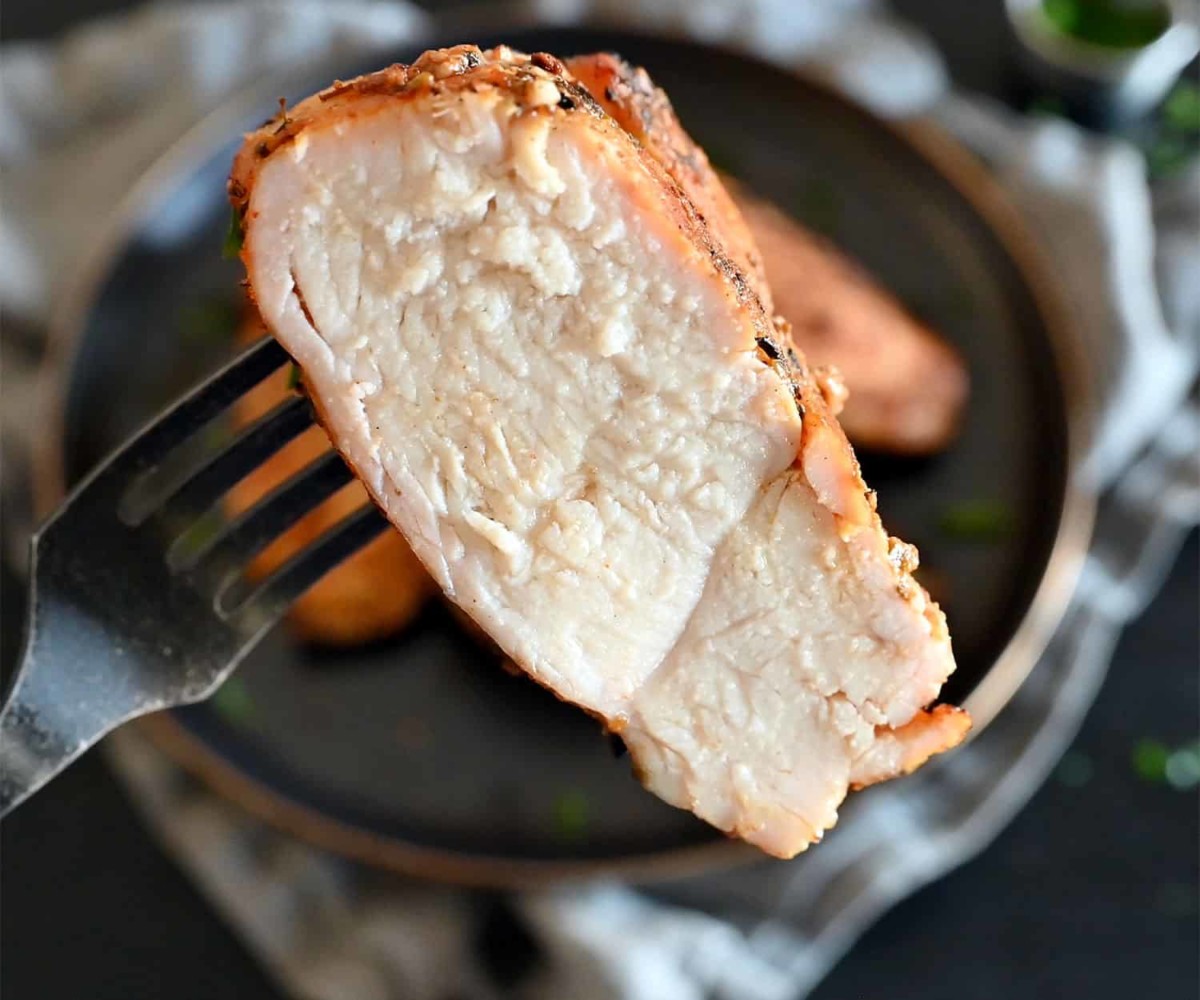
If you follow USDA guidelines and cook your chicken breasts to 165F degrees, they will be incredibly juicy. Be sure to place the thermometer probe into the thickest part of the breast. It’s best to come at it from the side.
| DONENESS | done |
| TEMPERATURE | 165F / 74C degrees |
| RESTING TIME | 5 minutes |
As with all meats, make sure you let the chicken rest for 5-10 minutes before slicing it. This will allow the juices to relax and settle into the meat.
Grilling Chicken Breasts on a Gas Grill
When using a gas grill, set your dial to medium to medium-high heat. You want the grill to heat up to about 350F degrees.
To add smoky flavor to your chicken breasts, use a wood chip foil pouch or smoke tube filled with Cowboy Smoking Wood Chips. I like pecan, hickory and apple flavors with chicken.
Place the foil pouch in the back of the grill over the heat. Once it starts smoking, add the chicken breasts to the grill.
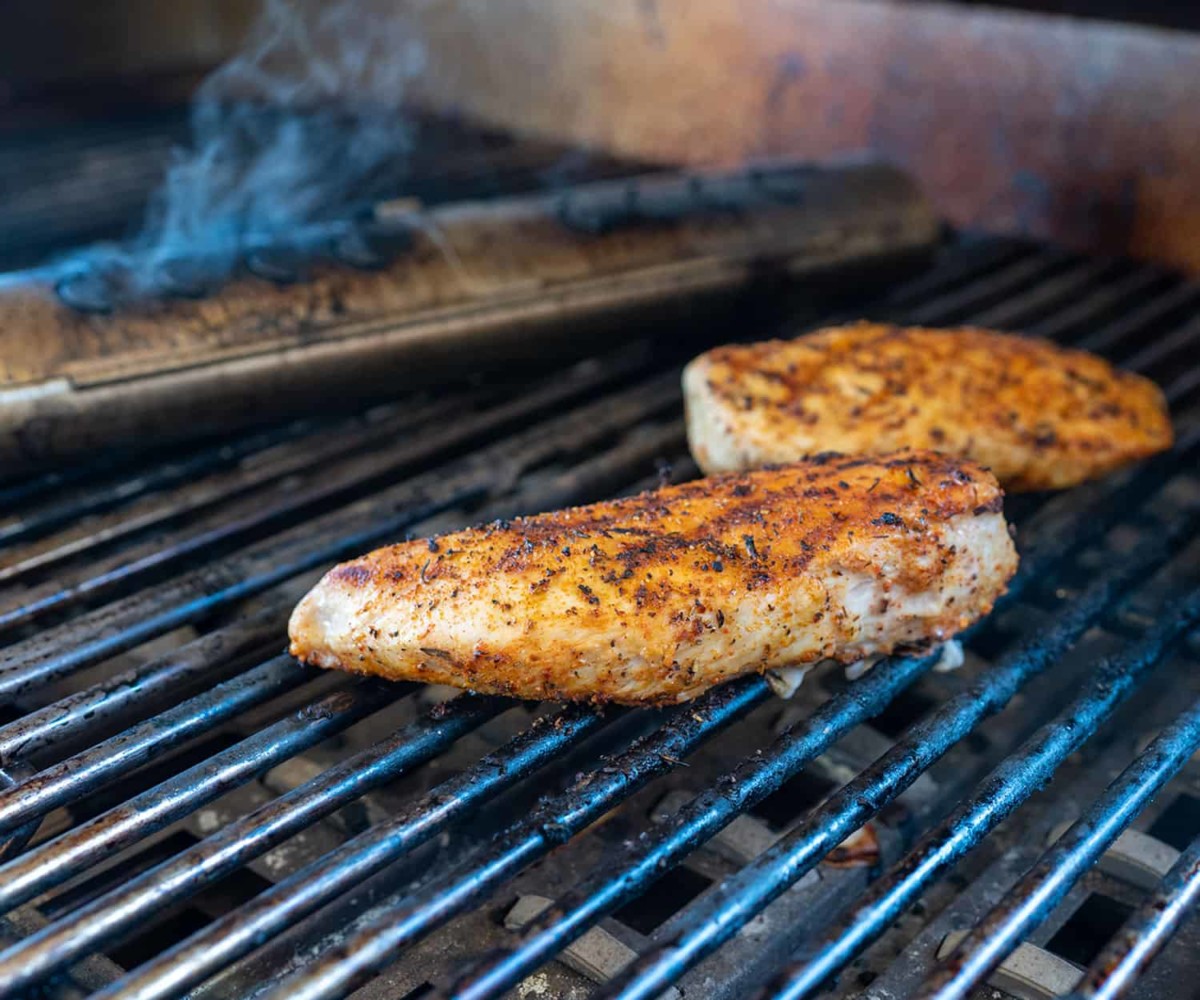
Then, place the breasts on the grill top-side-down. Grill them for 3 minutes. Flip them and cook another 3 minutes. Flip and cook for 3 more minutes.
Then, flip them one final time and let them cook for another 3-5 minutes to that internal temp of 165F.
Grilling Chicken Breasts on a Charcoal Grill
There are a variety of charcoal grills, including your standard kettle, a ceramic cooker and a campsite grill.
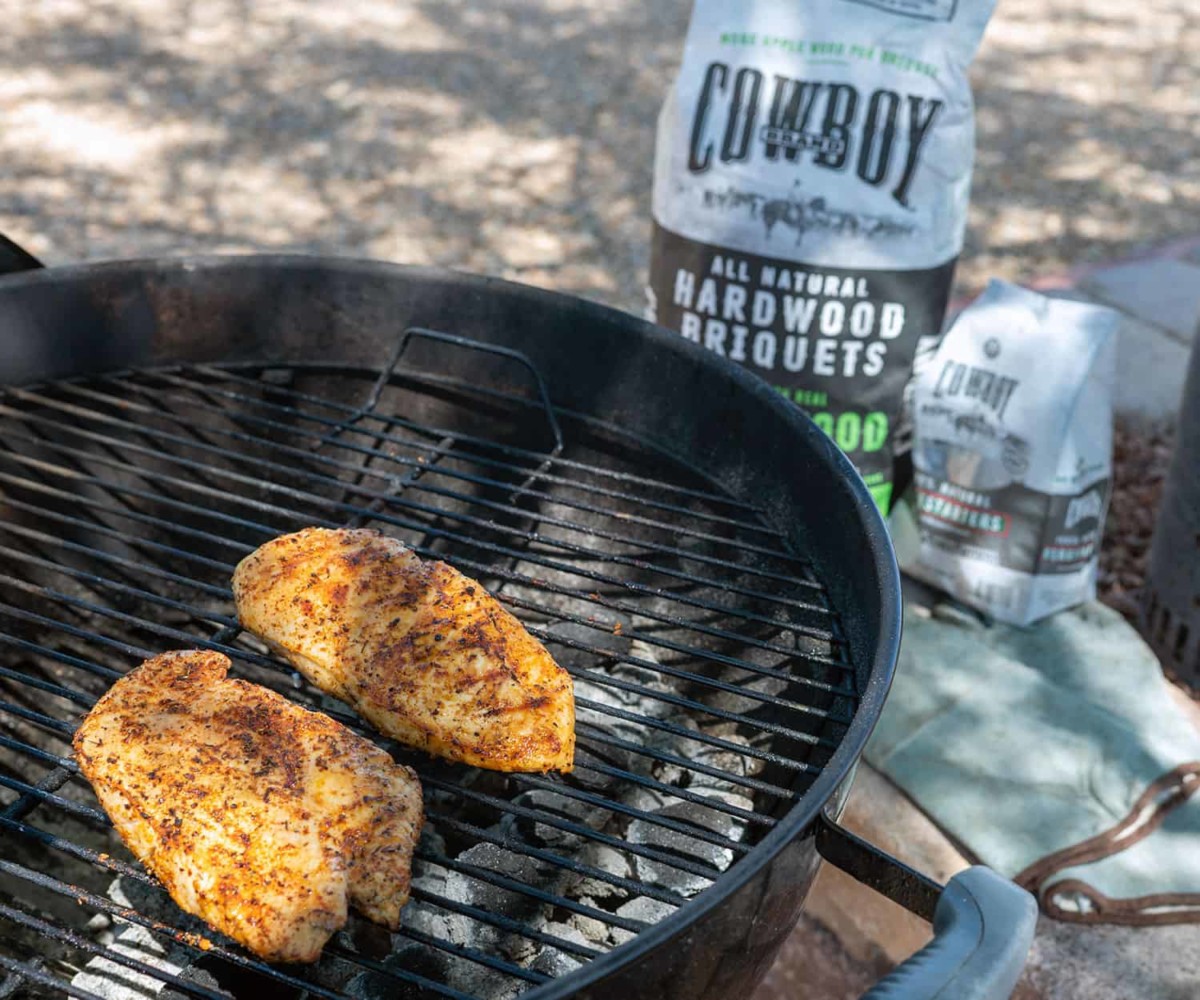
For kettles and campsite grills, I like to use Cowboy Hardwood Hickory or Apple Briquets. Fill a charcoal chimney with briquets and add a firestarter under the chimney. Light it up and let it burn, until the briquets are gray. Then, dump them into the grill.
When I’m cooking in a ceramic cooker, I prefer Cowboy Oak and Hickory Hardwood Lump Charcoal. You can add the lump charcoal to the inside of the grill, tuck in a few firestarters, light it up and let it burn, until it ashes over and the smoke runs clean.
Once the coals are ready, adjust the vents on the grill until the temperature reaches 350F degrees.
Then, grill the breasts top-side-down for 3 minutes. Flip and grill another 3 minutes. Flip again and cook for 3 minutes. Then, flip one final time and continue grilling until the internal temperature of the chicken reaches 165F degrees.
It should take about 3-5 more minutes, depending on the thickness of the breasts.
If you’re using a campsite grill without a lid, plan for a little more time, since it doesn’t have a lid to lock in the heat.
Grilling Chicken Breasts on a Pellet Grill
This is one of the easiest ways to grill chicken, because you just fill your pellet grill with Cowboy Charcoal and Hickory Barbeque Pellets, set the dial to 400F degrees and let it warm up.
Pellet grills are setup with indirect heat, so you’ll want to set your grill temperature to 400F degrees. If you cook it at a lower temp, it will take much longer to cook the chicken, which can cause it to have a dryer texture.
With this cook, you’ll be opening and closing the grill door frequently, which may cause your grill temperature to fluctuate. Just keep it set to 400F degrees throughout the cook, and you should be fine.
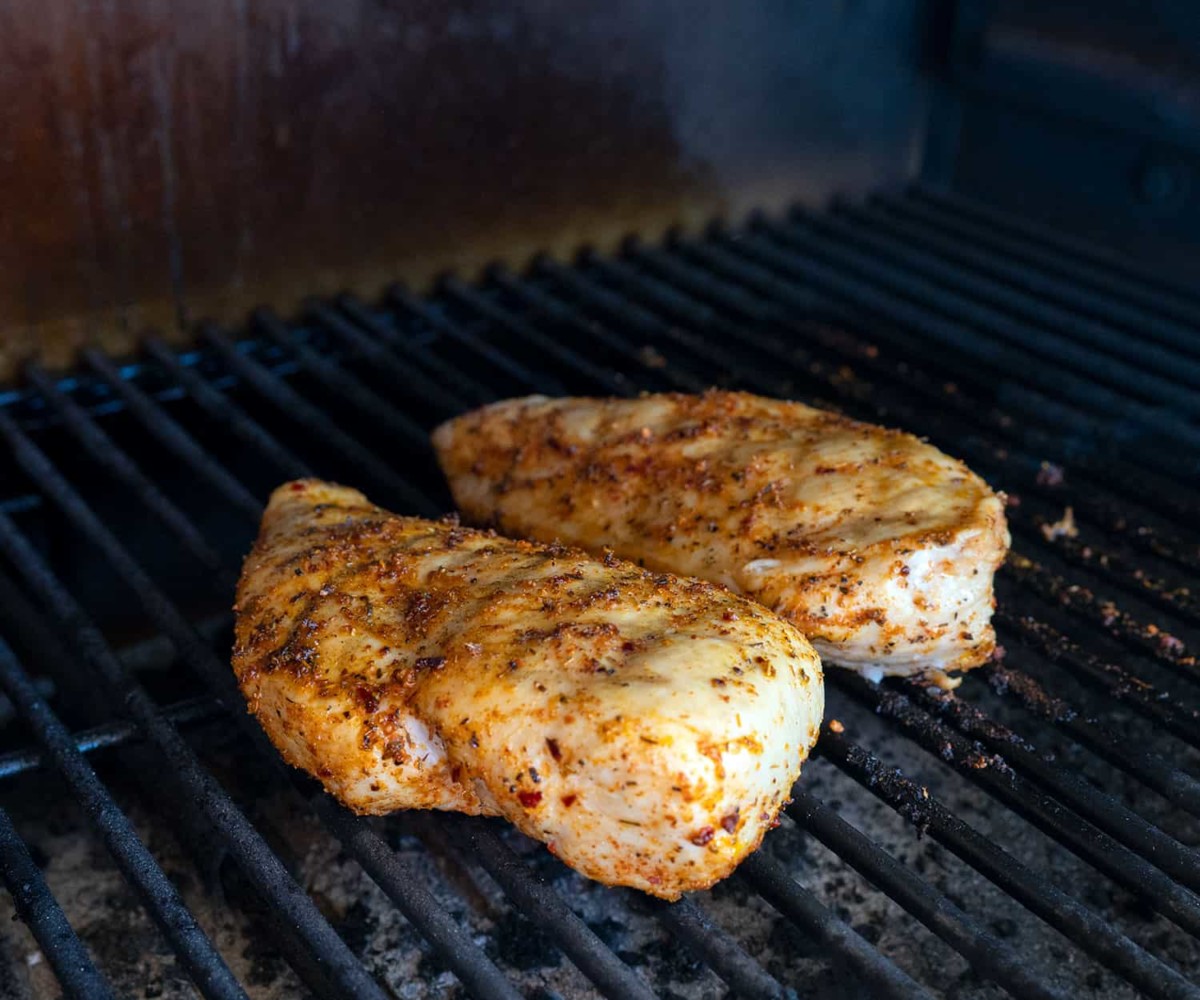
Place the chicken on the pellet grill top-side-down and cook for 5 minutes. Then, flip and cook for another 5 minutes. Flip again and cook for 5 minutes. Then, give it a final flip and continue cooking it to an internal temperature of 165F degrees.
This should take another 9-11 minutes, depending on the thickness of the chicken breasts.
Grilling Chicken Breasts on a Ninja Foodi Grill
Turn your Ninja Foodi Grill to the grill setting and adjust the temperature to medium. (According to the manual, medium cooks at about 450F degrees.) Set the timer for 20 minutes.
Place the chicken breasts on the grill grate top-side-down and grill for 3 minutes. Flip. Cook another 3 minutes. Flip. Cook 3 more minutes. Then, flip one final time. It will take about 5-7 more minutes for the chicken to reach an internal temperature of 165F degrees.
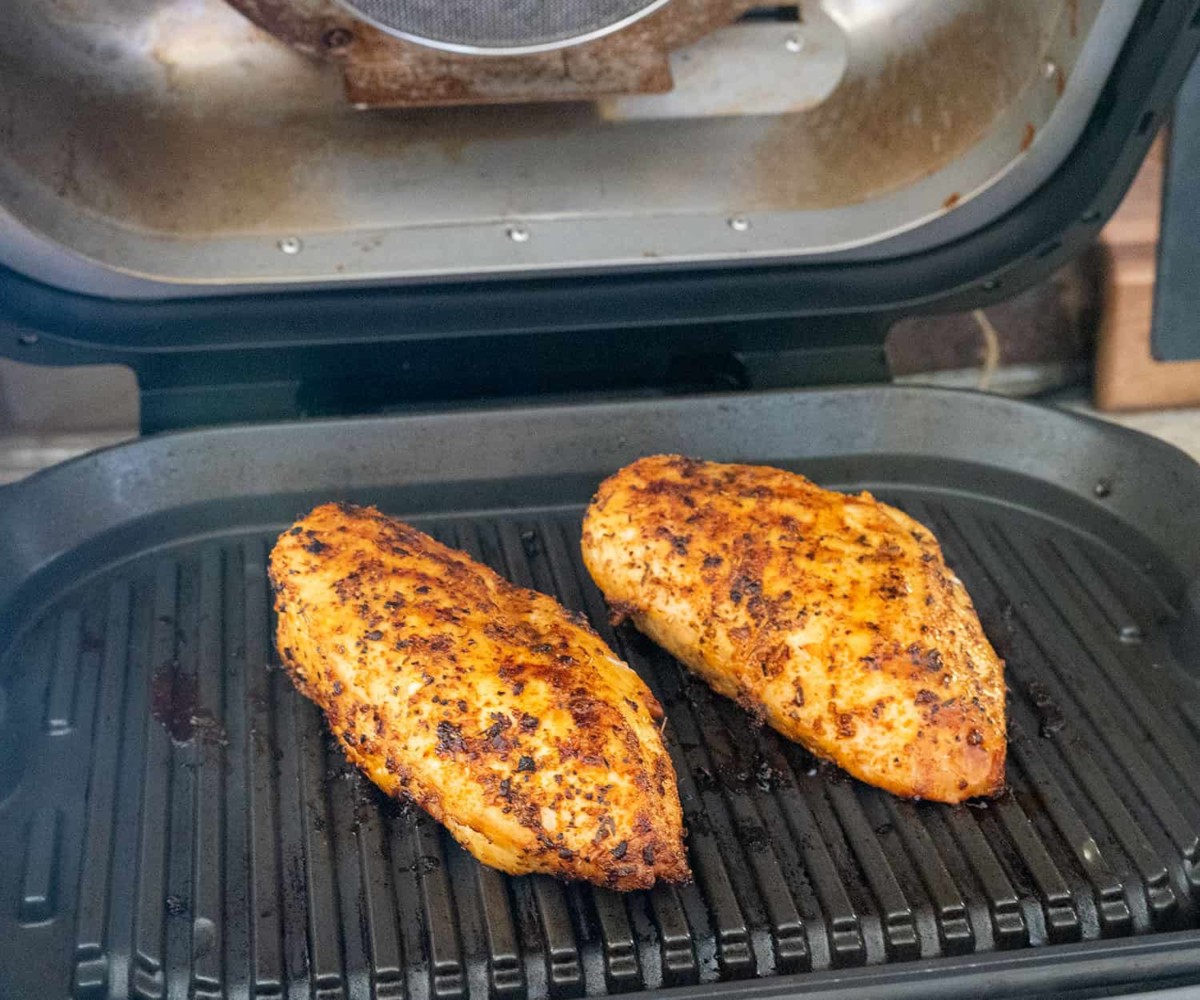
The grill’s automatic alert that tells you when to flip your food will chime during the cook. Just ignore that for this recipe.
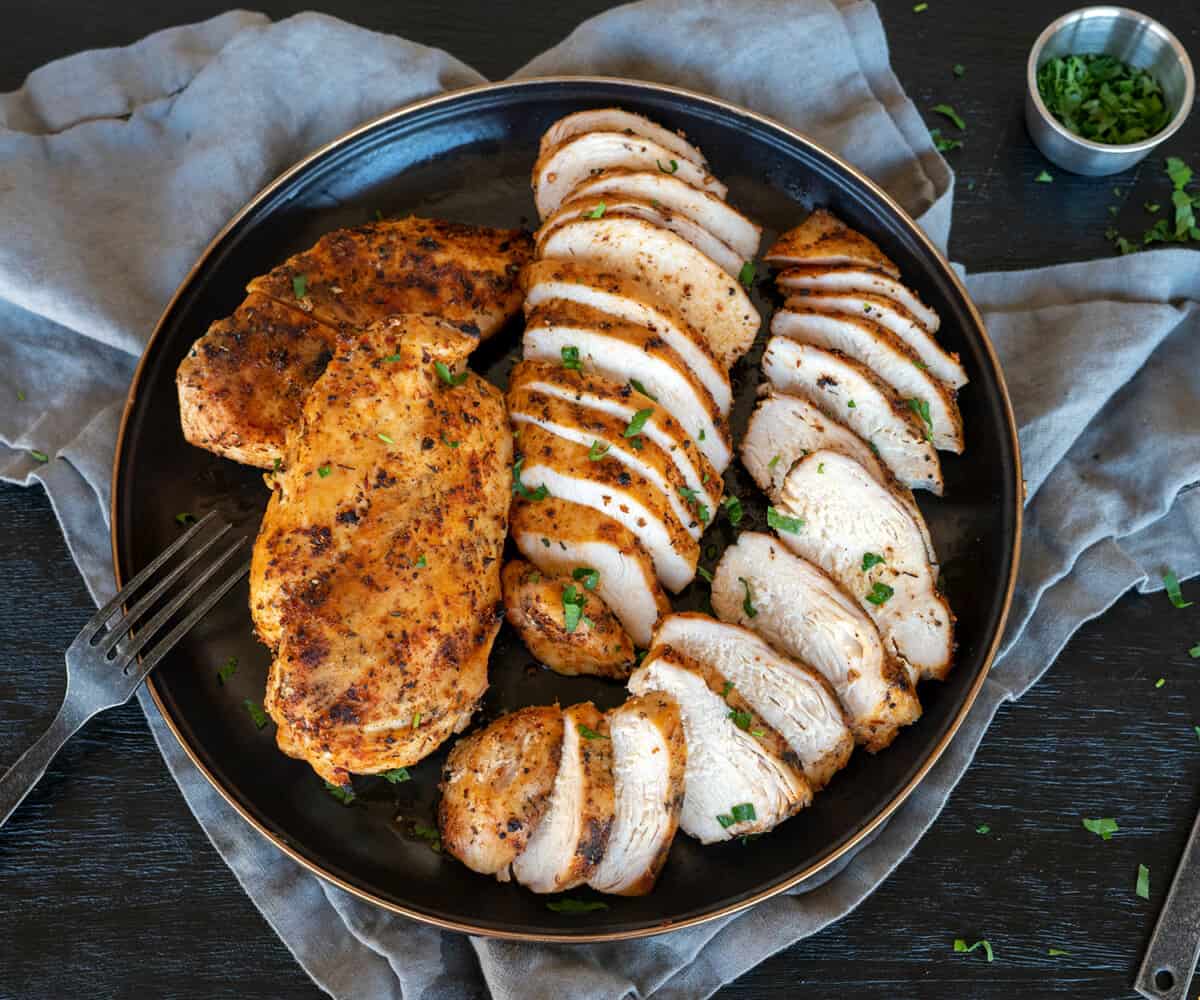
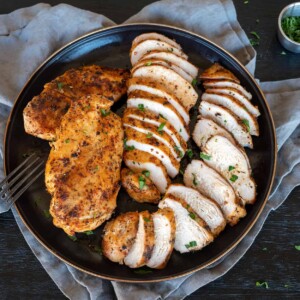
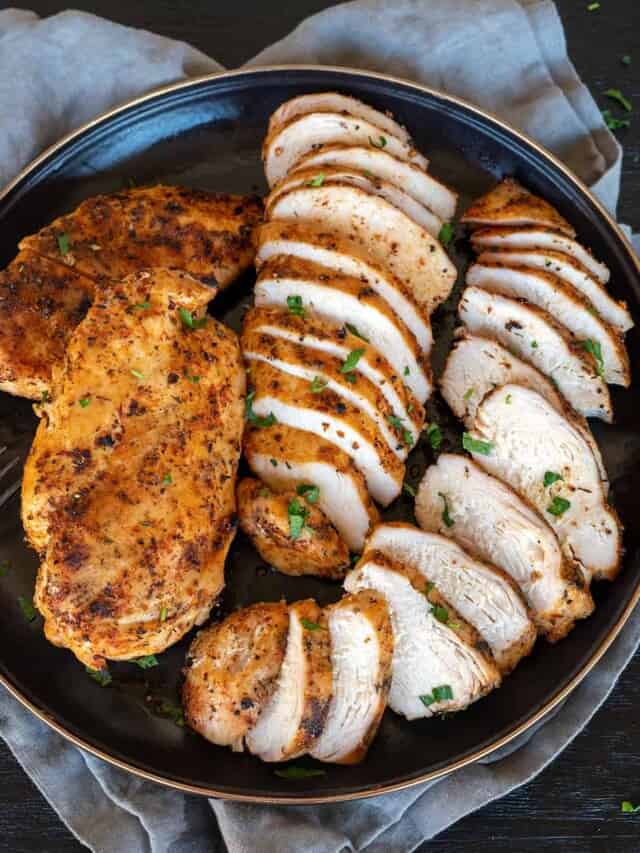
How to serve grilled chicken breasts
This chicken breast recipe is great straight off the grill. Let it rest for 5-10 minutes, and then slice it up and serve the juicy grilled chicken with some of your favorite sides.
For an added low calorie pop of flavor, you can squeeze on some fresh lemon juice and sprinkle with salt. black pepper and fresh herbs.
If you like BBQ chicken, brush the chicken with your favorite BBQ sauce during the final few minutes of cooking. Maybe try my Korean BBQ sticky sauce from my Grilled Korean Chicken Wings recipe.
Storage
You can store leftover grilled juicy chicken breasts in the refrigerator in an airtight container for up to 3-4 days. It’s best to leave them whole and then slice them when you’re ready. You can also freeze them for about 4 months.
Leftover chicken is great hot or cold. It can be served on sandwiches, in tacos and on salads.
GCG Pro Pitmaster Tips
- For even cooking, buy boneless, skinless chicken breasts with the rib meat attached
- Brine for 1 hour
- Grill to an internal temperature of 165F degrees
- Slice just before serving to retain juiciness
Frequently Asked Questions
With this chicken recipe, you’ll have so many options. You can grill up several breasts and save them for future meals. If you keep the cooked chicken in the refrigerator, the USDA recommends using it within 3-4 days. If you freeze the cooked chicken, it will be good for up to 4 months. To maintain the most juiciness, I recommend saving the chicken breasts whole and slicing them when you’re ready to serve them.
A 4-ounce serving of boneless, skinless chicken breast is about 150 calories. Keep in mind that each breast is usually around 8 ounces, which is two servings. While the brining liquid has about 50 calories of sugar, hardly any of those calories will absorb into the chicken. The sugar is included to help brown the chicken. If you prefer not to use it, you can leave it out. The recipe also calls for a little olive oil, so the chicken won’t stick. You can use non-fat cooking spray, if you prefer.
You can reheat the chicken in a microwave, but do so using the reduced-power mode. This will slowly bring the chicken to temp. If you just zap it at regular power, you will dry out your chicken. Instead, place the chicken breast on a plate, add a teaspoon of water to the plate. Cover with a damp paper towel and reheat in 30-second intervals at 50% power, until it’s warmed through. To reheat the chicken on the stove, slice the chicken and add it to a skillet with a splash of chicken broth or pat of butter.
It generally takes 12-15 minutes to cook chicken on a charcoal grill. You’ll flip it every three minutes, until it reaches an internal temperature of 165F degrees and the juices run clear.
Sides to Serve with Grilled Chicken
More Chicken Recipes
Want even more great grilling recipes and tips? Subscribe to my newsletter and follow me on Facebook, Instagram and TikTok for my latest grilling adventures. If you make a recipe, please leave a comment and rating below.
Save this BBQ Tip
Enter your email, and I’ll send this link directly to your inbox. Plus, you’ll get new BBQ recipes and tips weekly.
Grilled Chicken Breasts
Ingredients
- 4 chicken breasts, boneless, skinless
Juicy Chicken Brine
- 16.9 oz bottle of water, room temp
- 1 tbsp kosher salt
- 1 tbsp sugar
- 1 tbsp Christie Vanover's Chicken Rub
Finishing Rub
- 2 tsp olive oil
- 2 tsp Christie Vanover's Chicken Rub
Instructions
- Prep the Chicken: Trim excess fat and gristle from the chicken, leaving the tender attached (see tips above). Place in a zip-top bag.
- Brine: In a bowl, combine the water, salt, sugar and rub. Pour it into the bag with the chicken. Seal and massage to work in the marinade. Let soak for 1 hour on the counter.
- Gas Grill: Heat your grill to 350F degrees. Add a foil pouch with Cowboy hickory chips for added flavor. Place the chicken on the grill over direct heat.
- Pellet Grill: Heat your grill to 400F degrees with Cowboy Charcoal and Hickory Pellets. Place the chicken on the grill.
- Charcoal Grill: Use a charcoal chimney to light Cowboy Charcoal Hickory or Apple Briquets. Once ashed over, dump the coals into your grill. Let burn for 15 minutes. Adjust the vents so the heat is around 350F degrees.
- Ninja Foodi Grill: Set the grill setting to medium heat and set the time for 20 minutes.
- Season: Remove the chicken from the marinade. Rub with a drizzle of olive oil and more rub.
- Grill: Place on the grill top-side down. For the gas, charcoal and Ninja Foodi grill, grill for 3 minutes. Flip. Grill for 3 minutes. Flip. Grill for 3 minutes. Flip and grill for another 3-7 minutes, until the internal temperature reaches 165F degrees. For the pellet grill, grill for 5 minutes. Flip. Grill for 5 minutes. Flip. Grill for 5 minutes. Flip and grill for another 9-11 minutes, until the internal temperature reaches 165F degrees.
- Rest: No matter which method you use, allow the chicken to rest for 5-10 minutes. Slice and serve.
Video
Notes
- You can brine the chicken in as little as 30 minutes or as long as overnight. I have found that one hour is long enough to create really juicy chicken. Refrigerate, if brining for more than an hour.
- It’s important to cook the chicken to an internal temperature of 165F degrees. If you go beyond that, the chicken will become less juicy.
- Note the different grill temperature for the pellet grill. Most pellet grills are setup with diffusers that block the heat, which is why it’s best to set it to 400F degrees. If you cook the chicken at 350F degrees, like you do on the other grills, it will take much longer for the meat to come to temp.
- To retain juiciness, serve whole chicken breasts or slice just before serving.
Nutrition
Nutrition information is automatically calculated, so should only be used as an approximation.


Christie. Read through this recipe & it sounds great. Since I’d feel comfortable freezing some breasts I think I might try it. Most often, recipes appear to large an amount for one person to try — so I become skeptical. Mahalo. My Aloha. A. Jodie
Thank you for the feedback. I appreciate it.
Christie…WOW!!! What a great website and what I love about the recipe is how you incorporate every single step of the process from picking out the chicken & prepping it to how to cook it on a variety of cooking vessels. You’re so thorough and even included what tools & ingredients to use, the USDA guidelines for cooking chicken & your grilling pro tips. This site is so beautiful, professional, & easy to follow. You are amazing & represent women in the field of grilling & cooking well! Great job & looking forward to seeing you at an SCA comp again. #GIRLSCANGRILL -TAMMY, 🎗️BBQ
Thank you for giving different directions for different grills/smokers. That is very helpful.